Lab 4: Invoke Published Document Action within a Mule Application
Unresolved include directive in modules/module_g__intelligent_document_processing/pages/lab4.adoc - include::partials/lab4_repair.adoc.adoc[]
Overview
In this lab you’ll learn how to invoke, from a Mule application, an IDP Document Action previously published to Anypoint Exchange.
As part of the exercise you’ll start from a pre-drafted application and you’ll be asked to complete it. The application polls an email inbox for a new email and when it finds an email sends (POST) the attachment to IDP. The application also exposes an endpoint to retrieve the IDP elaboration results.
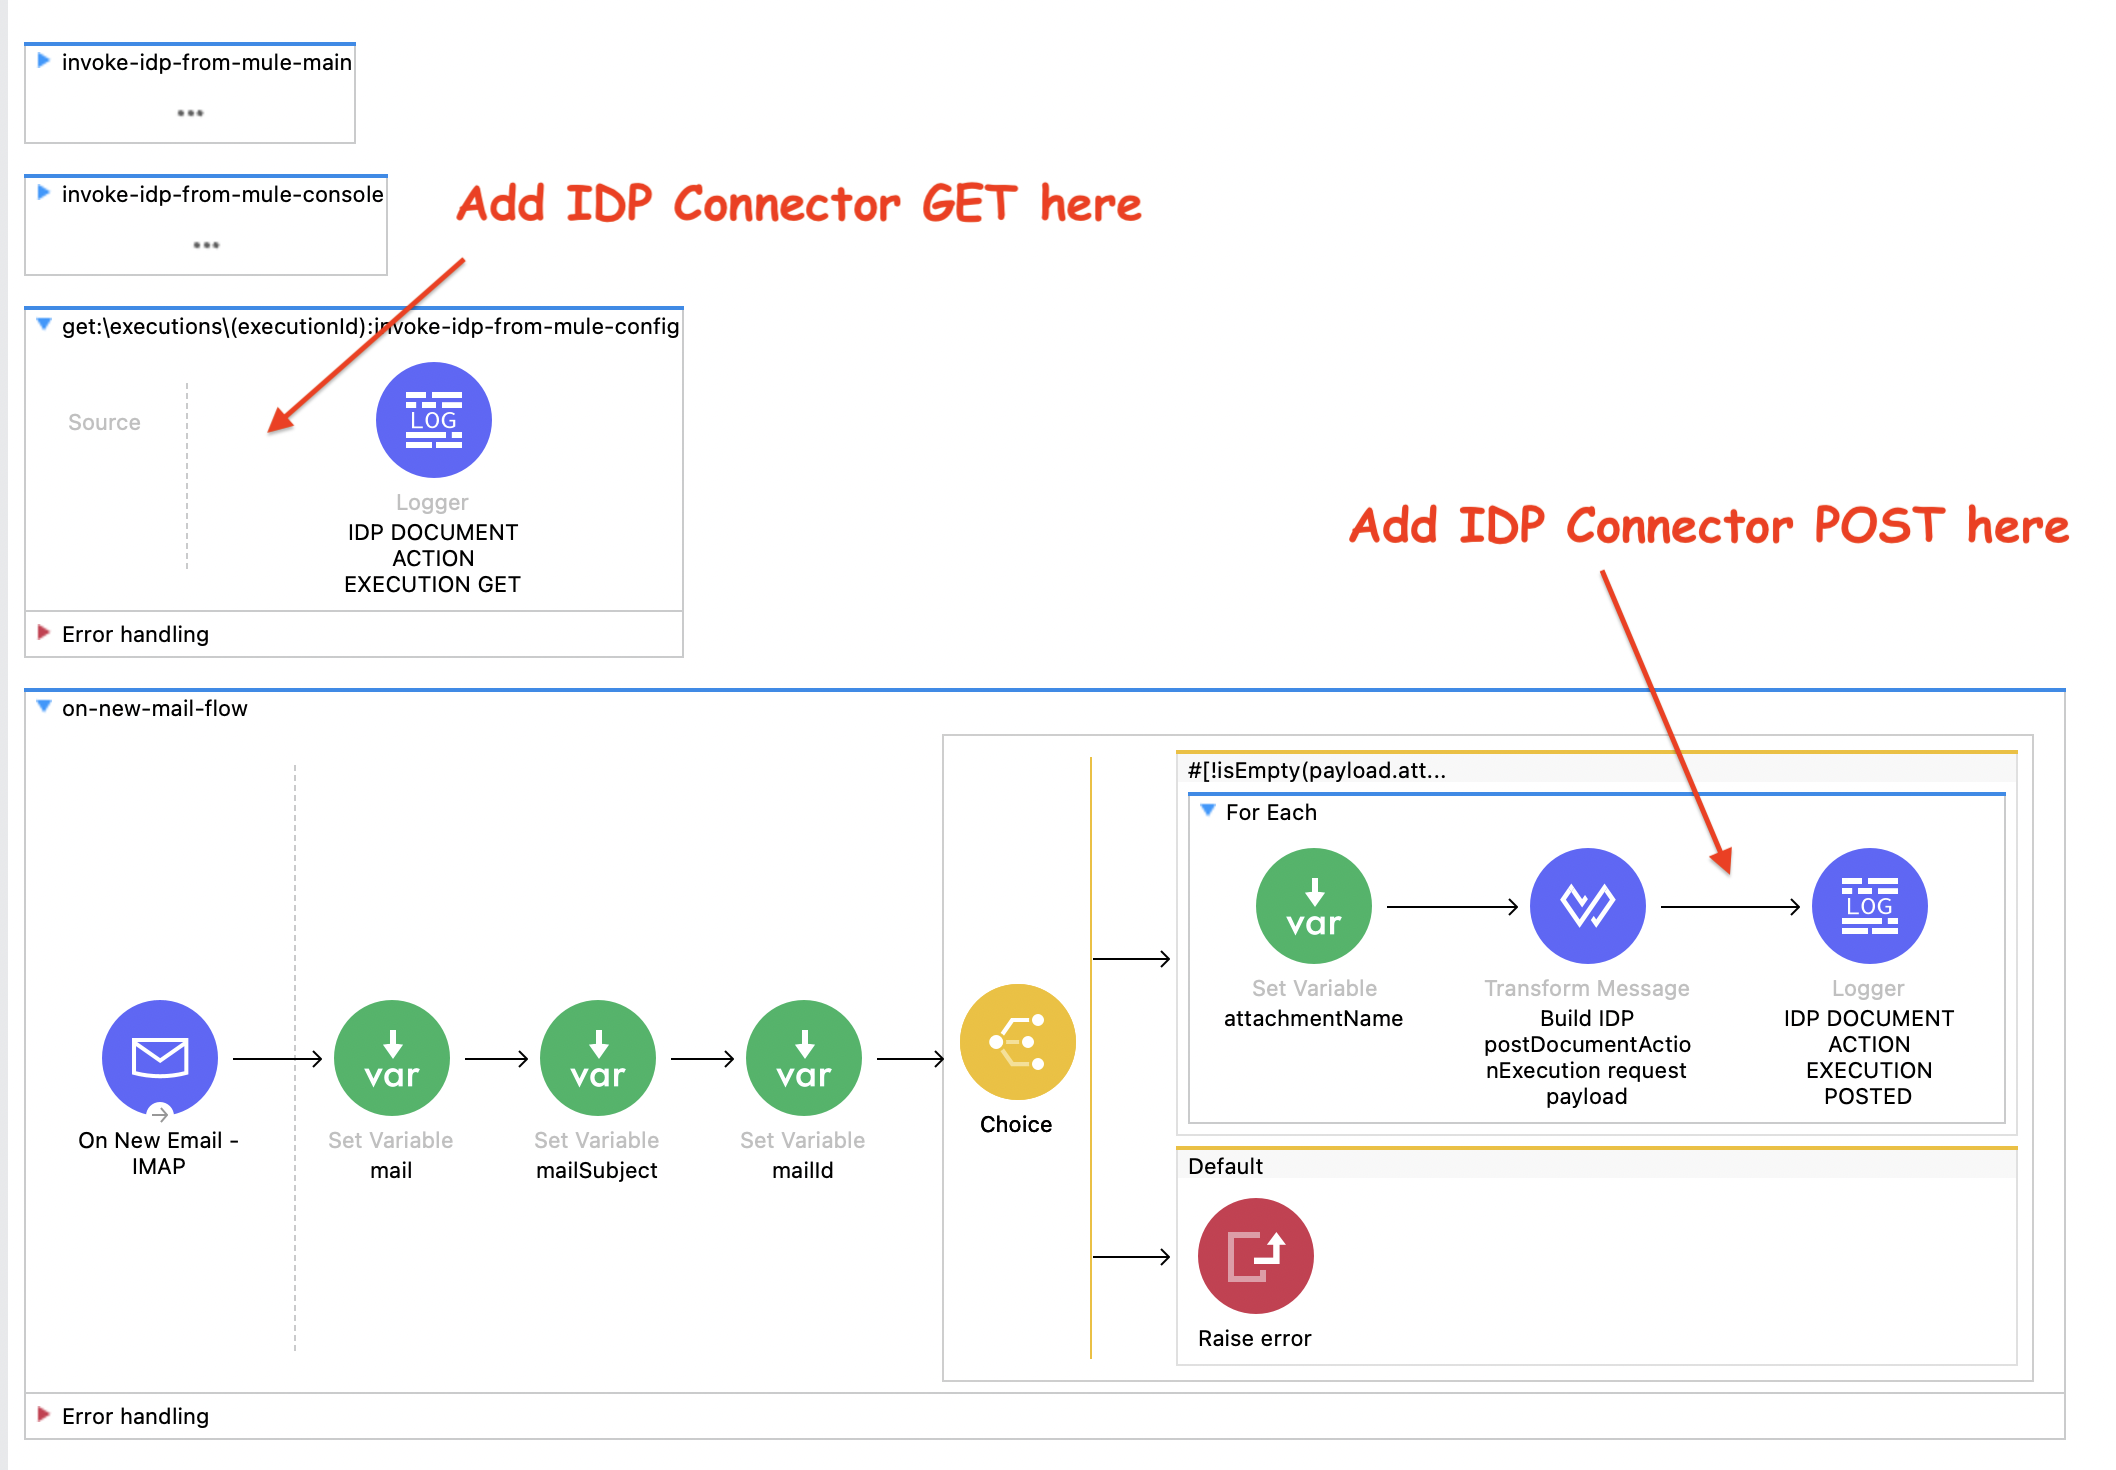
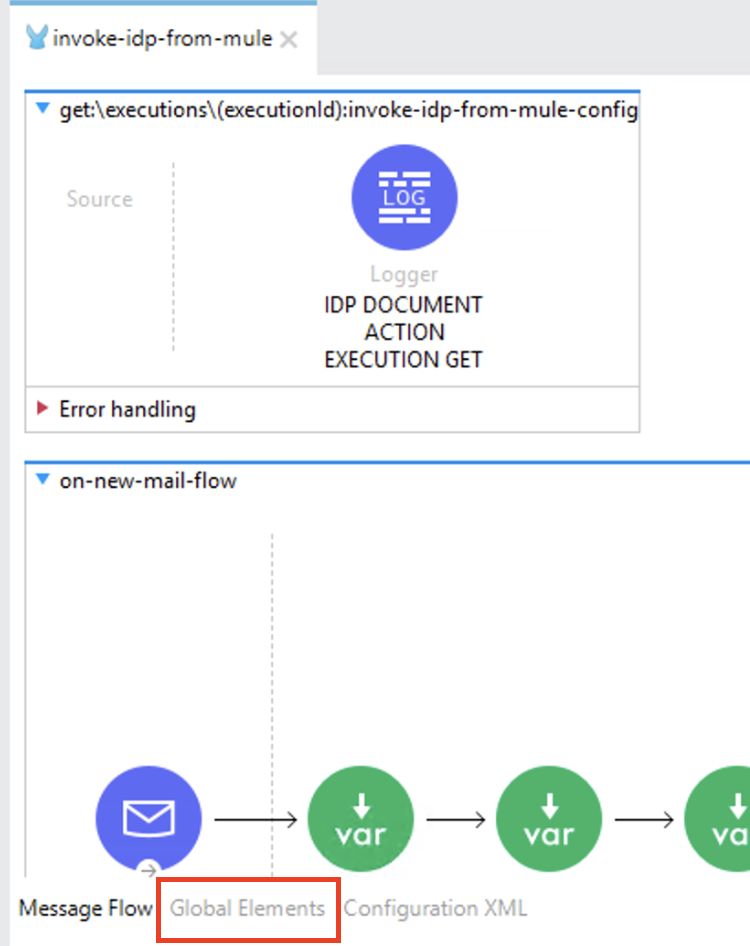
Below, you will see the drafted application you’ll be working on.
Prerequisites
If you didn’t complete Lab 1: Process an Invoice with MuleSoft IDP , in order to be able to consume the NTO Invoice Document Action in Anypoint Studio, you have two options:
-
Use the document action published by another workshop attendee.
-
Quickly create a new <your-initials>
- NTO Invoicedocument action (leave everything set to the default) and publish it to exchange.
Step 1: Open and setup Anypoint Studio
Your provided Windows EC2 instance has an Anypoint Studio already downloaded and installed.
-
Locate the Anypoint Studio shortcut on the desktop and open it

-
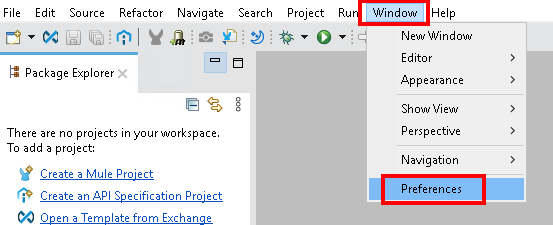
Open the Window menu and click on Preferences option:
-
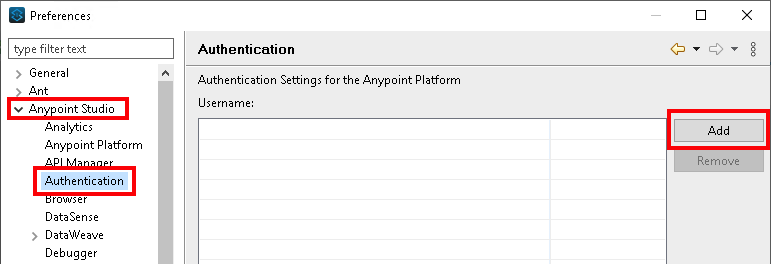
In the Preferences window, expand the Anypoint Studio section, click on the Authentication option and then click the Add button to create a new authentication entry:
-
A new popup window will be displayed. Enter your Anypoint org credentials and click on Sign in:
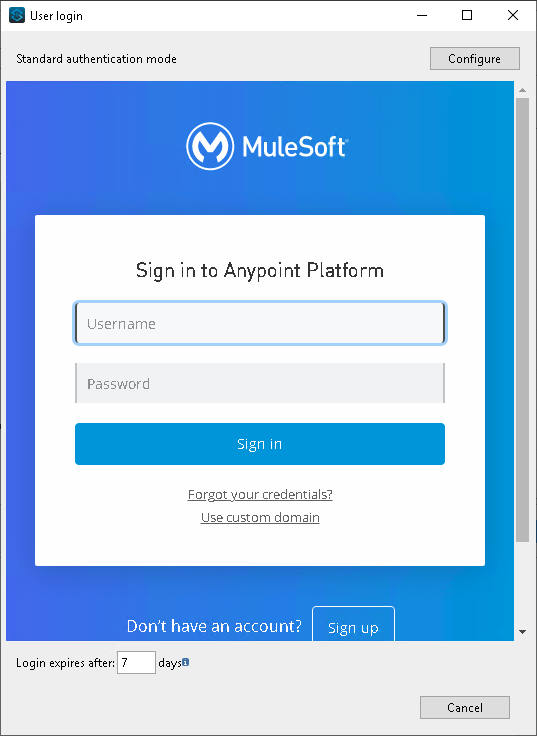
Click No when asked about providing a password hint.
-
Click on Apply and Close to save the settings.
Step 2: Import Pre-drafted Mule Application
-
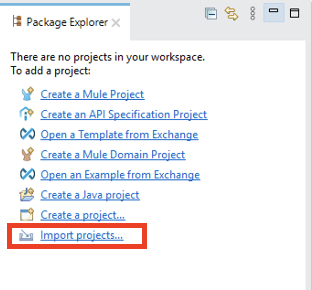
Click on the Import projects… link
-
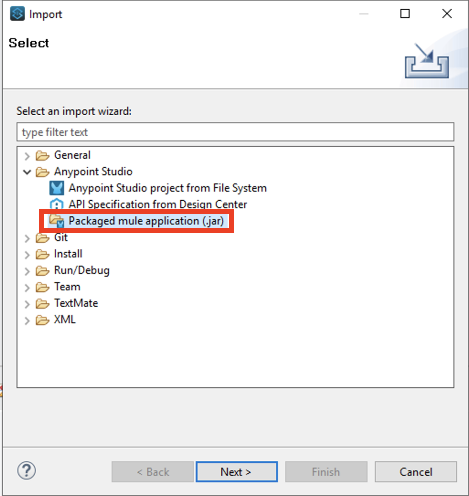
Select Packaged mule application (.jar) and click Next.
-
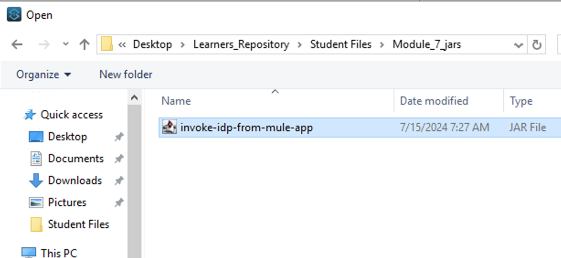
Select invoke-idp-from-mule-app.jar from the Student Files folder (under path
Student Files/Module 7) and click Open.You should have the Google Drive link sent to you along with the credentials and other workshop material. This drive contains the student files for all Labs. If you do not have access, ask the instructor.
-
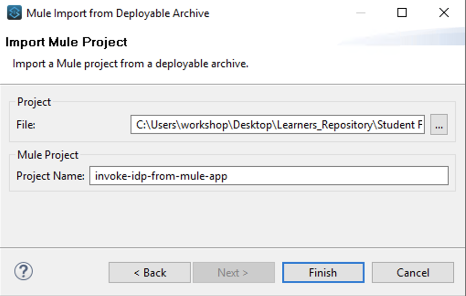
Click Finish.
-
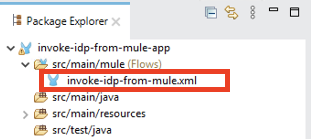
Now that you have imported the project, expand the src/main/mule folder from the Package Explorer on the left and double click the invoke-idp-from-mule.xml mule file.
Now that the mule file is open scroll to the bottom, you should see the get and post flows you will complete as part of this lab.
-
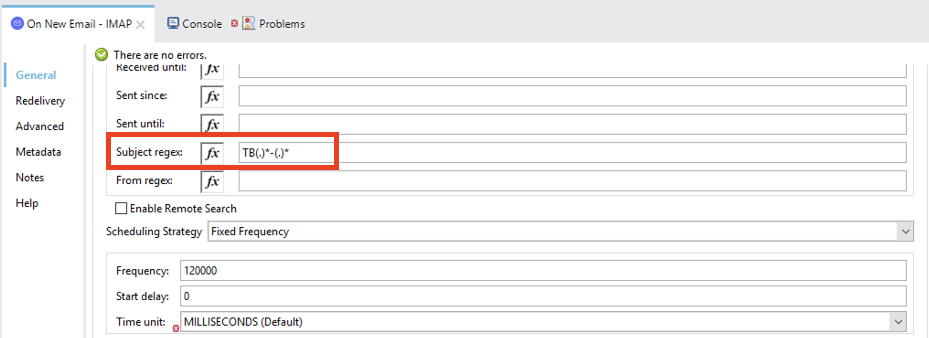
In order to avoid having applications from the other attendees polling for the same email, you have to properly update the email subject search criteria to filter out only the email with a subject starting with your initials.
Double click on the On New Email - IMAP element form the bottom of the page.
-
A new section is loaded in the bottom-center section to configure the On New Email - IMAP element. Set the Subject regex with <your-initials>
(.)*-(.)*
-
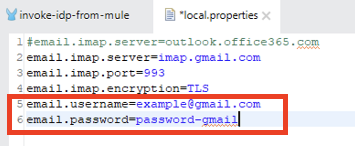
Now you need to configure the email connector for the imported project. Expand the src/main/resources/config folder from the Package Explore on the left and double click the local.properties mule file.

-
Complete the .properties file as follows:
Field Value email.username
<The email address provided by the instructor>
email.password
<The email password provided by the instructor>
-
Save the modified file.
Step 3: IDP Document Action Connector Dependency
-
Go to the Mule Palette and click on the Search in Exchange option.

-
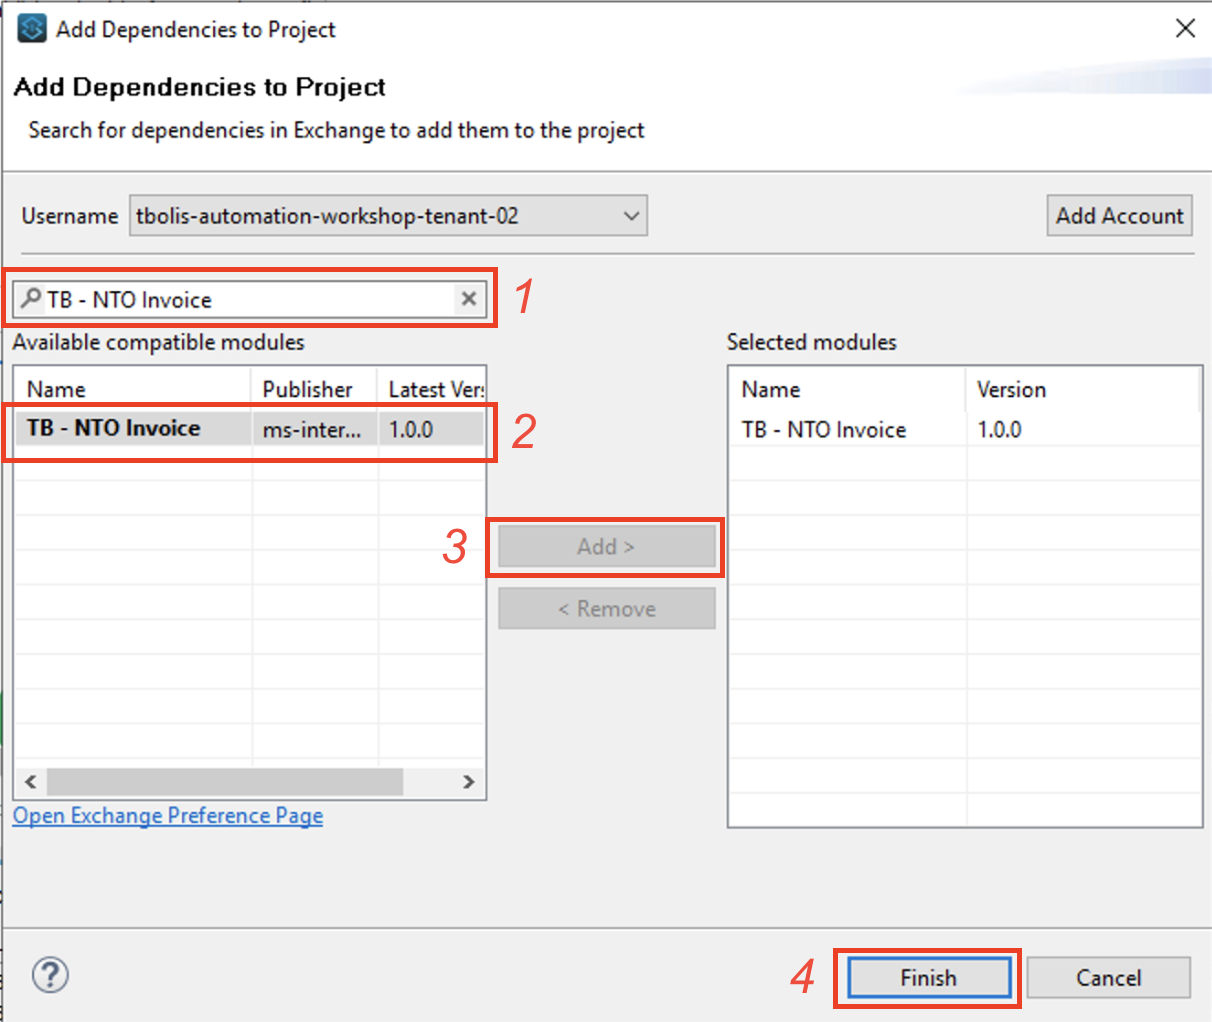
Follow these steps to add the dependency to the project:
-
In the search area enter <your-initials>
- NTO Invoice. -
Select the module from the available ones and click Add.
-
The module should show up in the Selected Modules section.
-
Click Finish.
-
-
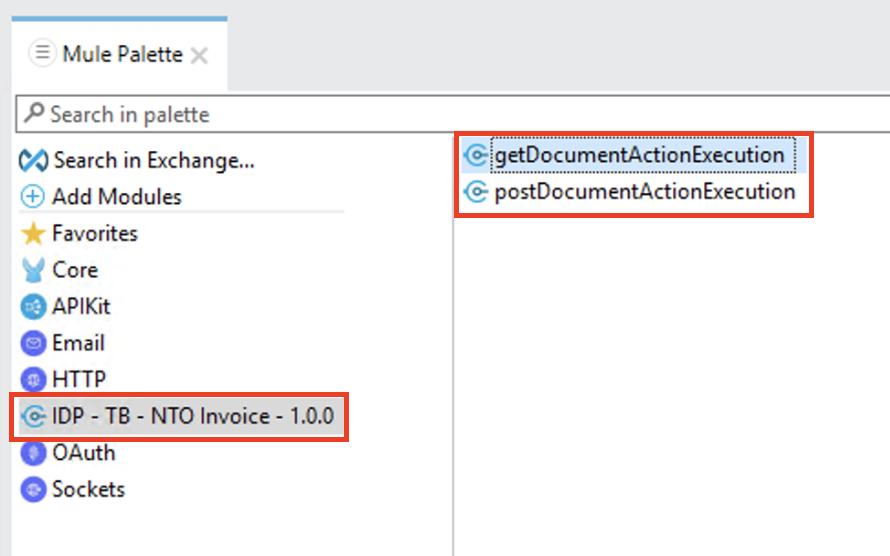
The added dependency should be now visible in the Mule Palette. The added module comes with two predefined methods getDocumentActionExecution and postDocumentActionExecution.
-
Now you have to create a global configuration for the connector you just added as a dependency.
In the invoke-idp-from-mule tab, select the Global Elements section at the bottom.
-
You just reached the Global Configuration Elements section, click the Create button.

-
The Choose Global Type pop-up window opens. Enter
IDPas Filter, select the first result and then click OK.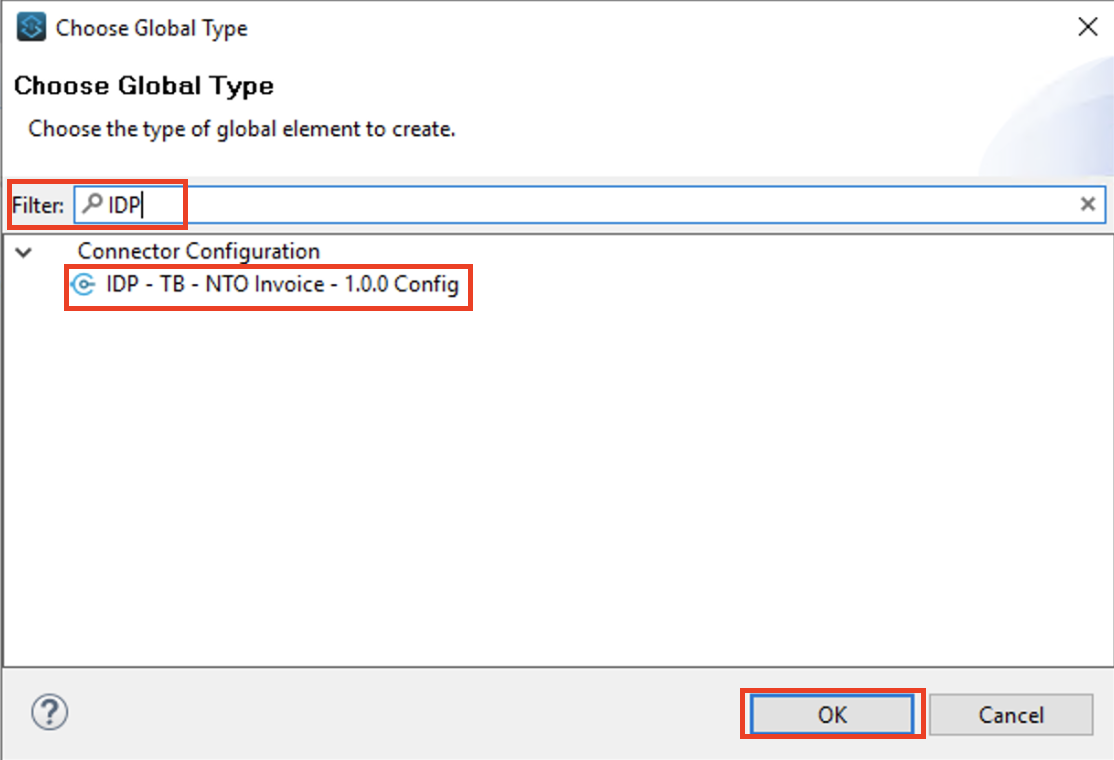
-
Configure the Global Element Properties as follows and click OK.
!!! Important Note. Do not test the connection, there is a known bug and any test will fail. !!!
Field Value host
idp-rt.us-east-1.anypoint.mulesoft.comport
443basePath
``
protocol
HTTPSclientId
<Replace with the value provided by the instructor>
clientSecret
<Replace with the value provided by the instructor>
accessTokenUrl

-
Go back to the Message Flow section by clicking it at the bottom of the invoke-idp-from-mule main tab.

Step 4: Use Connector POST Method inside the Mule Flow
-
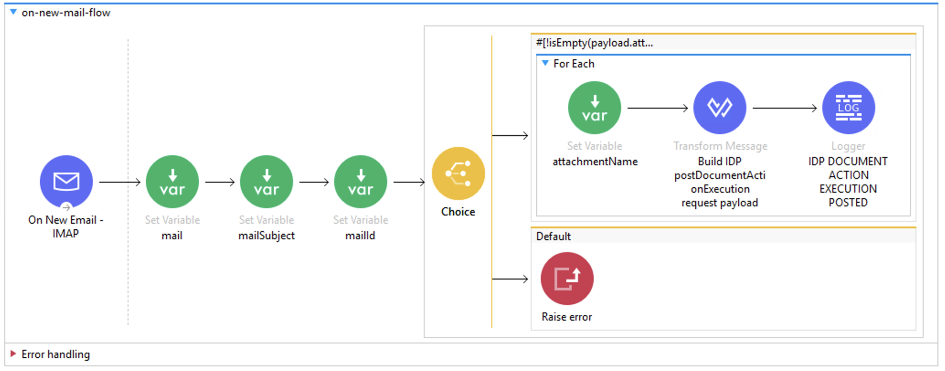
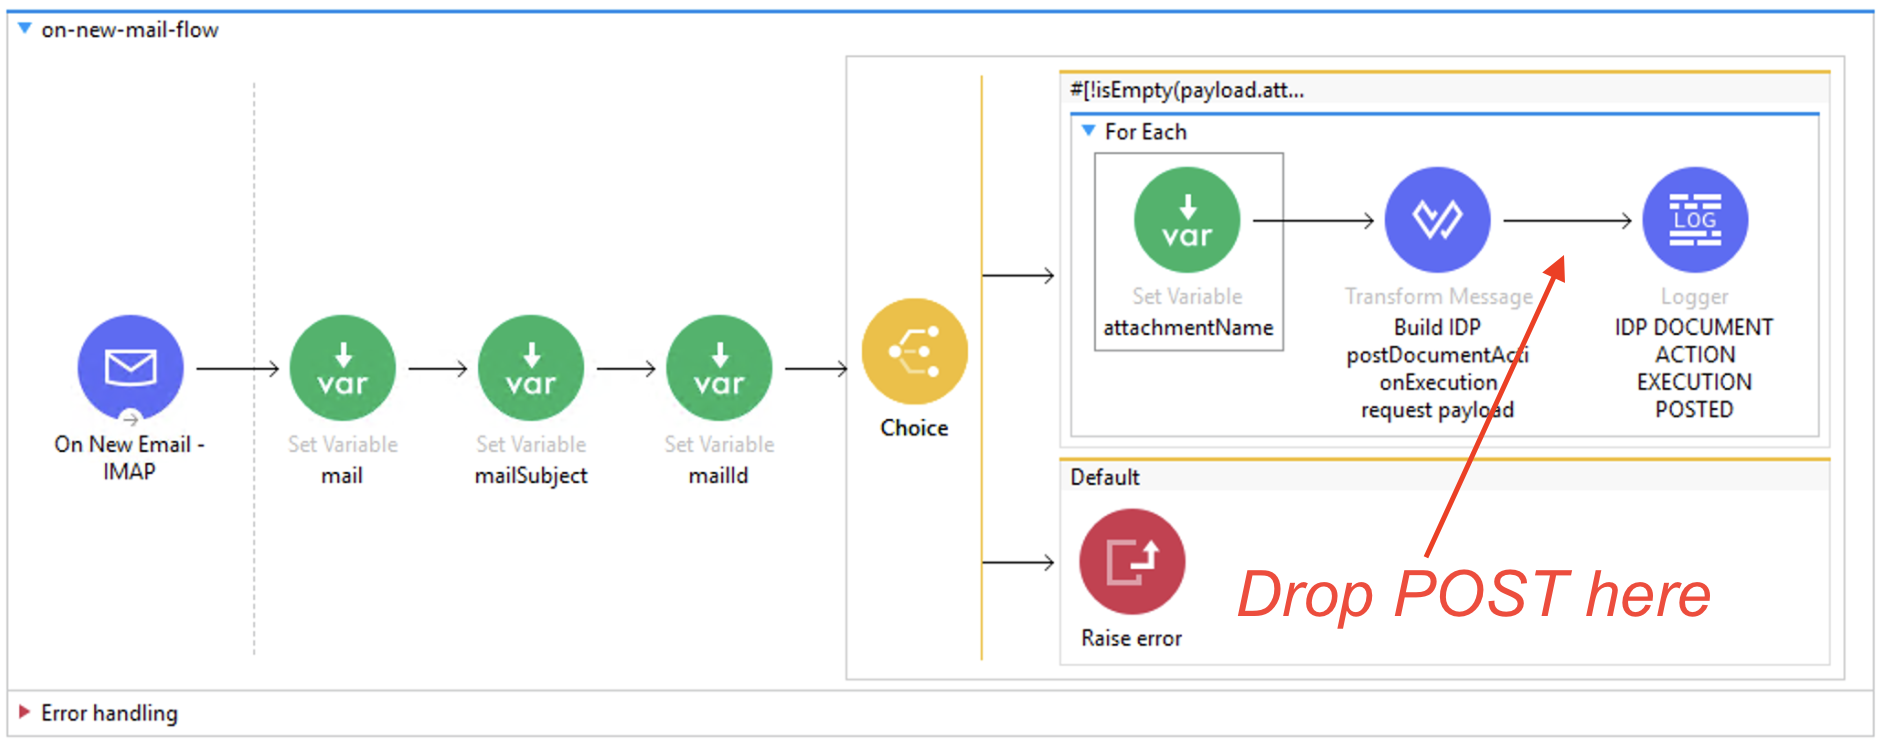
Locate the on-new-mail-flow flow in the page.
-
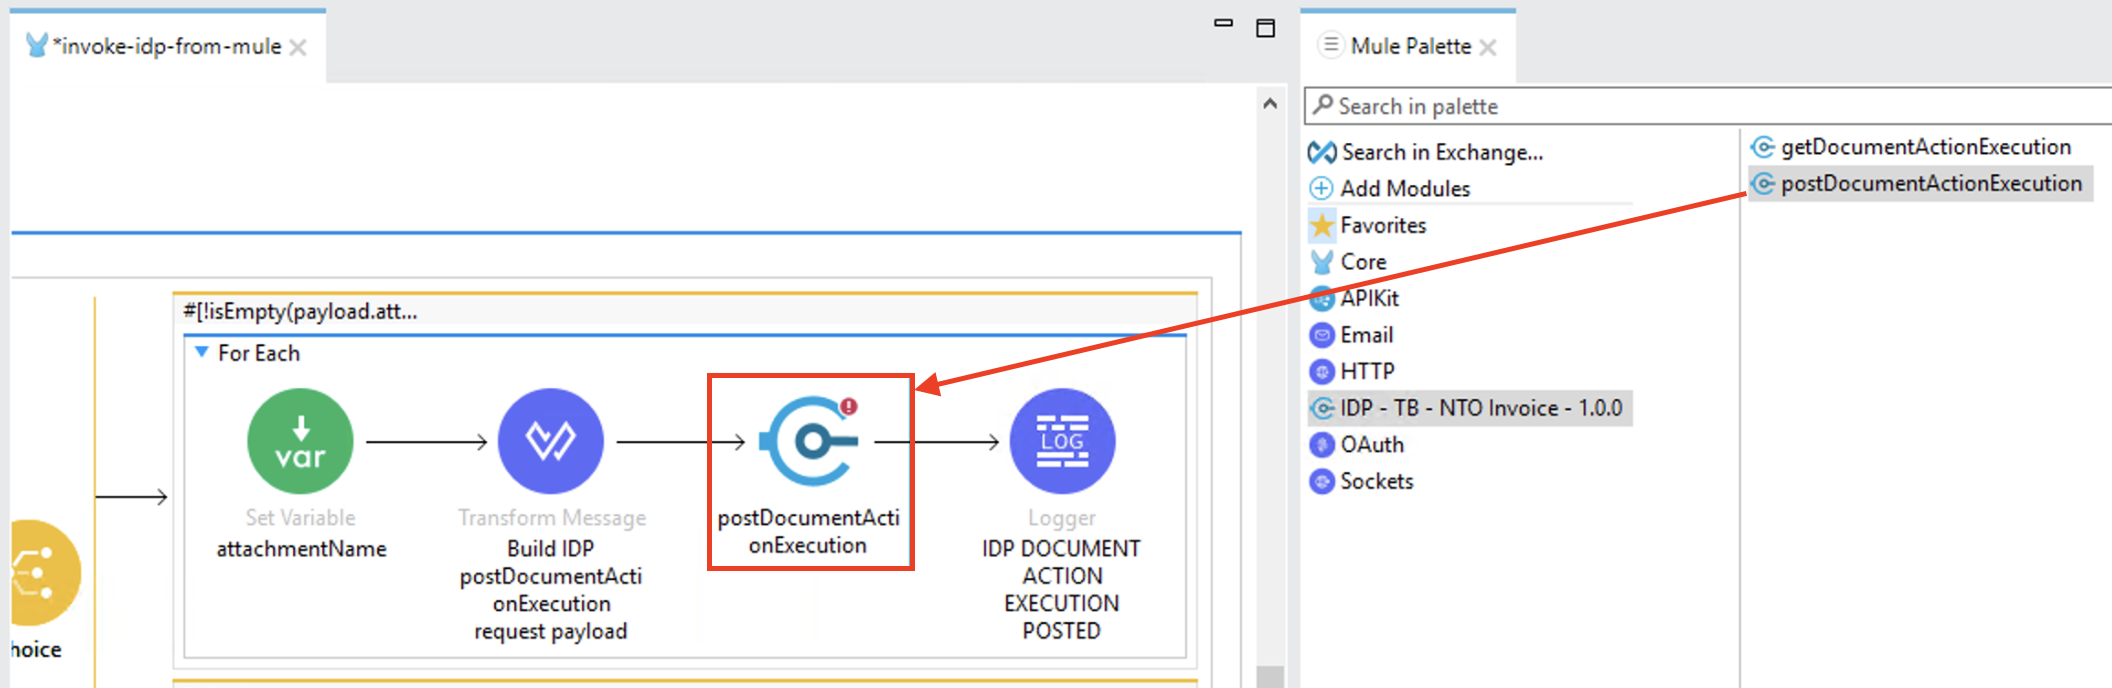
From the Mule Palette drag and drop the postDocumentActionExecution method as described below
-
AFTER the Transform Message element named Build IDP postDocumentActionExecution request payload
-
BEFORE the Logger element IDP DOCUMENT ACTION EXECUTION POSTED.
-
-
Double click the postDocumentActionExecution element you just added, the configuration should open at the bottom of the IDE. As you can see the connector configuration is automatically set to the one you previously configured.

-
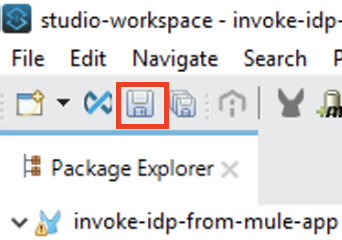
Save by clicking the Save button in the top-left corner.
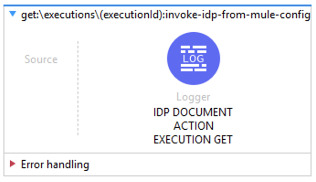
Step 5: Use Connector GET Method inside the Mule Flow
-
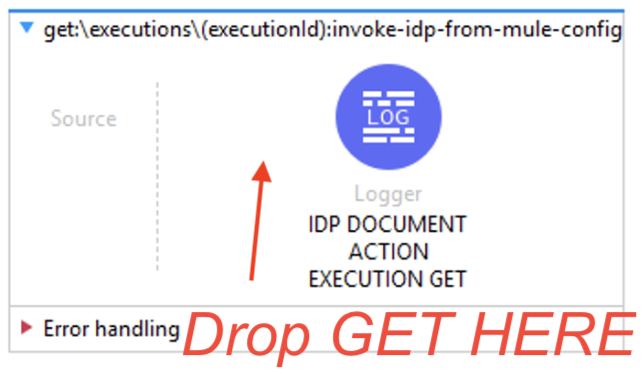
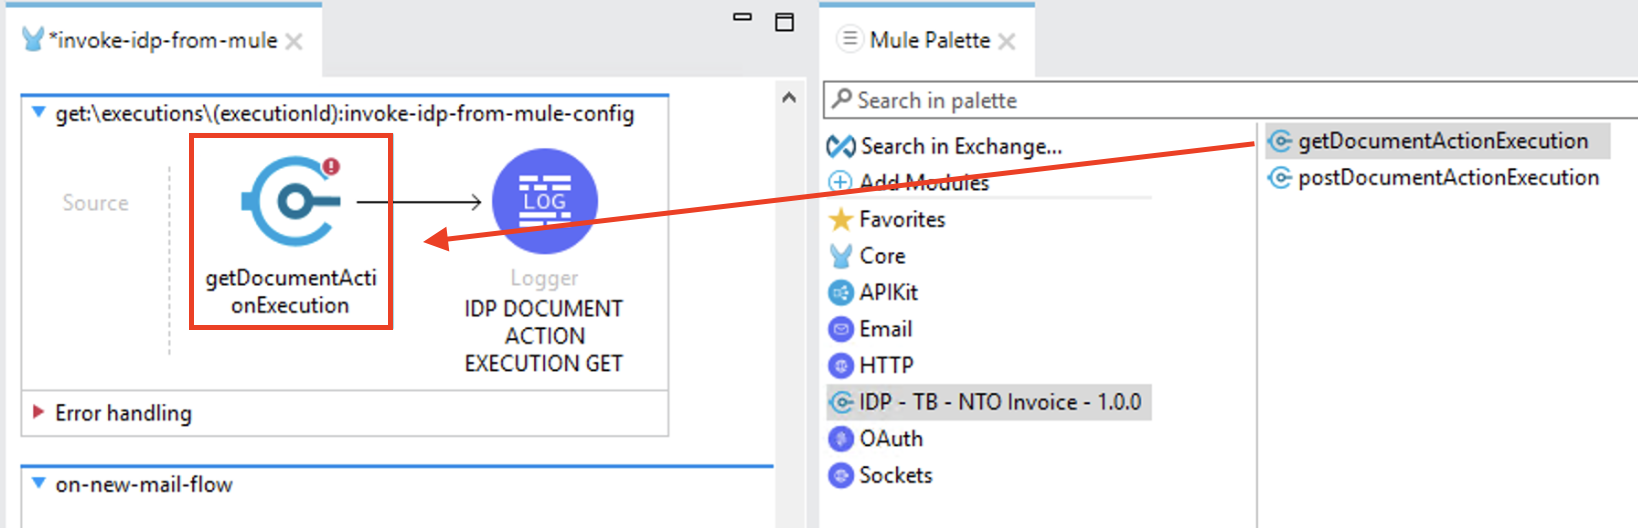
Locate the get:\executions\(executionId):invoke-idp-from-mule-config flow in the page.
-
From the Mule Palette drag and drop the getDocumentActionExecution method as described below BEFORE the Logger element IDP DOCUMENT ACTION EXECUTION GET.
-
Double click the getDocumentActionExecution element you just added, the configuration should open at the bottom of the IDE. As you can see the connector configuration is automatically set to the one you previously configured.
-
Now you have to provide to the connector the right value as Execution Id. Click the fx button next to Execution Id and set the value as
attributes.uriParams.executionId
-
Save by clicking the Save button in the top-left corner.
Step 6: Test your Application Locally
-
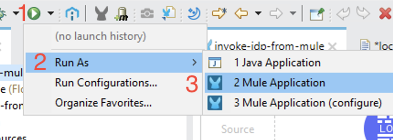
You can now run the application by selecting the Run button and then Run As → Mule Application.
-
Check the console until you see a message like the following stating that the application is correctly started/deployed.
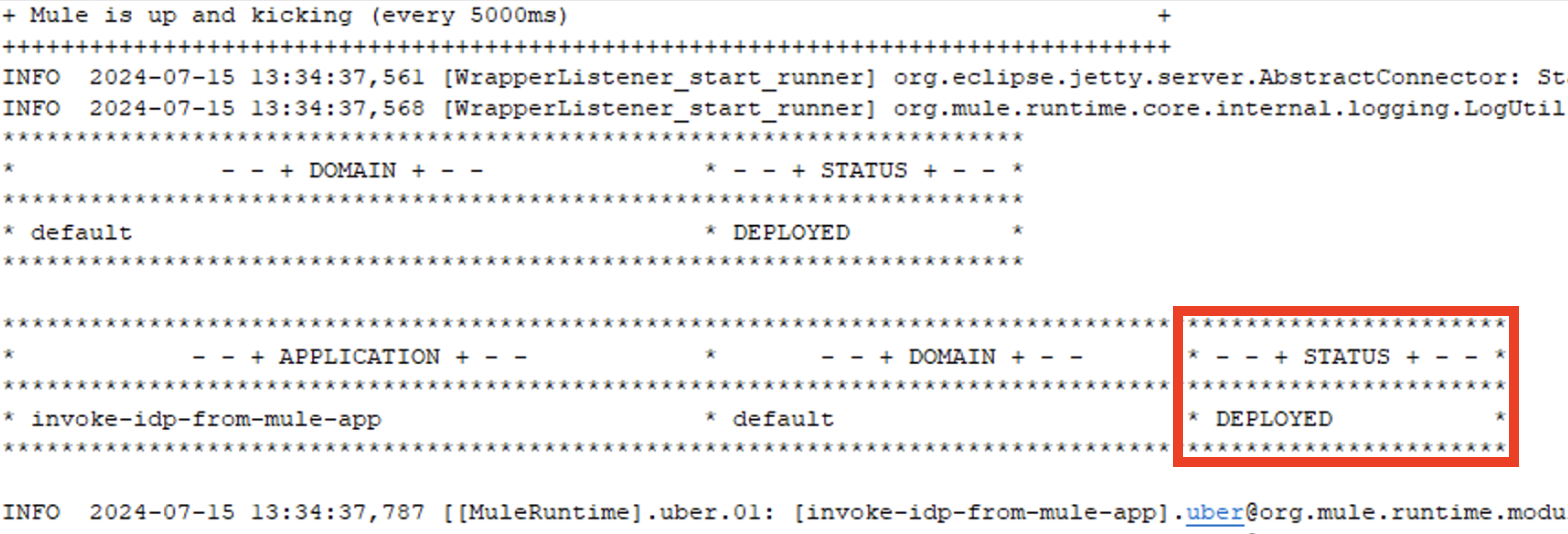
-
Then, send an email to the address provided by the instructor. Set the subject as <your-initials>
- NTO Invoiceand attach the email provided with the Learners Repository.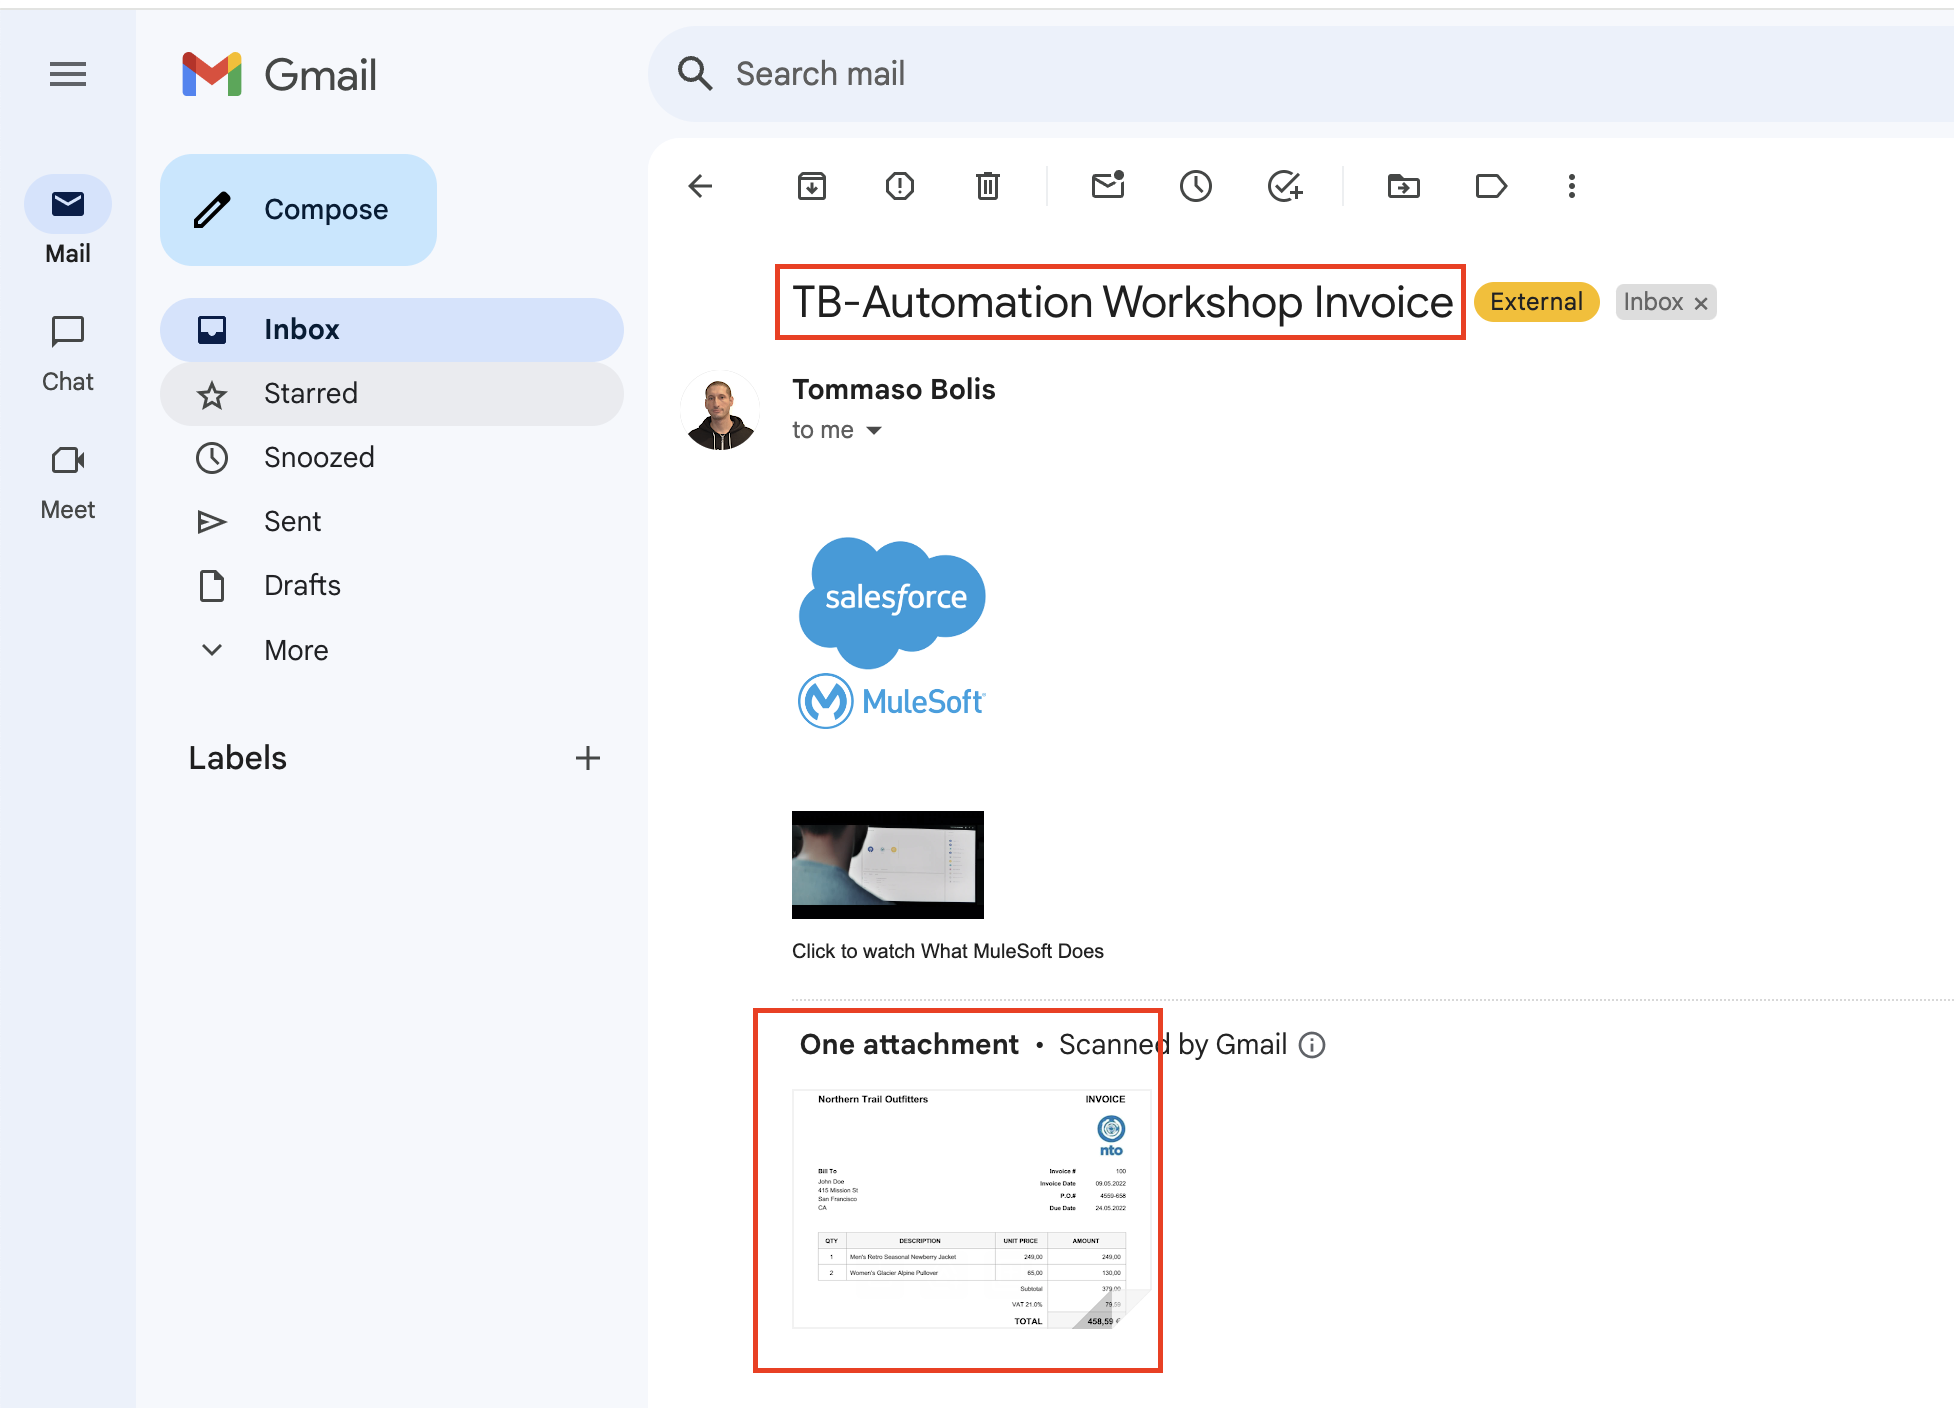
-
Check the console; once IDP is invoked and document processing starts, you should see a message like the following. Take note of the execution id since you will need it in a moment to poll for the processing results.
Note. This can take up to 1 minute.

-
Now that the IDP processing has started, you can poll for the results. Open a browser and navigate to
https://localhost:8081/consoleor click on theOpen consolebutton in the APIkit Console tab (it will automatically open the browser at the right location).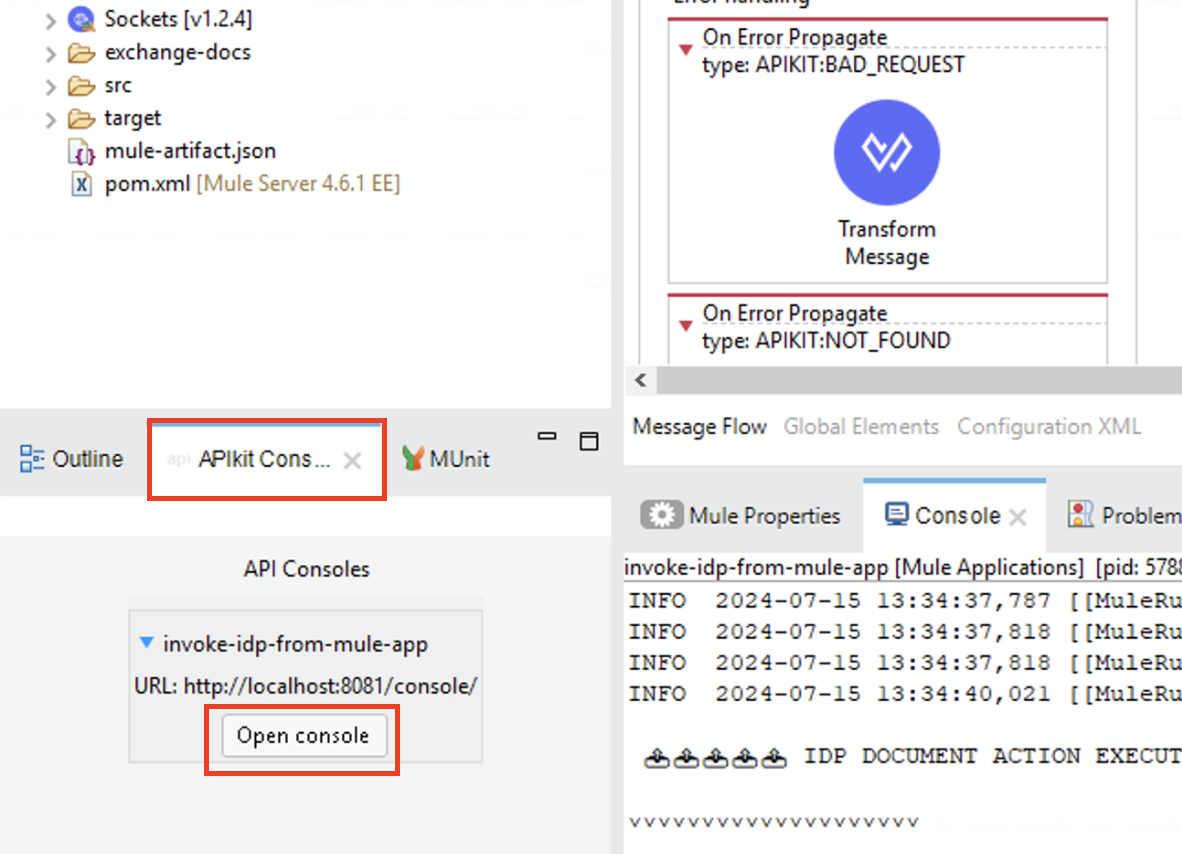
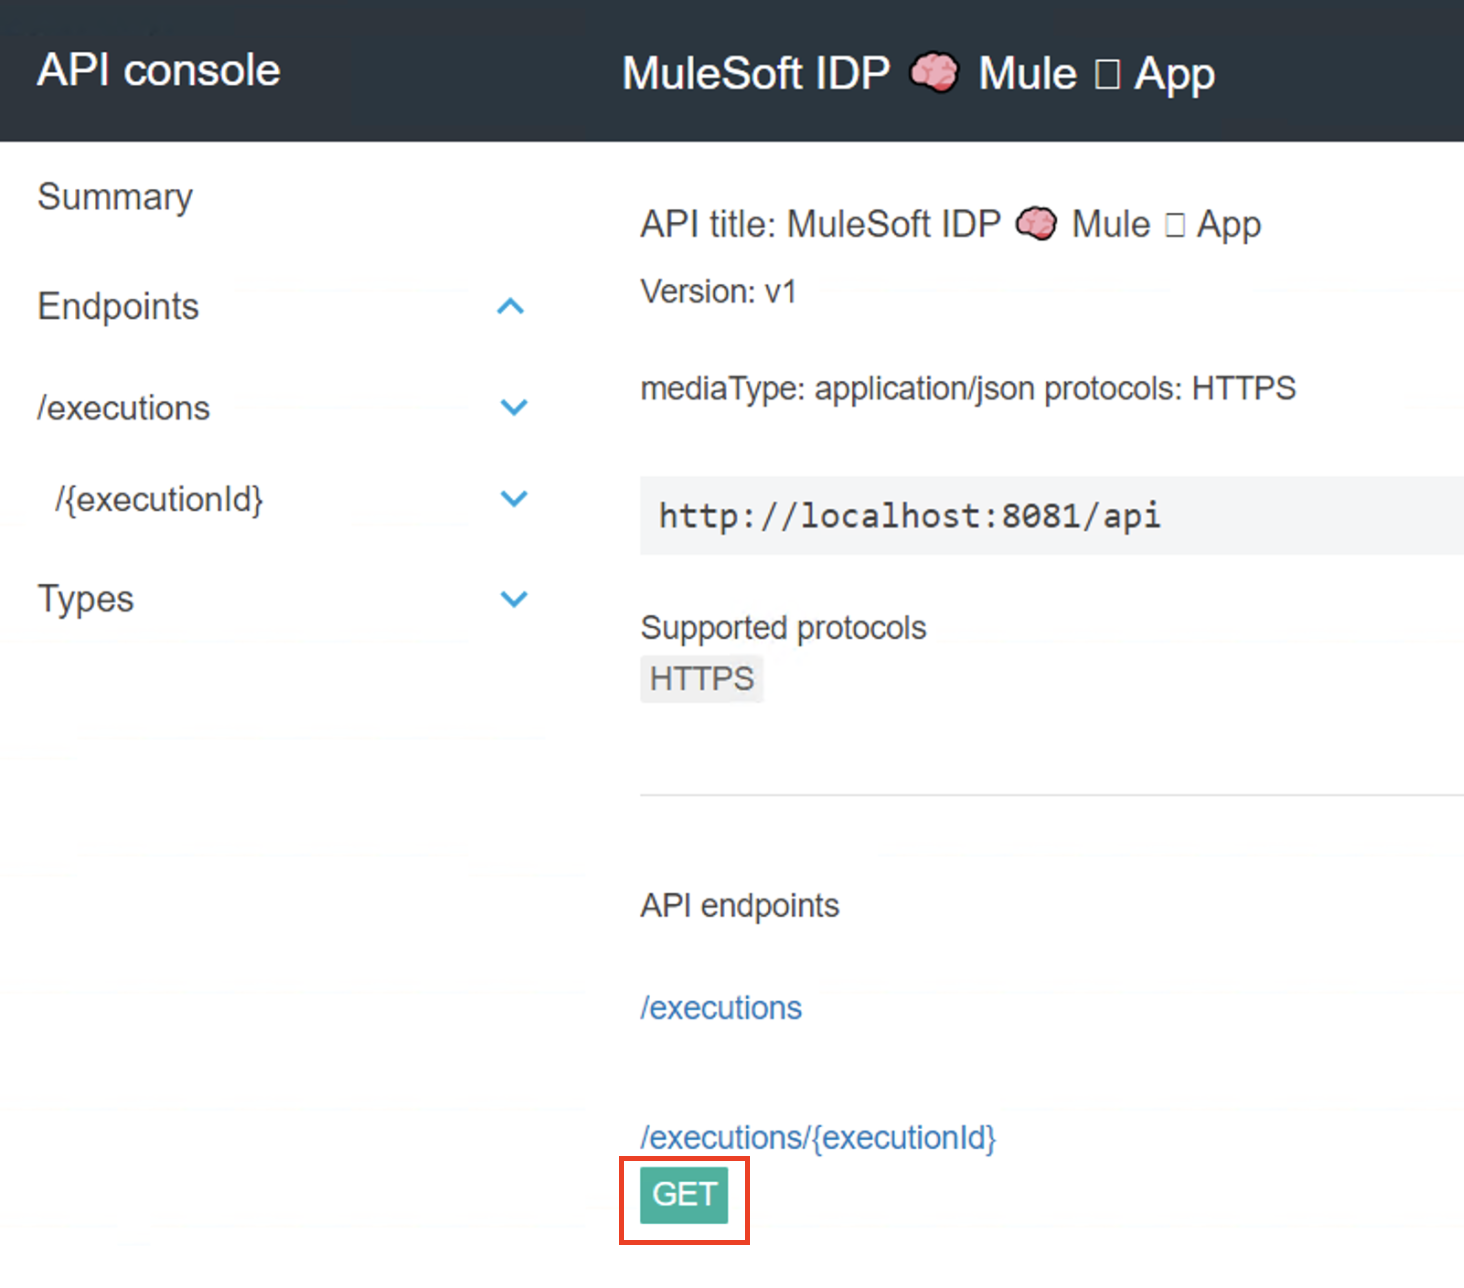
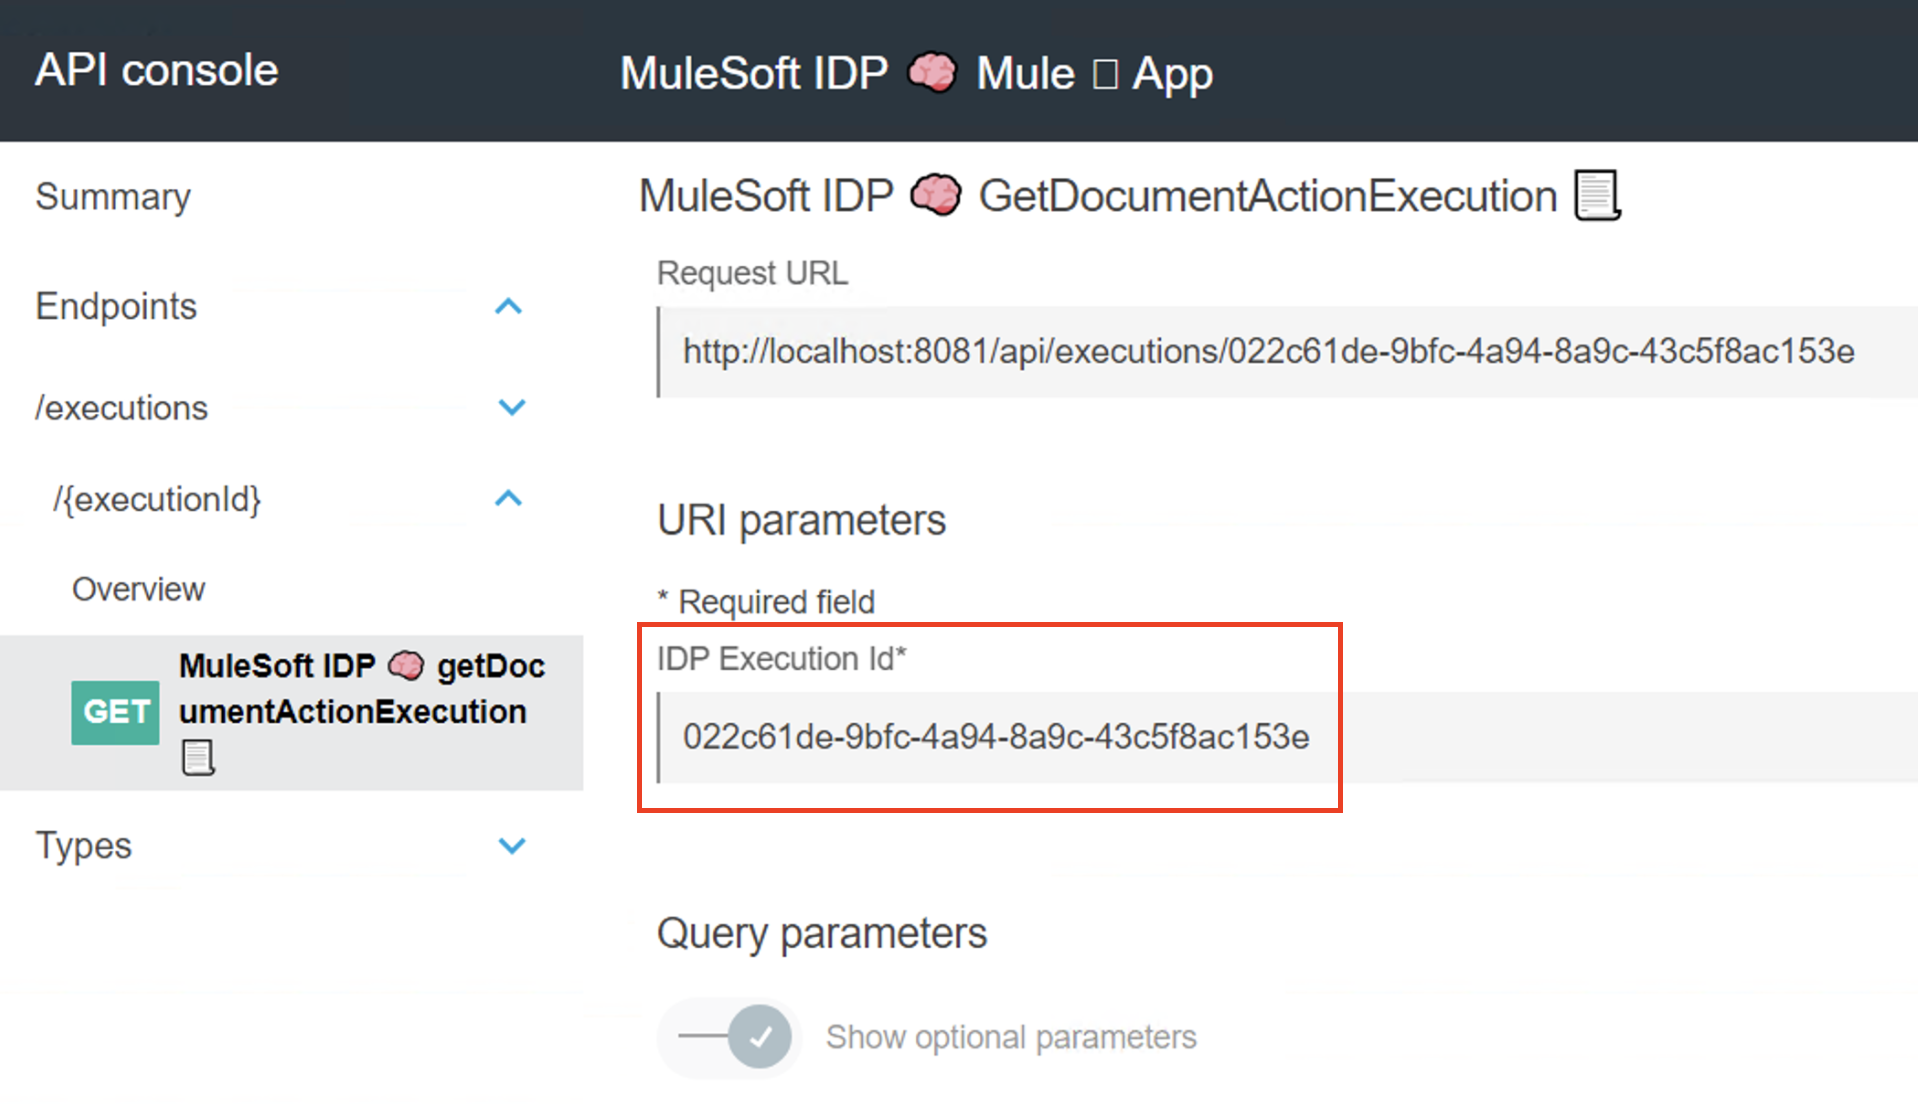
In the API Console click on the GET green button.
-
Click the Try it button in the top-right corner.
-
Replace the value in the IDP Execution Id* field with the one copied from the console and click the send button at the bottom of the page.
-
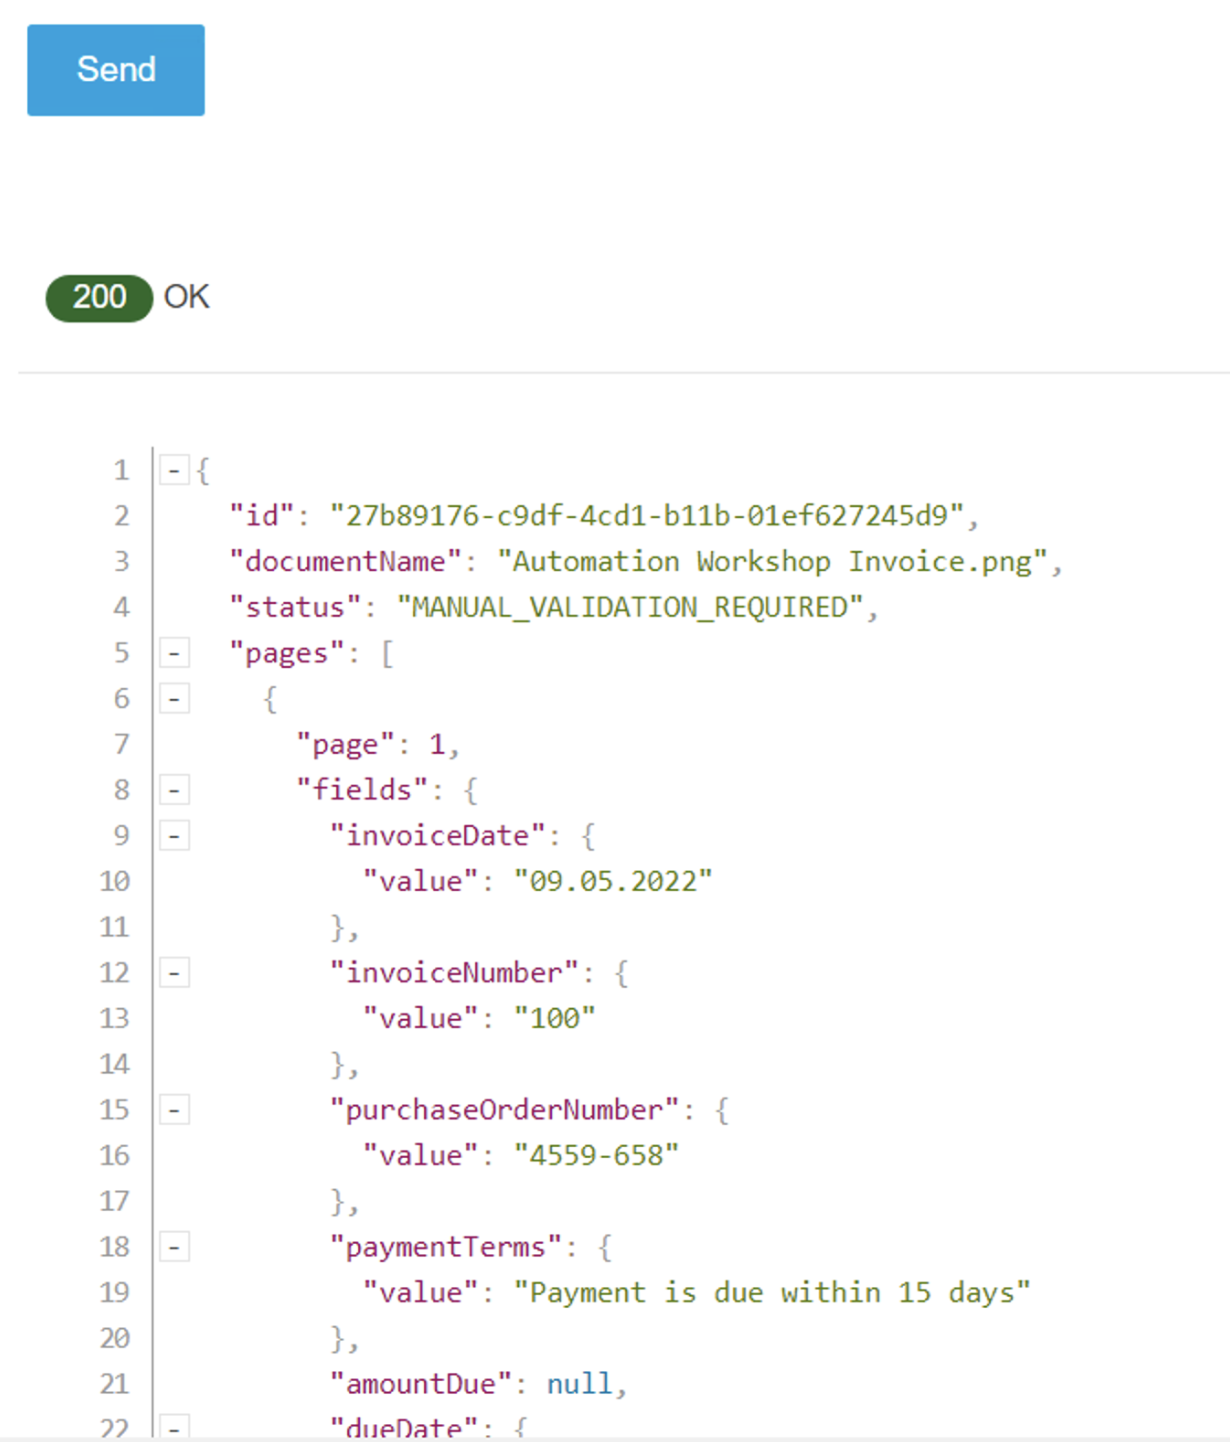
You should see a response like the following.
-
Congratulations! You have just learned how to invoke IDP from a Mule application.
Please proceed to Lab 5: Invoke Published Document Action within using Salesforce Flow