Lab 2: Complete a pre-drafted Flow Orchestration to orchestrate the whole process
Overview
-
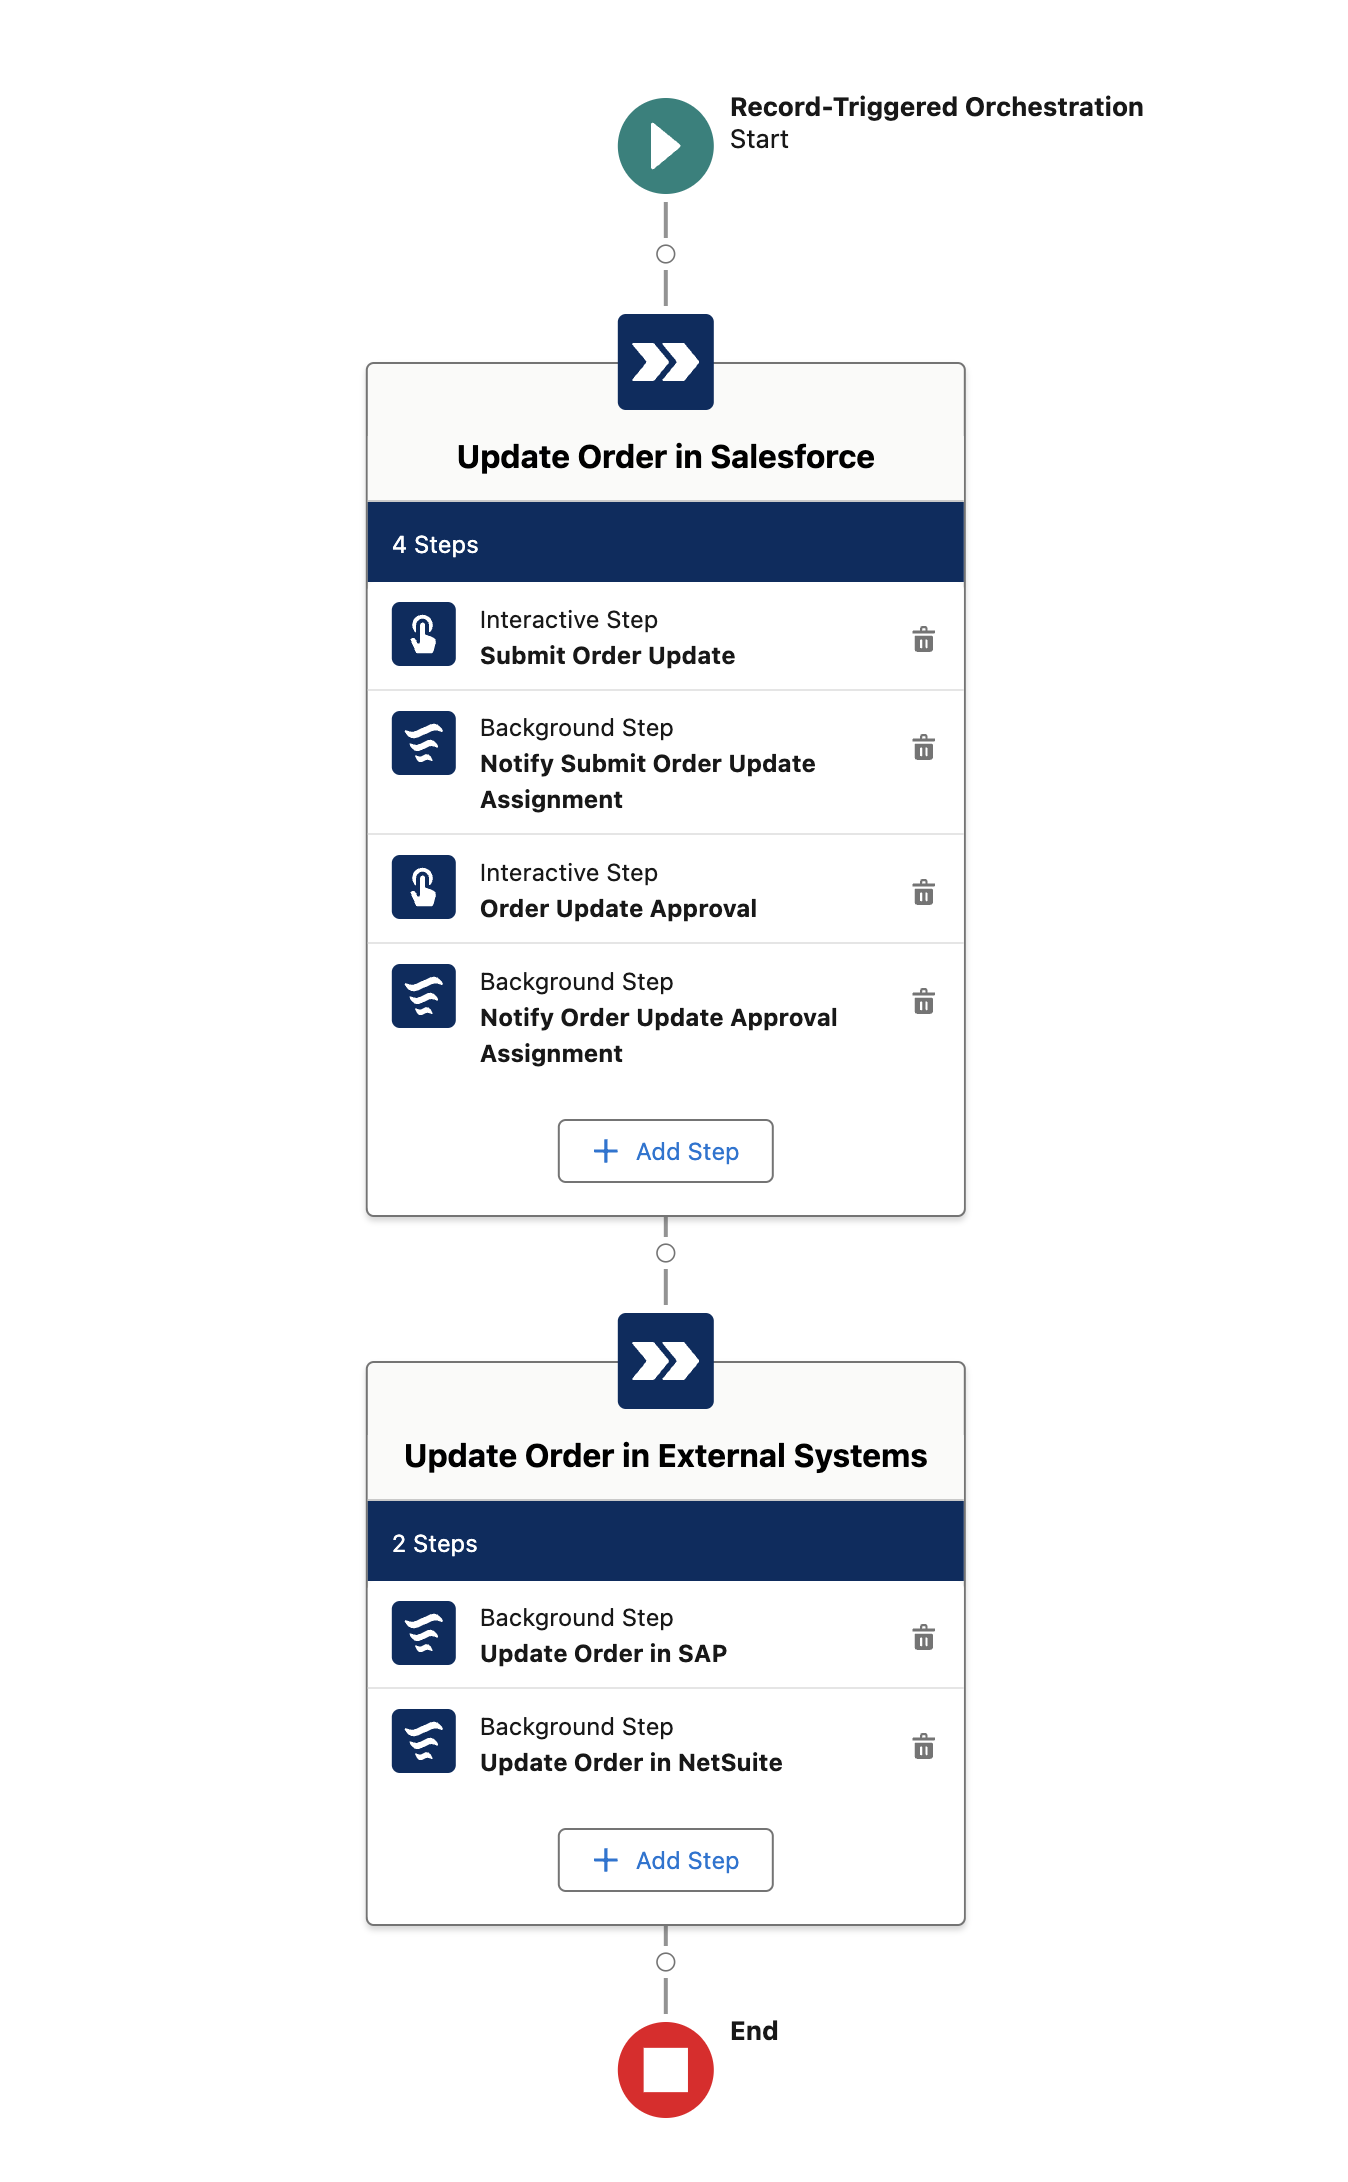
In this lab you will start from the following pre-built orchestration
-
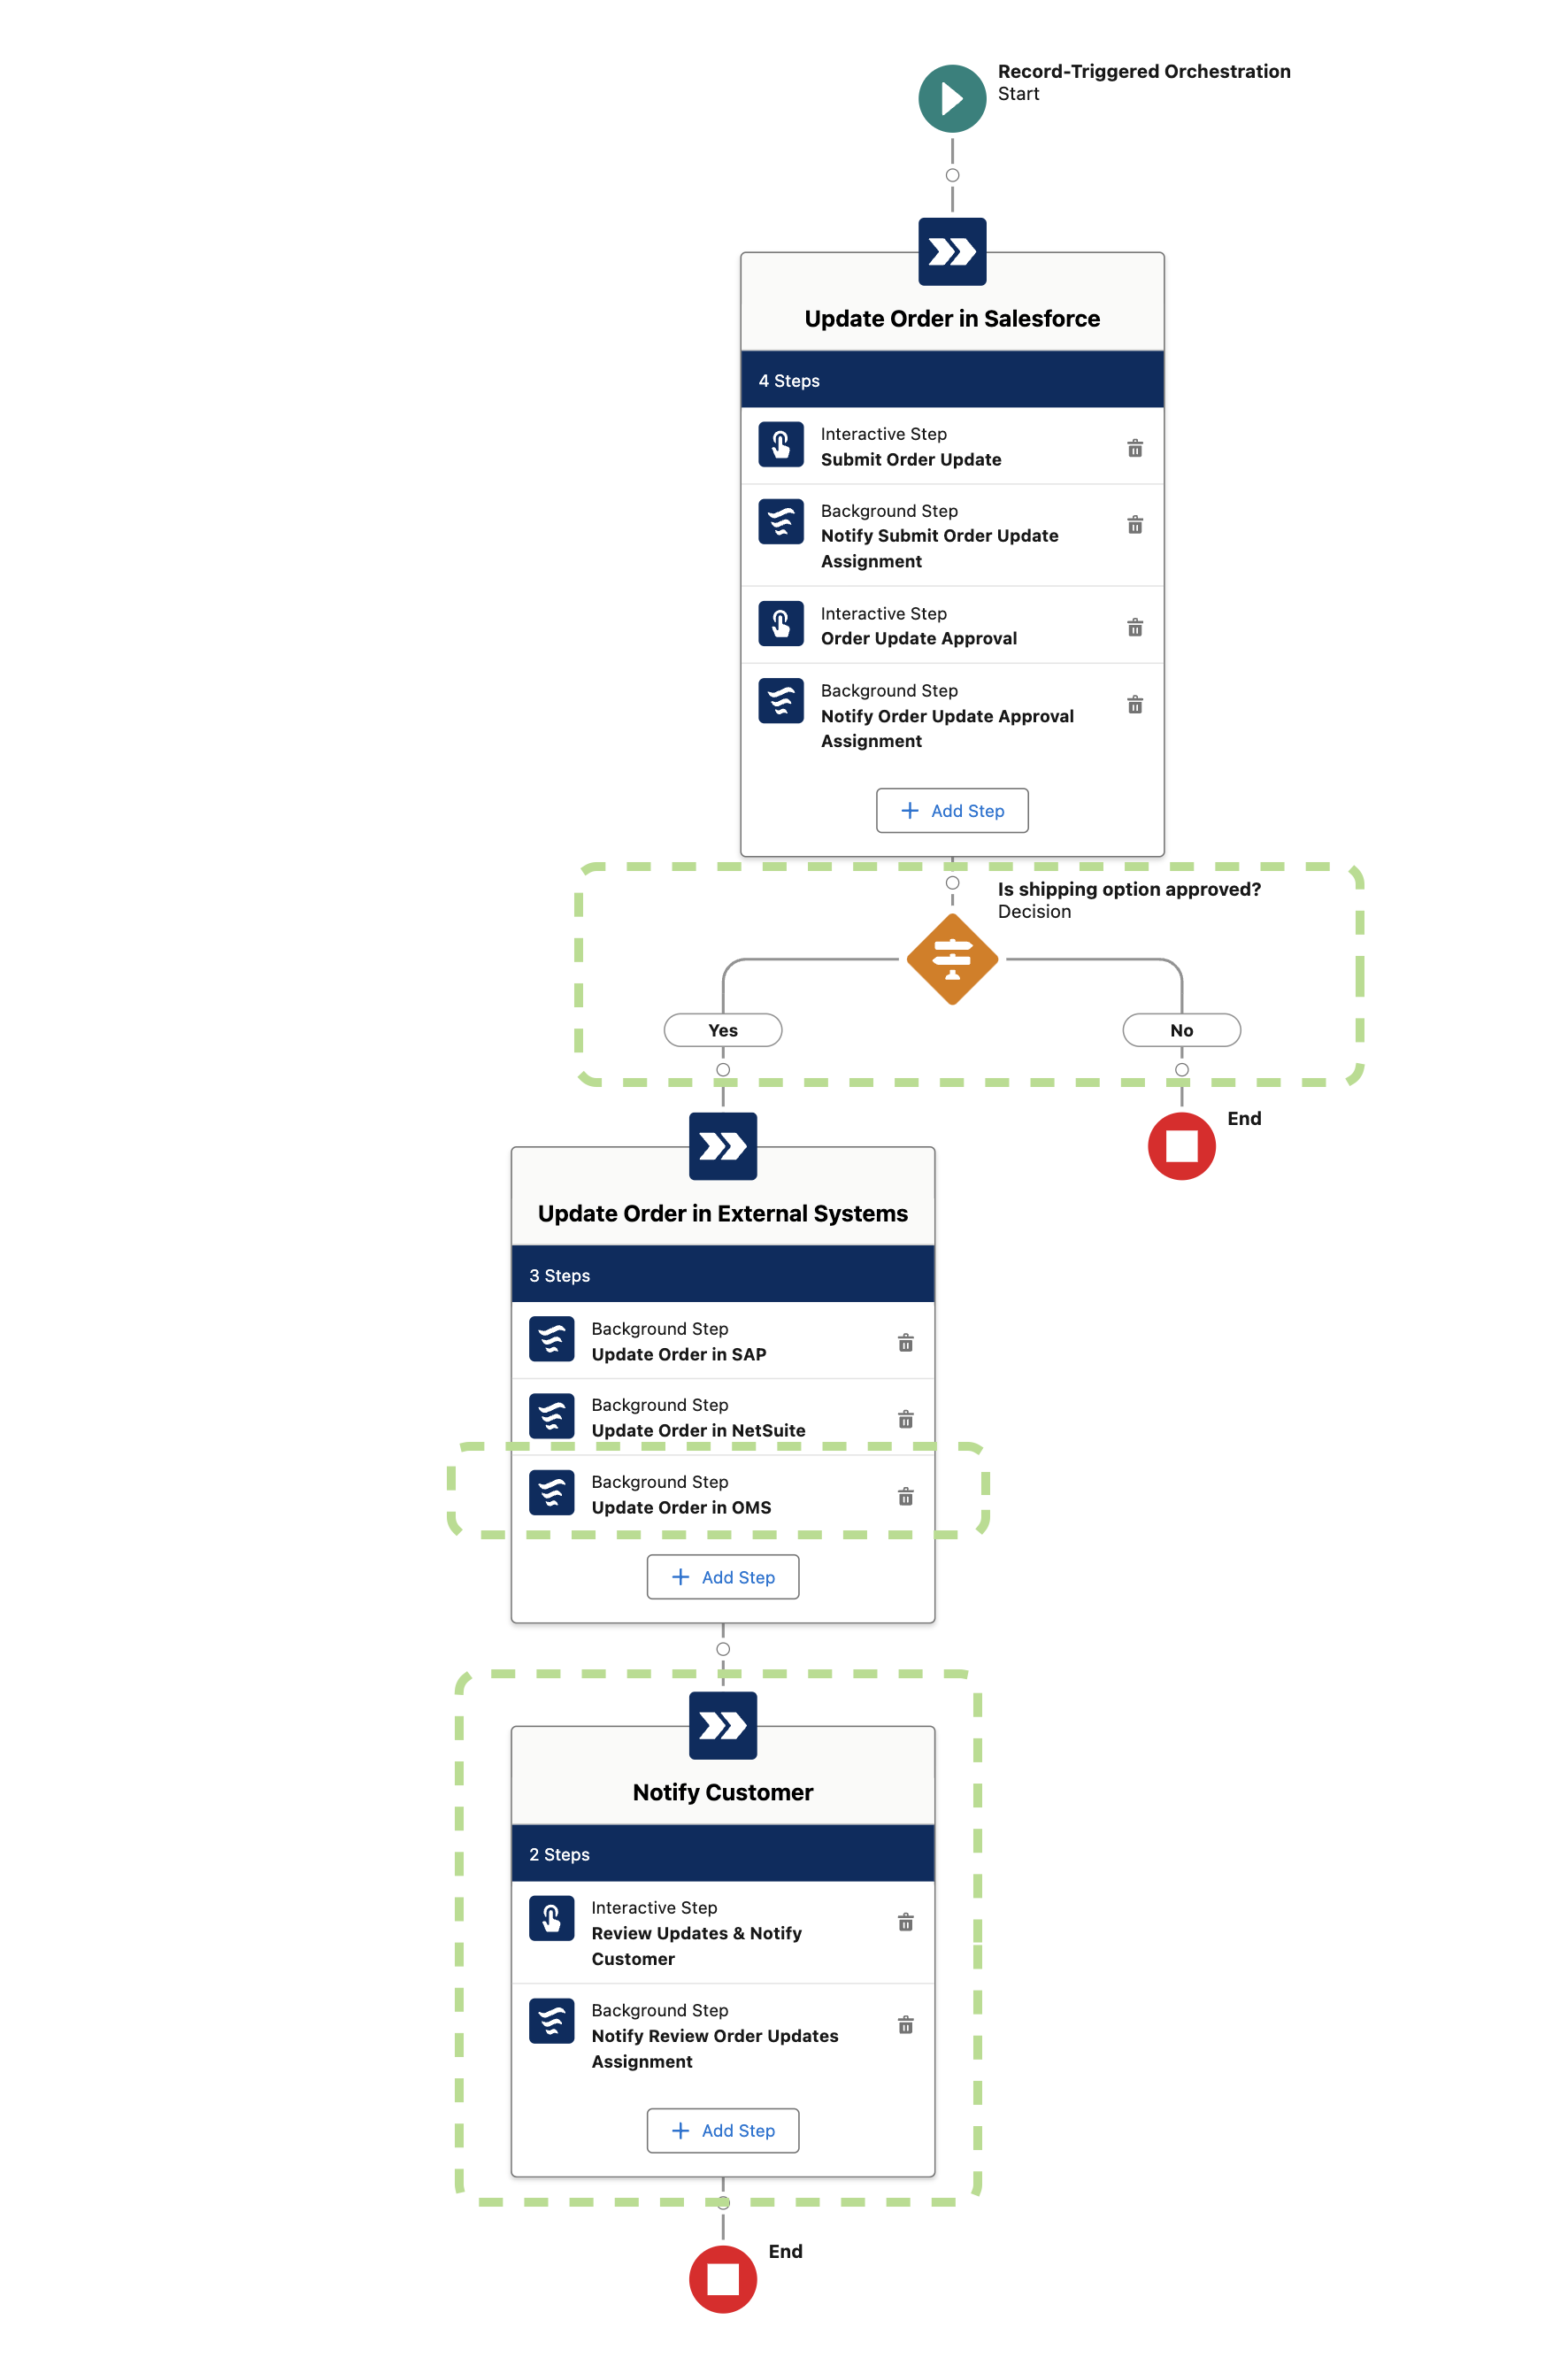
At the end you will have fully implemented version of the orchestration completed as follow (highlighted the parts you’ll build as part of this module).
Step 1: Create a copy of the Record Triggered Orchestration
-
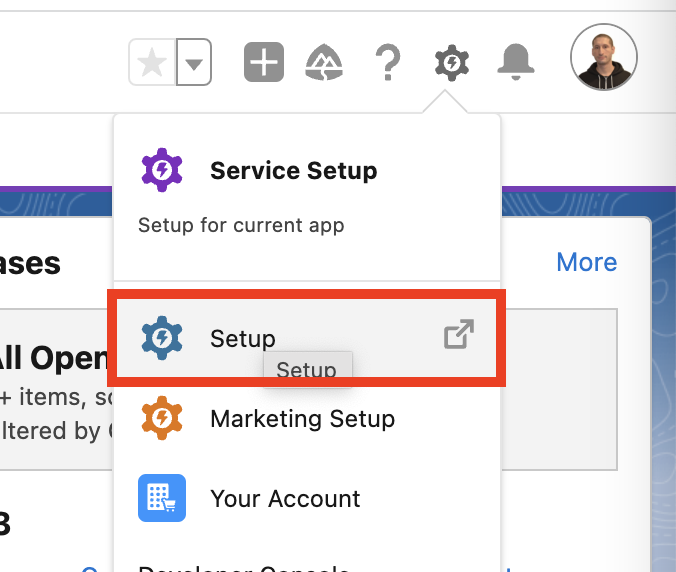
Login into the Salesforce Developer ORG and access the Setup menù.
-
Search for
Flowsin the Quick Find text field and clickFlowsunder Process Automation.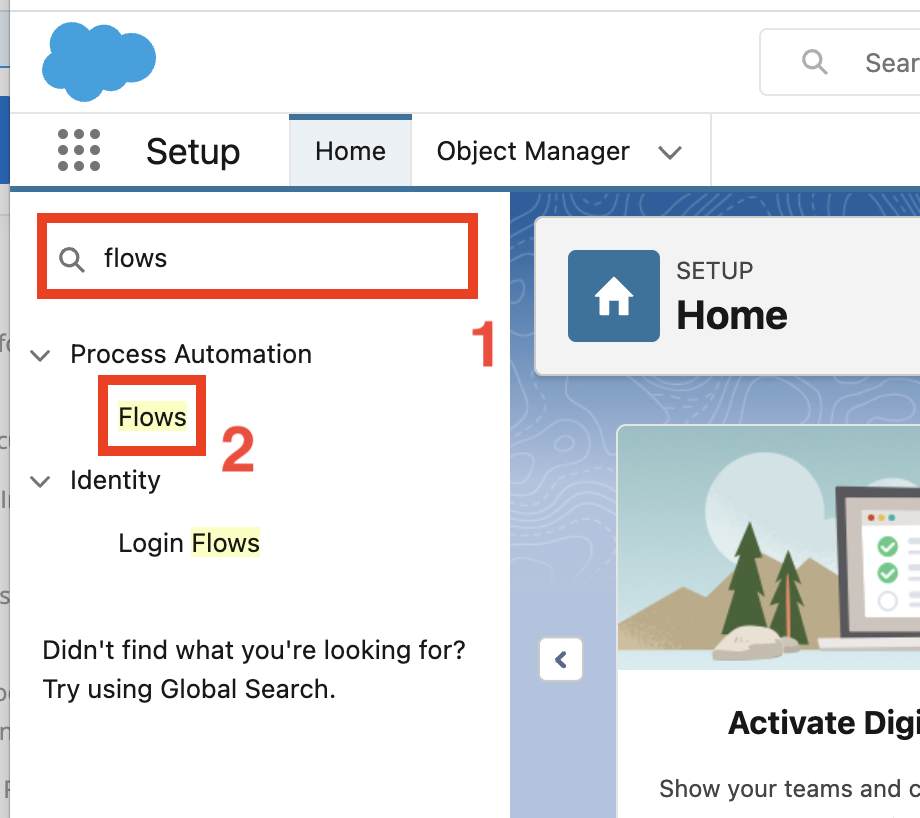
-
Select the
Orchestration Lab’s Flowslist view from the drop down menu in the top left section.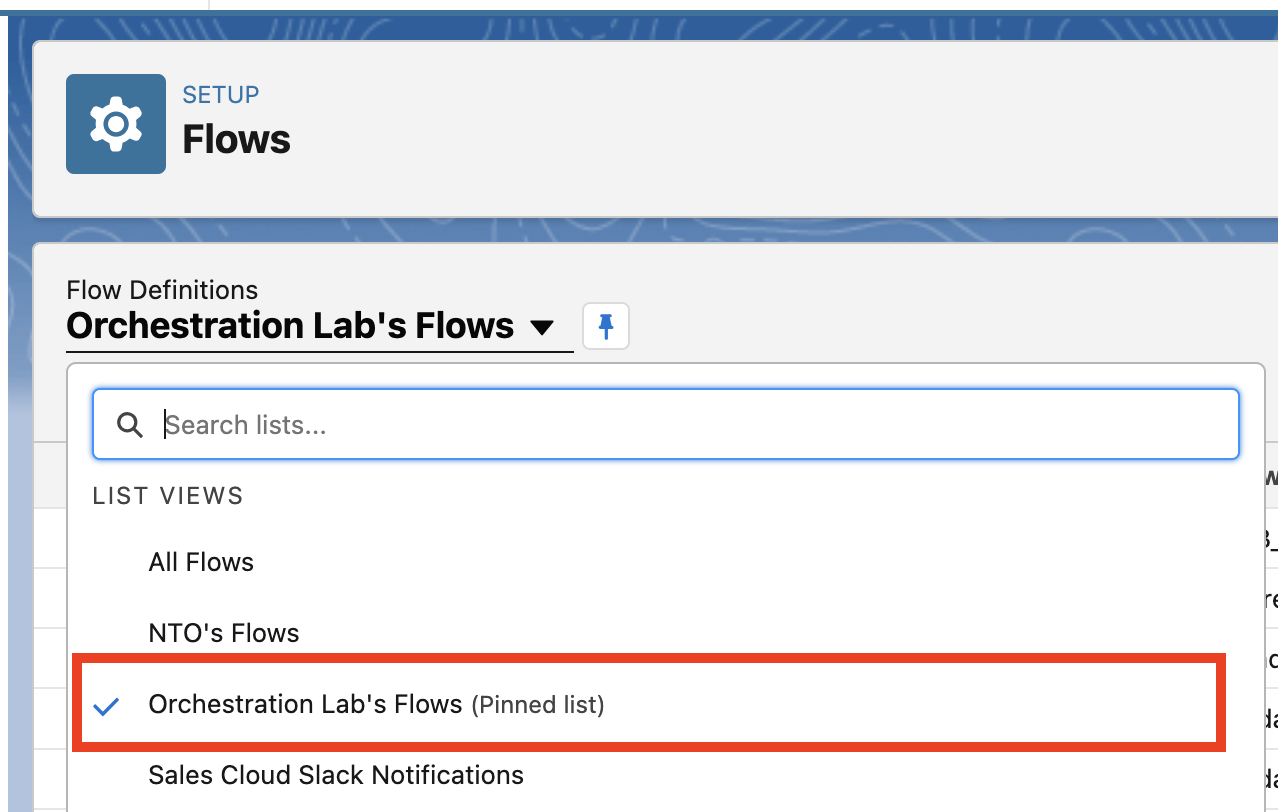
-
Click the
LAB - ORCH - Order Update (Draft)flow label link from the list.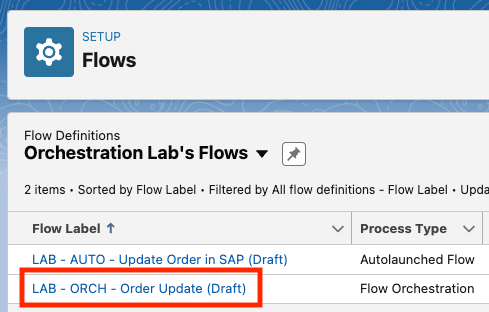
-
Once the flow is opened click the
Save Asbutton on the top right.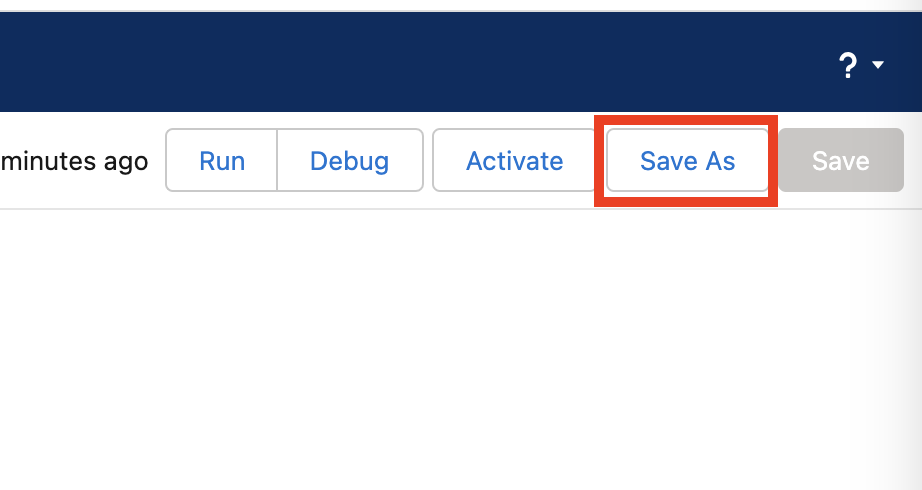
-
Select Save as
A New Orchestrationand provide<your-initials> - ORCH - Order Updateas Flow Label. Click outside the label field and the Orchestration API Name should appear automatically.Click the
Savebutton.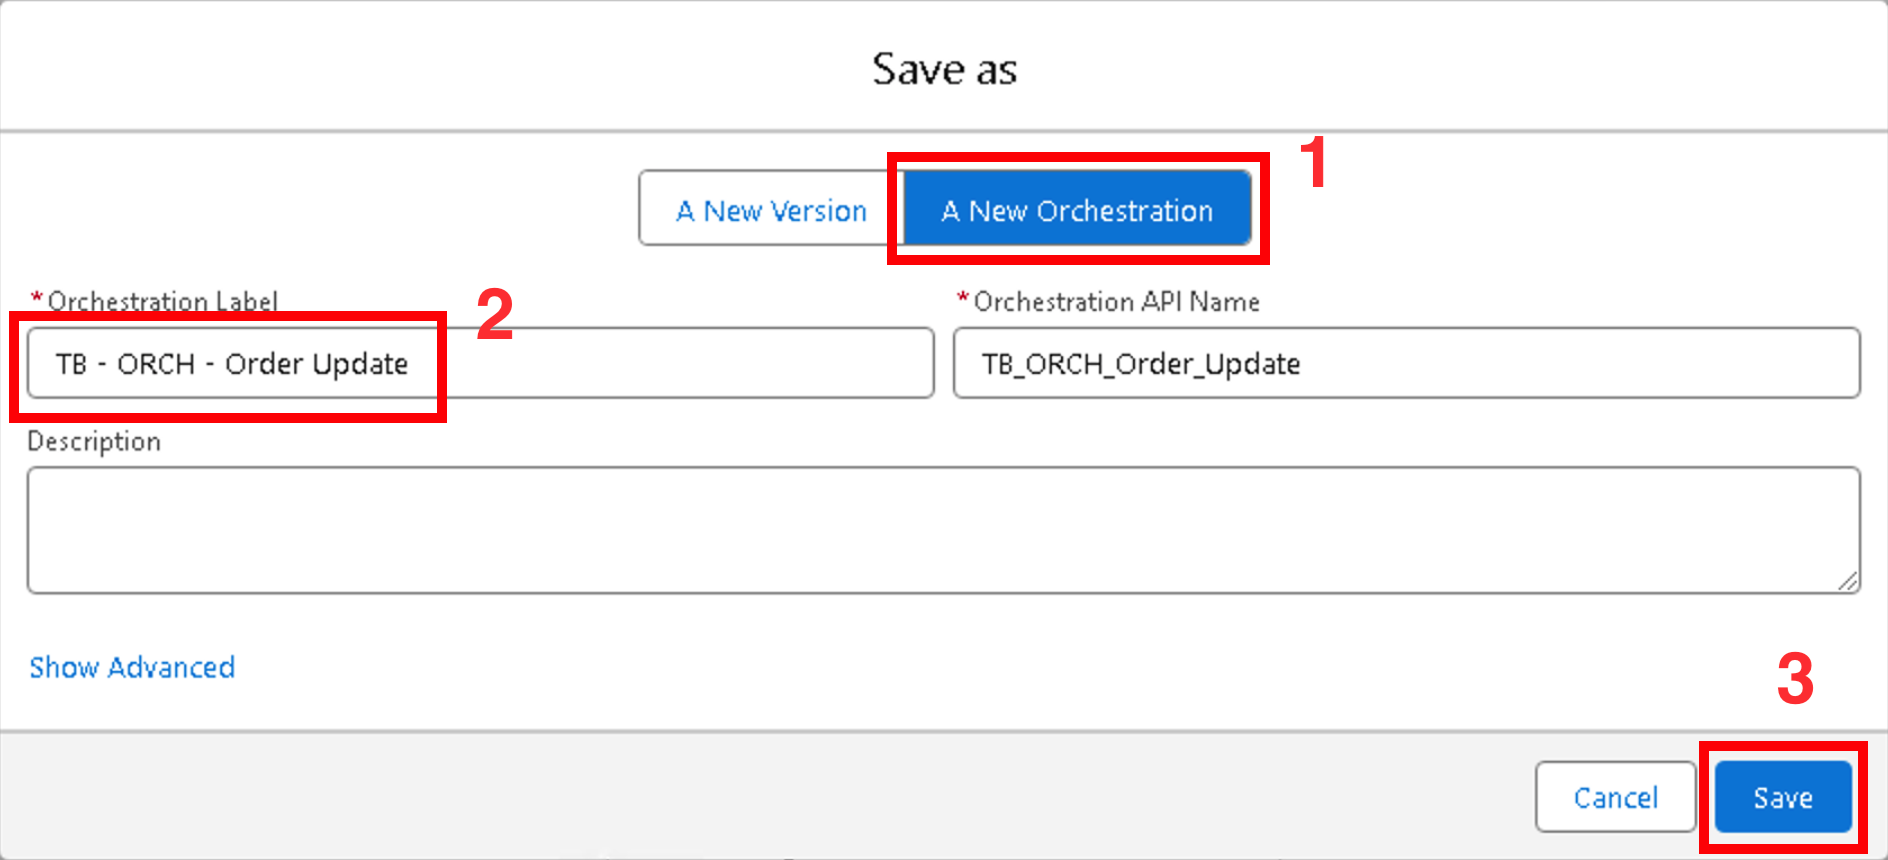
Step 2: Analize the pre-built orchestration
-
The pre-built orchestration comes with two stages. We will focus on the first one (
Update Order in Salesforce) since the second one has a more technical goal. -
The
Update Order in Salesforcestage orchestrates the activities in charge of the service agent and the warehouse manager. -
When the stage starts the service agent is notified and an interactive step
Submit Order Updateis assigned to theNTO Chat Agentsqueue. Click the step to learn more about how it is configured.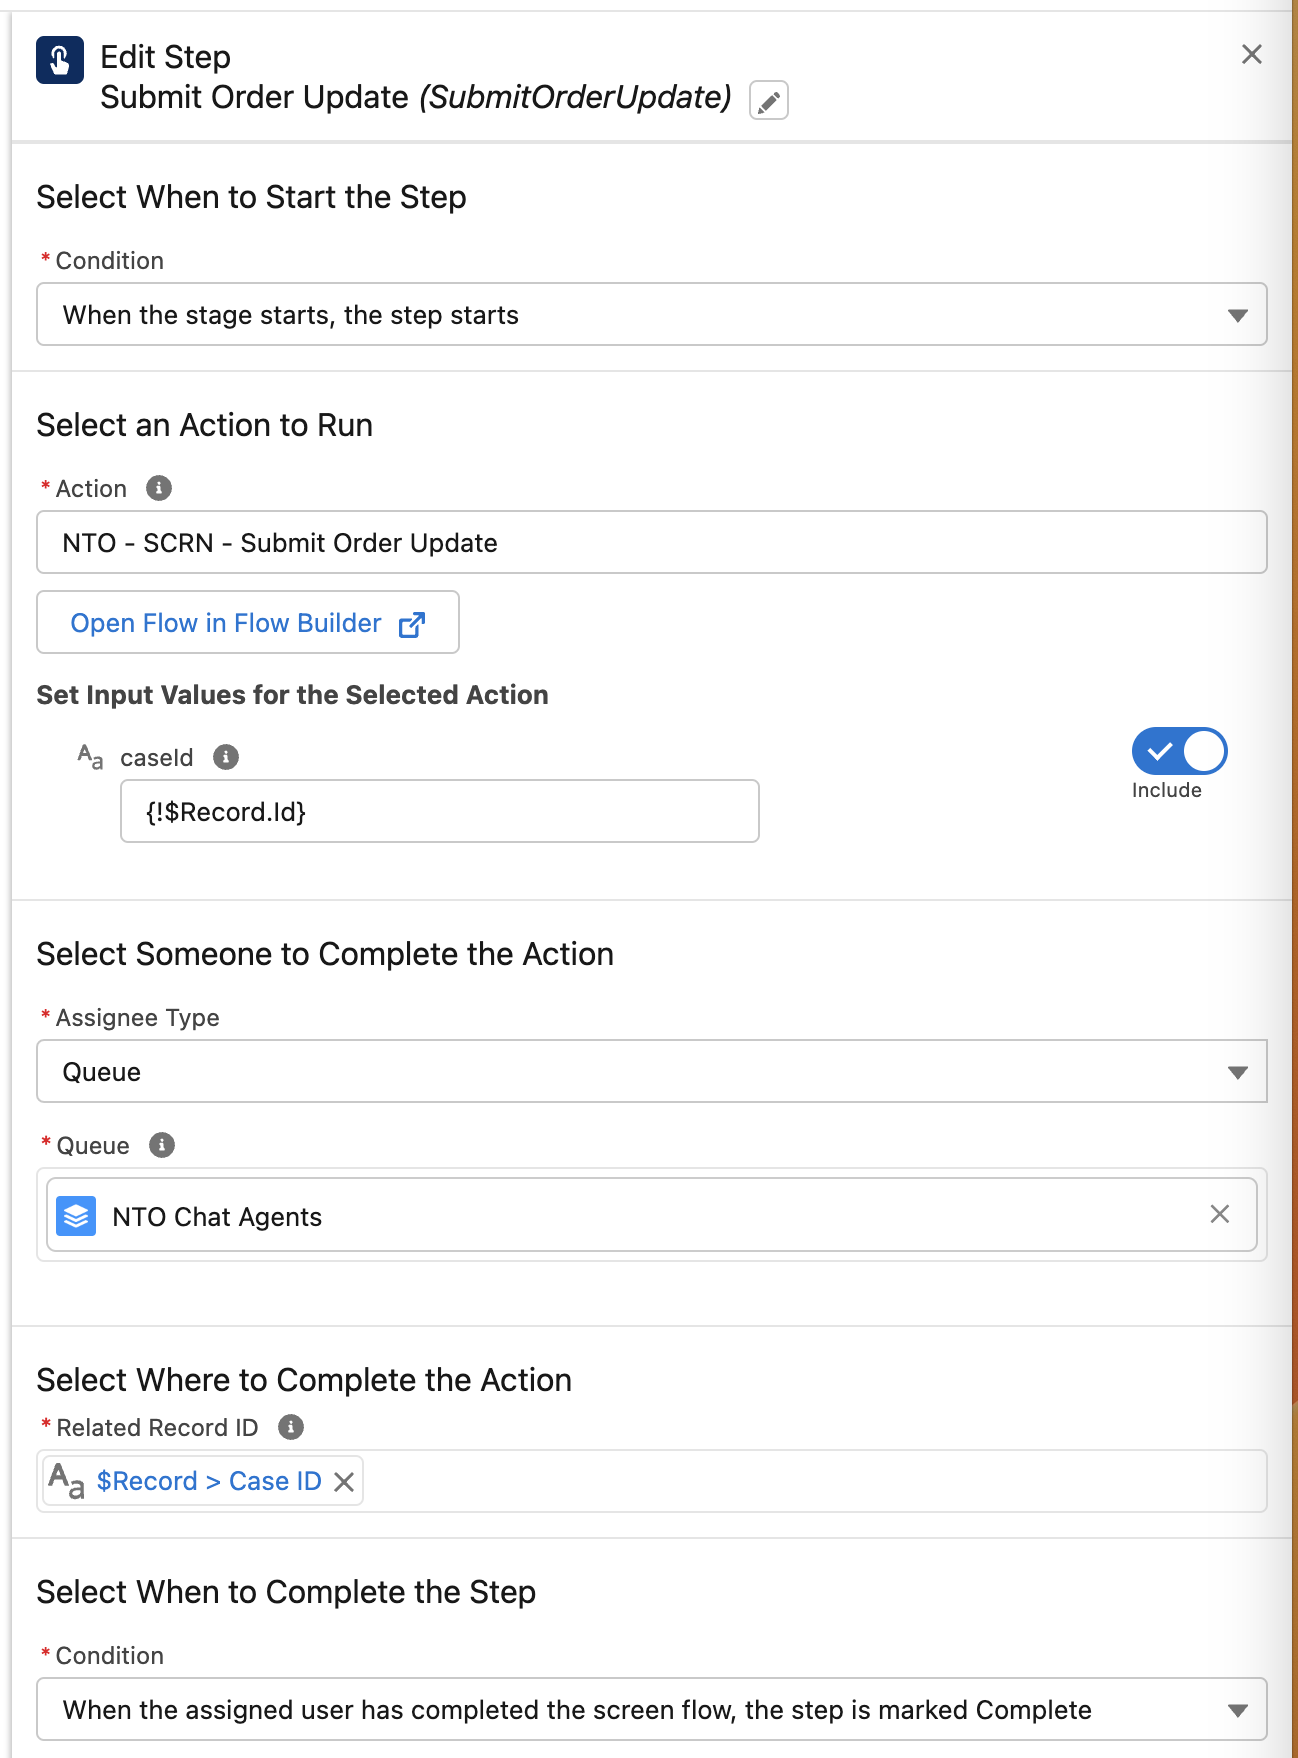
-
Only when the step
Submit Order Updatecompletes the Warehouse manager is assigned withOrder Update Approvalinteractive step.
Step 3: Draft the 2nd part of the orchestration
-
Click the add element button after the
Update Order in Salesforcestage and before the stageUpdate Order in External Systems.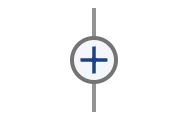
-
Select the
Decisionelement to add it.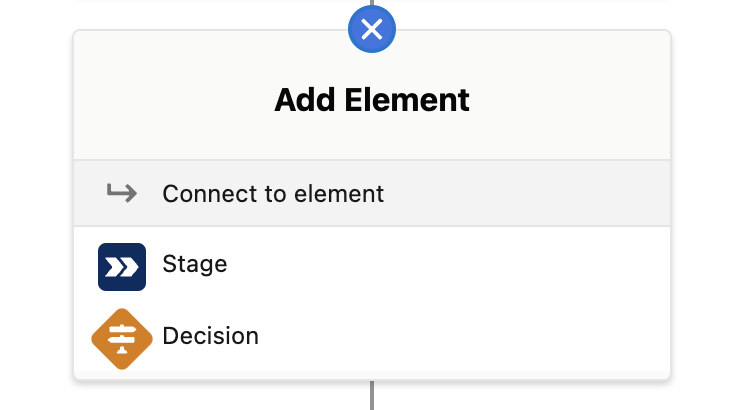
-
Enter
Is shipping option approved?as Label andIs_shipping_option_approvedas API Name. We will complete the configuration later.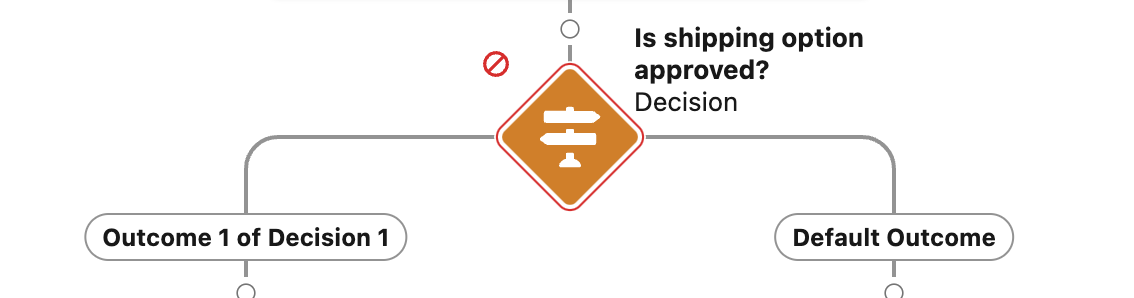
-
Click the add element button in the decision element right path.
-
Select the
Endelement to add it.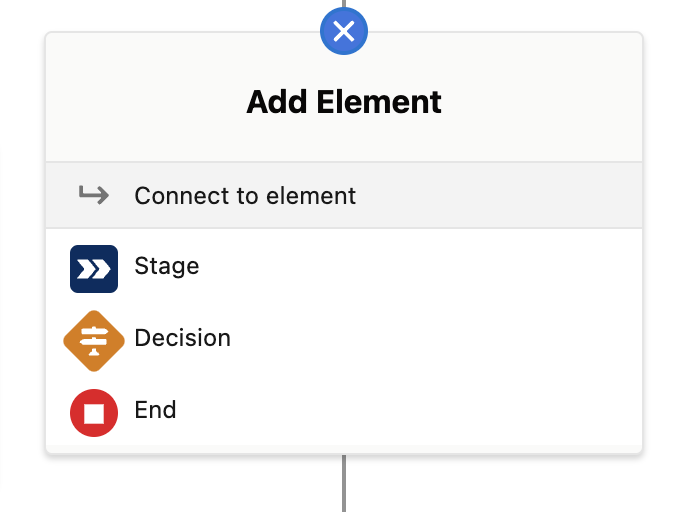
-
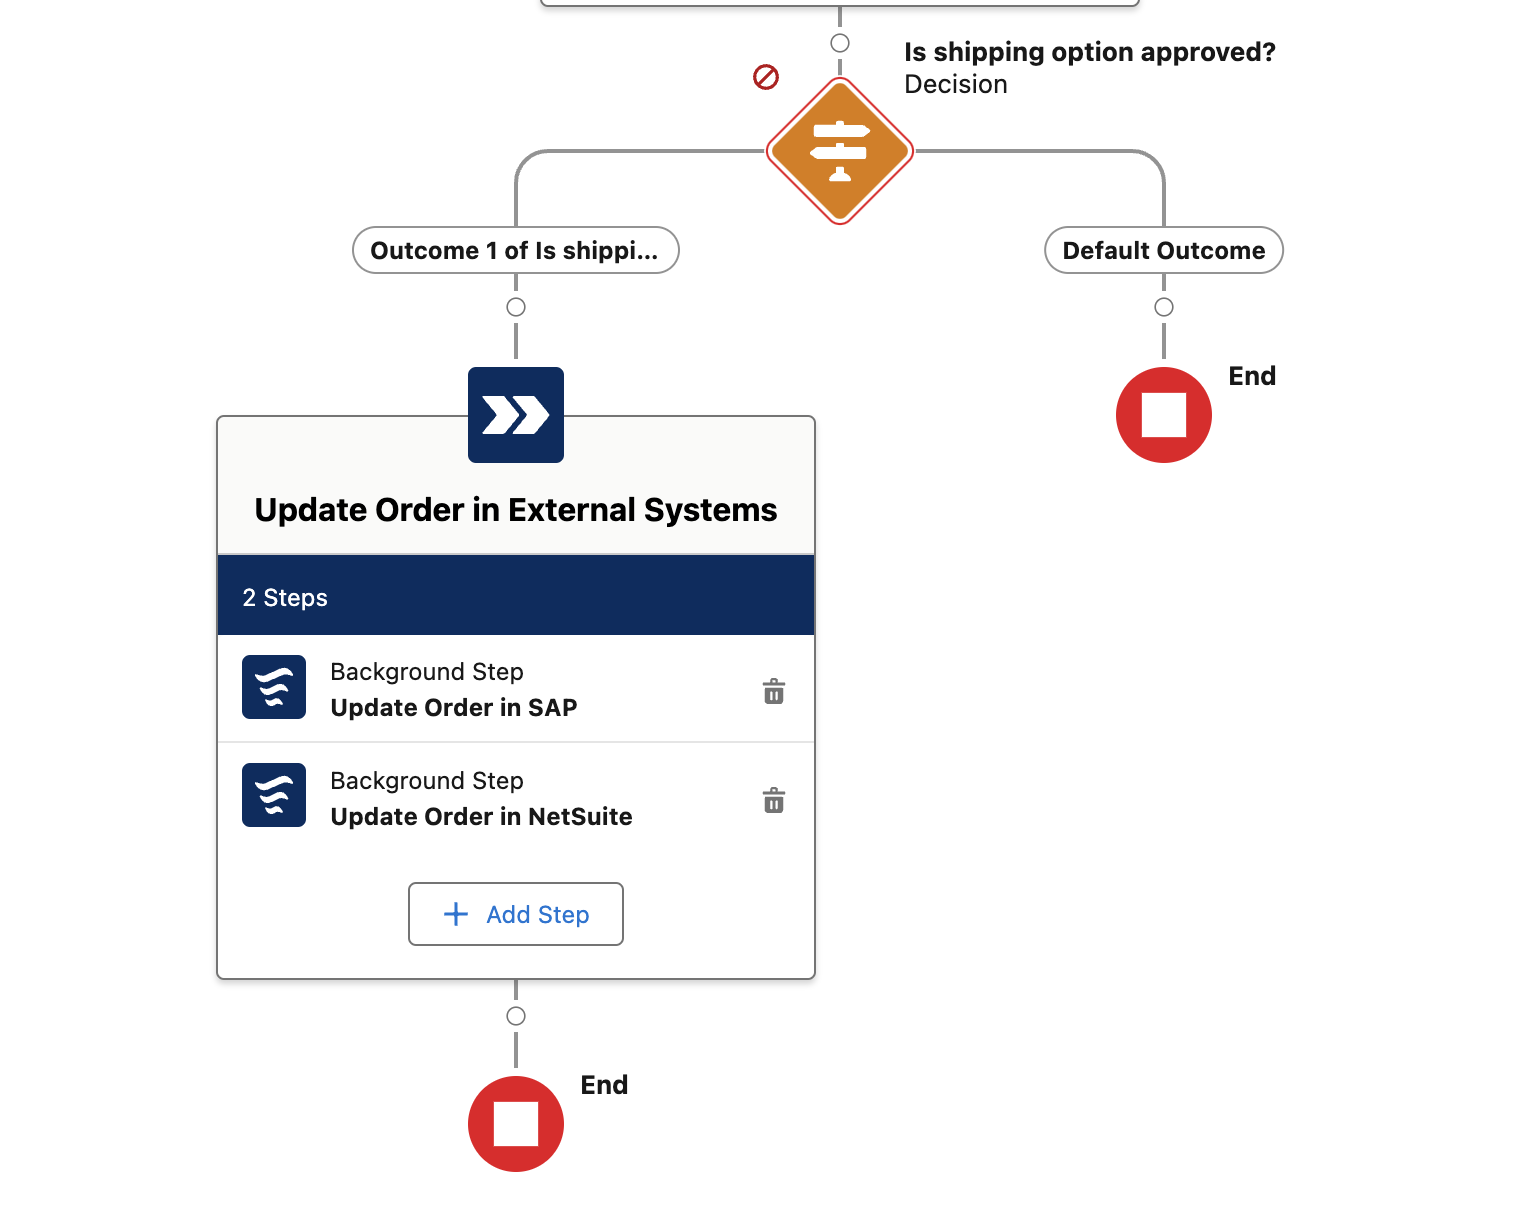
At this point you should have something like this.
-
Click the add element button after the
Update Order in External Systemsstage.
-
Select the
Stageelement to add it.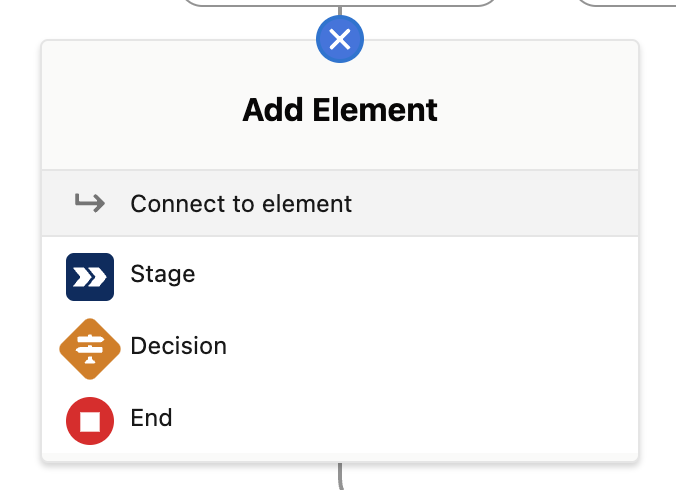
-
Enter
Notify Customeras Label andNotifyCustomeras API Name. We will complete the configuration later. -
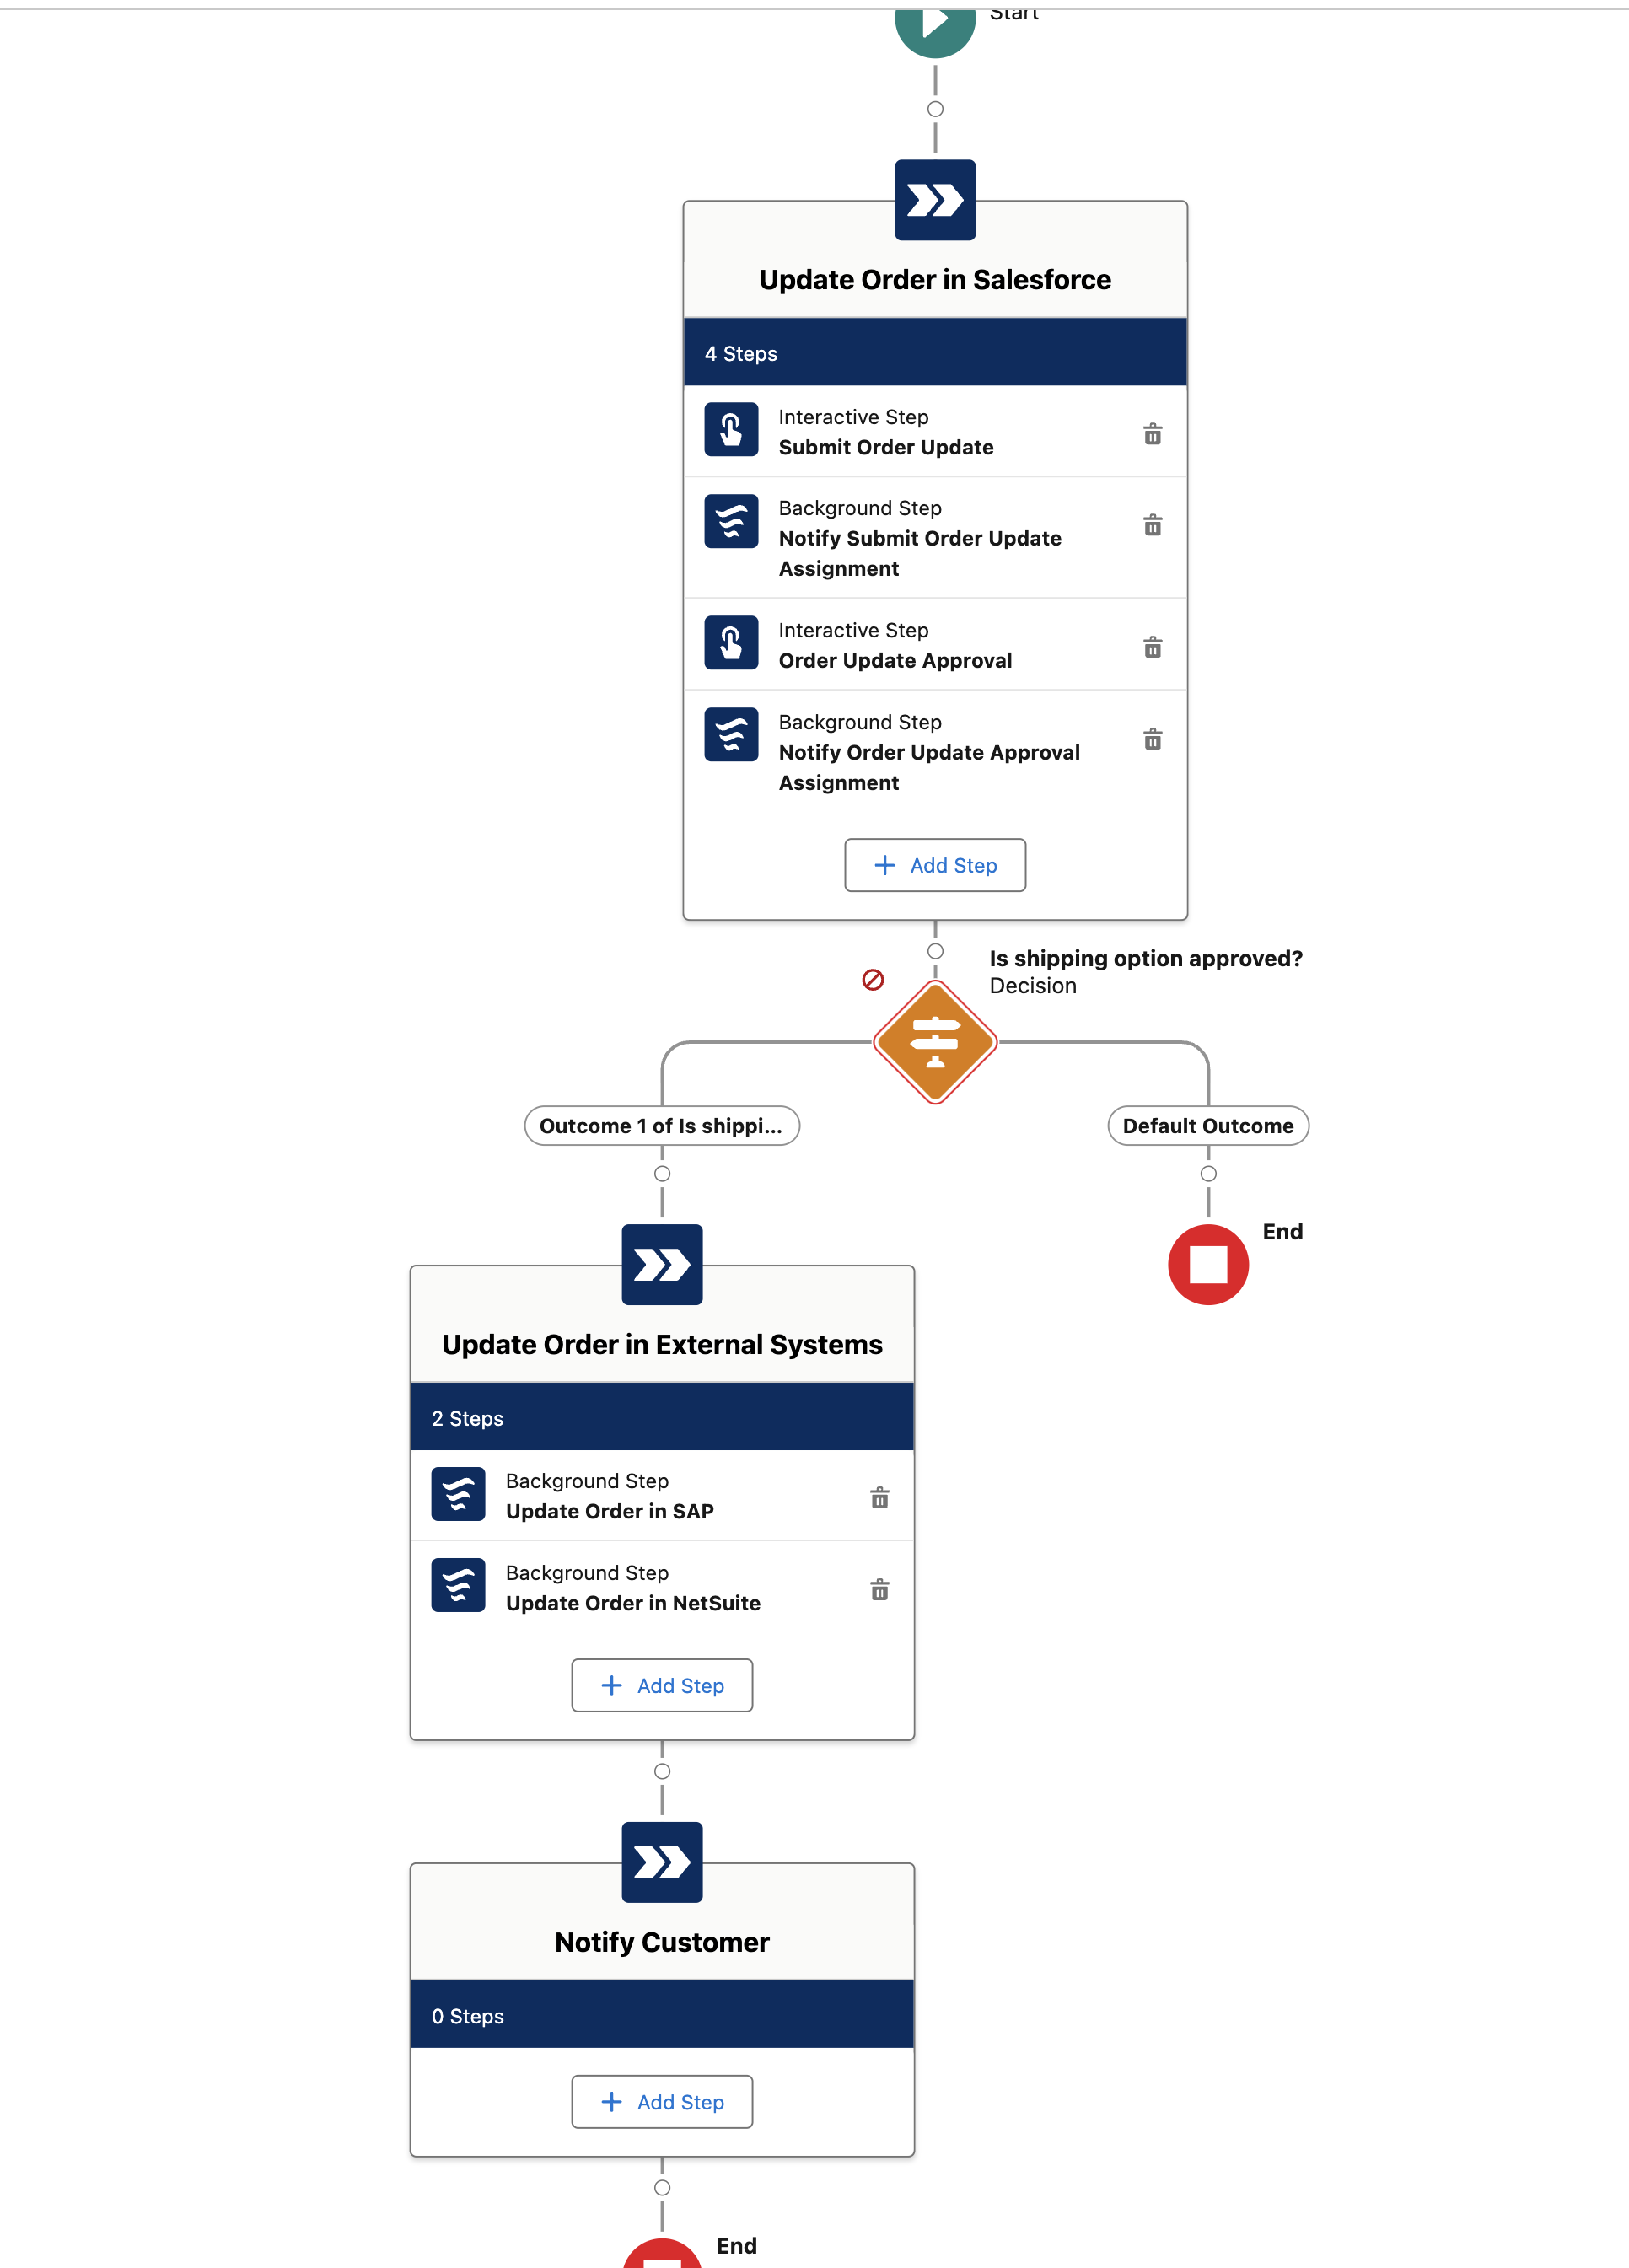
The fully drafted process should looks like as follow.
-
Click the
Savebutton in the top-right corner.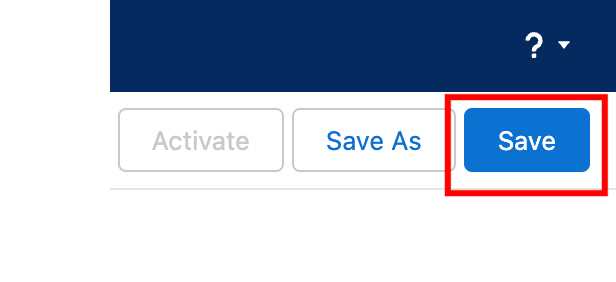
Step 4: Configure the triggering condition
-
Select on the Record-Triggered Orchestration Start element and click
Edit.
-
Update the
Set Entry Conditionsby adding the following conditionField Operator Value SubjectStarts With<your-initials>-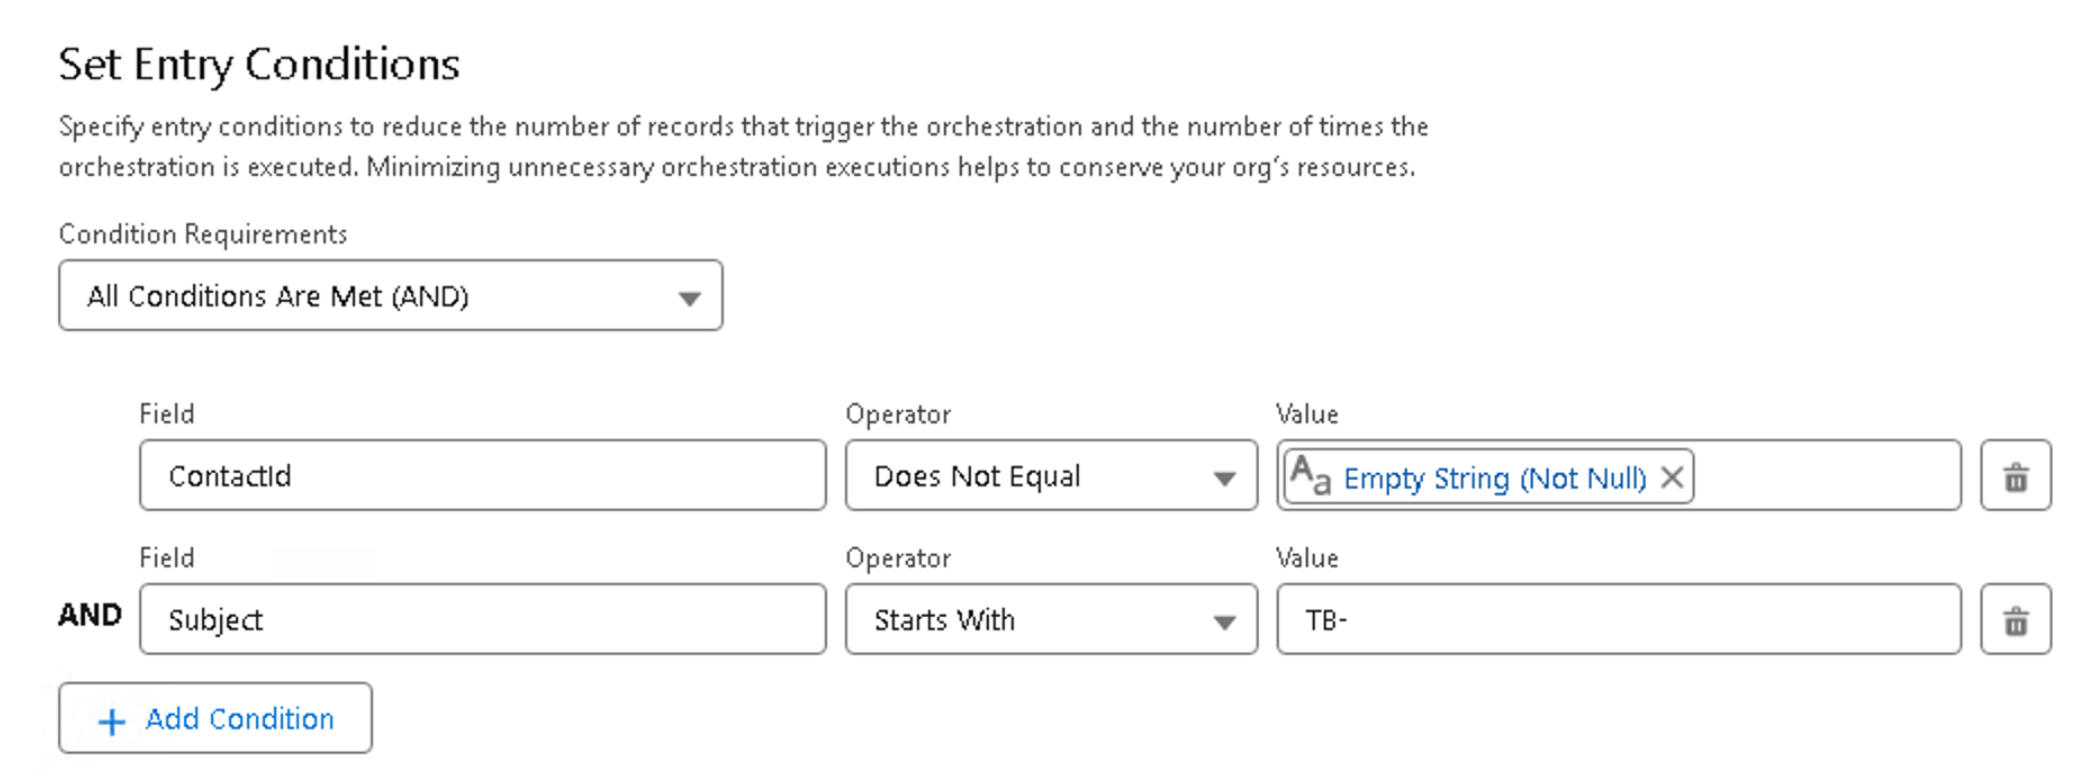
Step 5: Configure the "Is shipping option approved?" decision element
-
Select the
Is shipping option approved?decision element and clickEdit.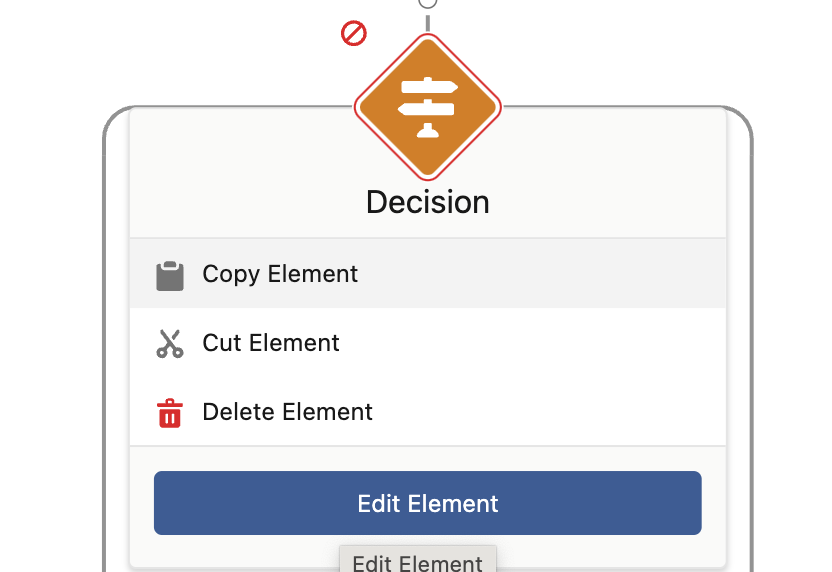
-
Configure the first outcome details as follow
Field Value Label
YesOutcome API Name
YesCondition Requirements to Execute Outcome
All Conditions Are Met (AND) -
Configure the first outcome conditions as follow
Resource Operator Value {!$Record.warehouseApproval__c}Equals{!$GlobalConstant.True}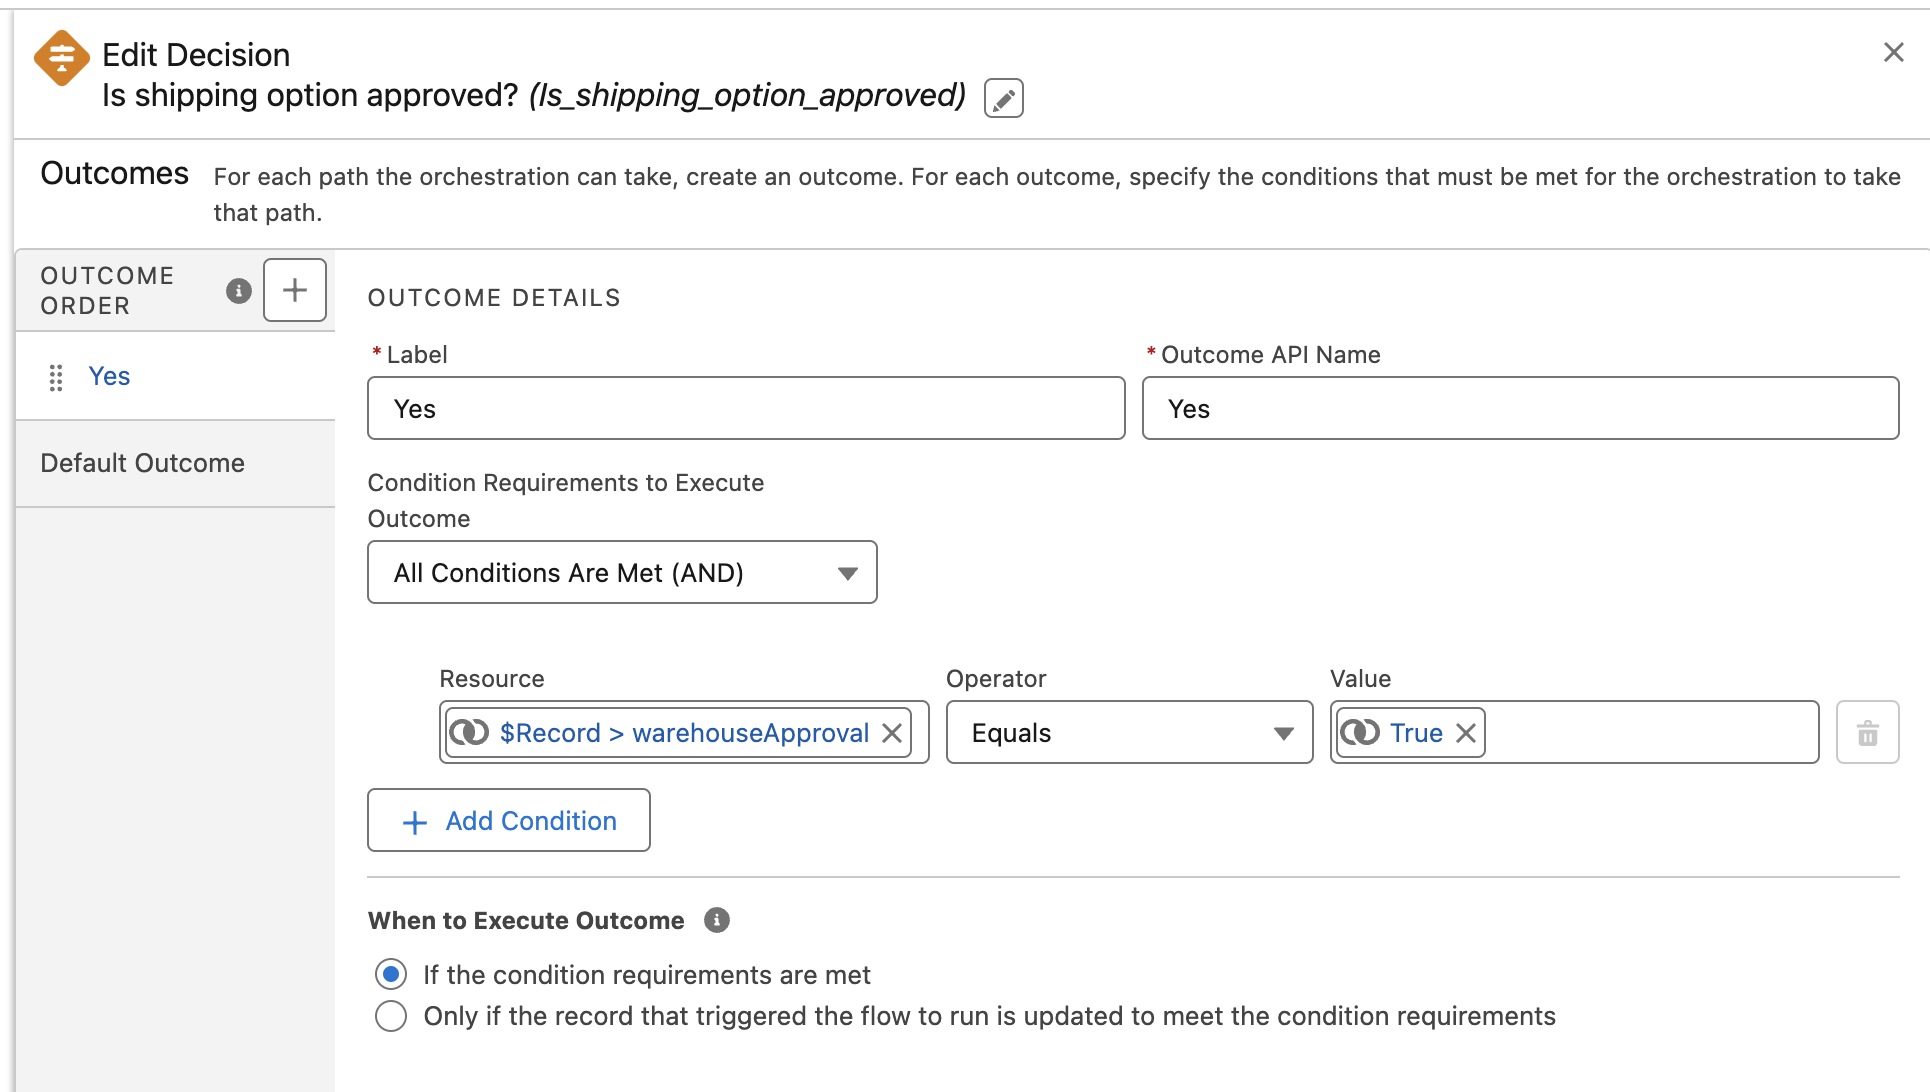
-
Label the Default Outcome as
No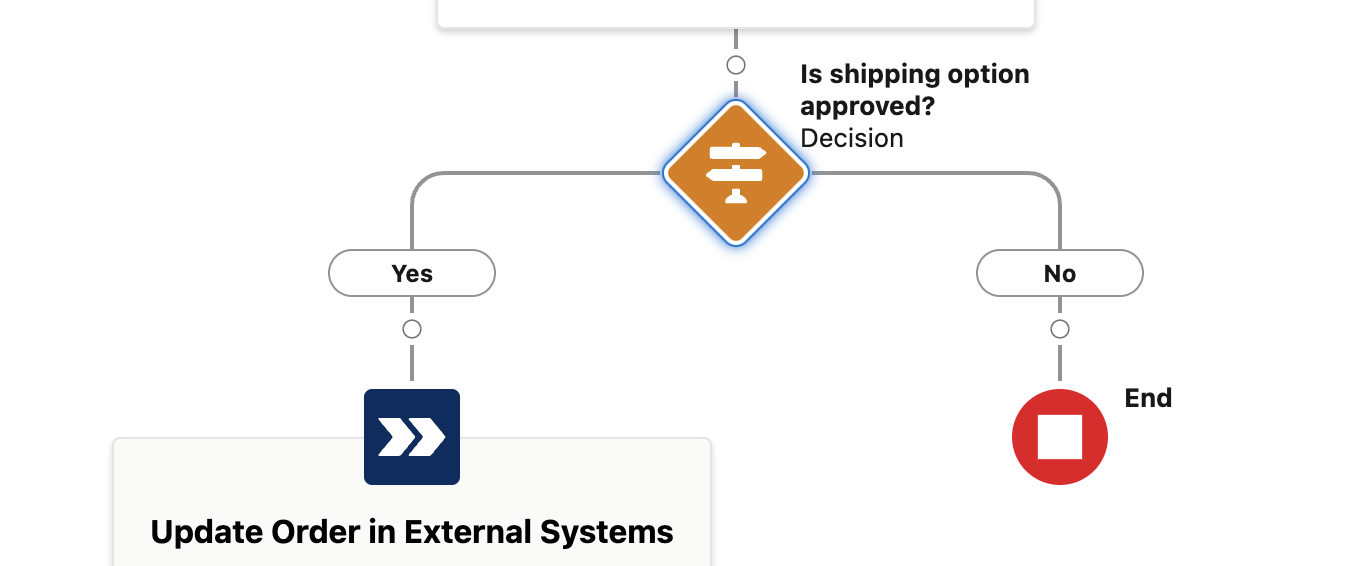
Step 6: Configure the "Update External System" stage
Add Background Steps
-
Click the
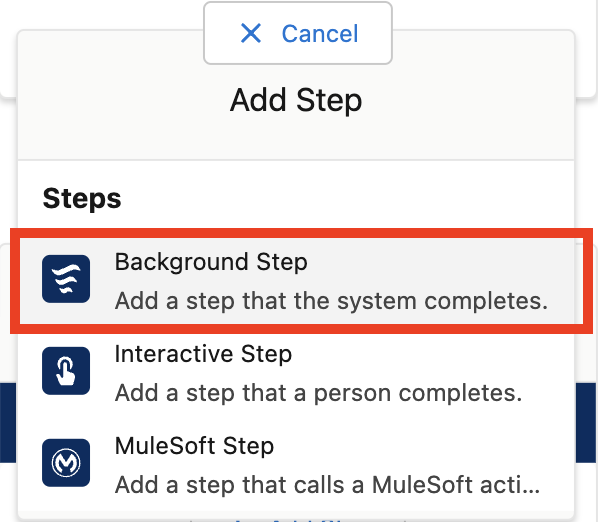
Add Stepbutton within theUpdate Order in External Systemsstage.
-
Select the background step option
-
Set
Update Order in OMSas Label andUpdate_Order_in_OMSas API name. Configure the step as follow.Field Value Condition
When the stage starts, the step startsAction
NTO - AUTO - Update Order in Legacy OMSContains external callouts or pause elements
true(Marks background step to be processed asynchronously to prevent orchestration errors.)businessJustification
{!$Record.BusinessJustification__c}caseId
{!$Record.Id}shippingDate
{!$Record.ShippingDate__c}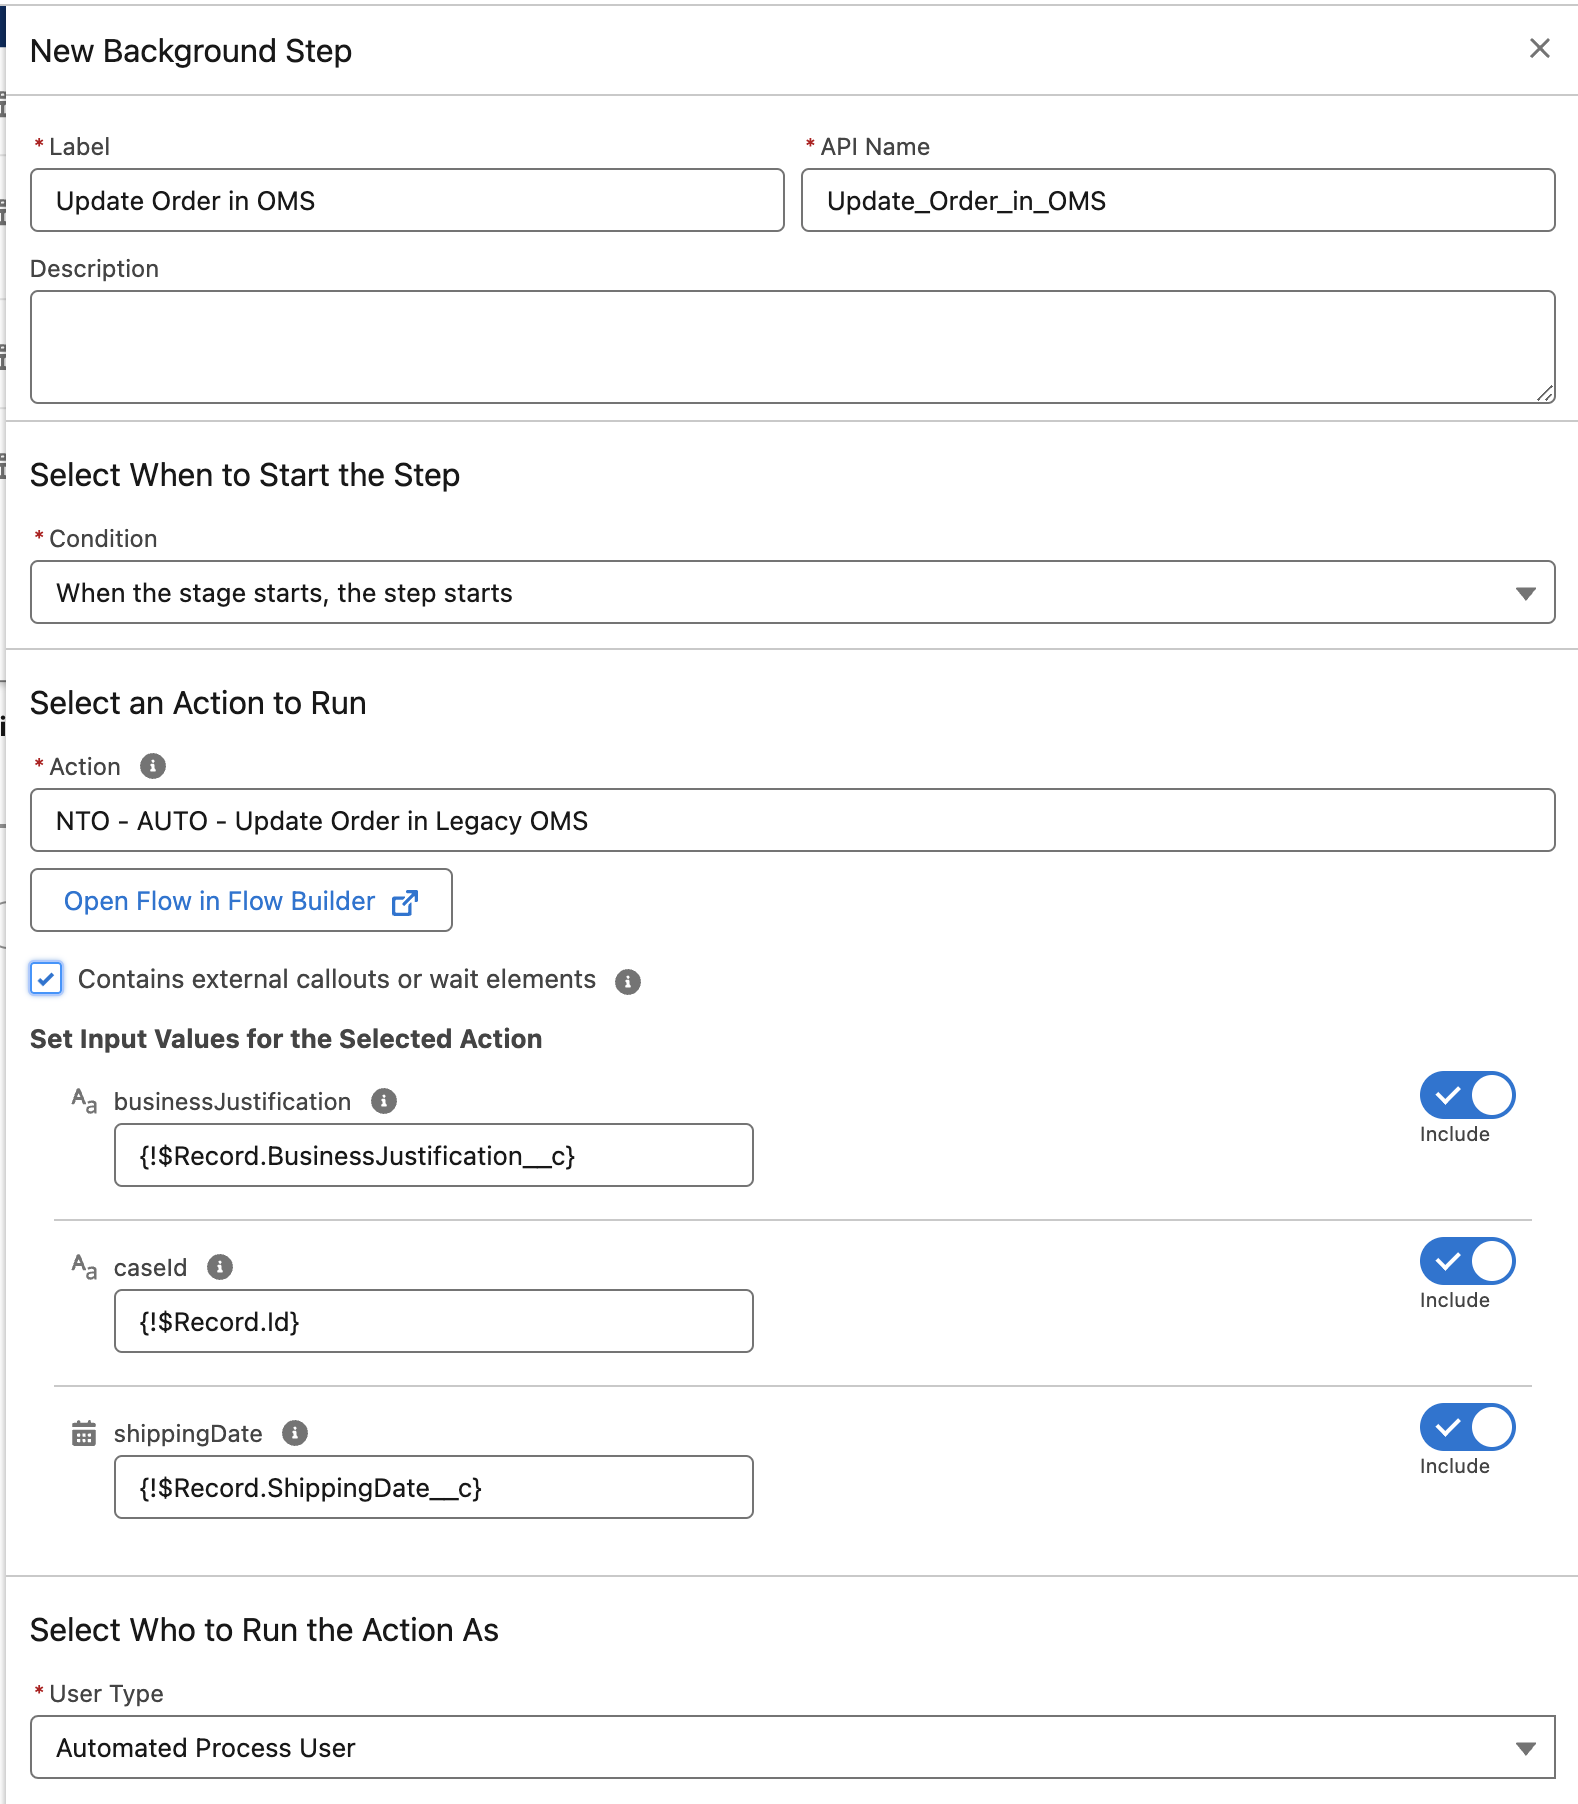
Configure Stage Exit Conditions
-
Select the
Update Order in External Systemsstage and then click theEdit Elementbutton.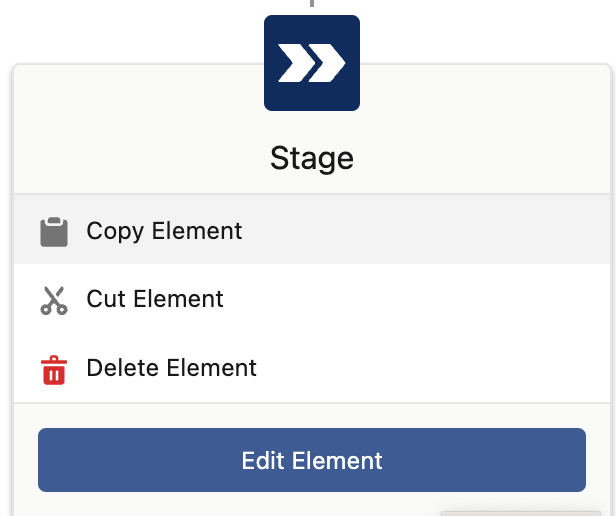
-
Configure the exit condition as follow.
Field Value Condition
When the specified requirements are met, the stage is marked CompleteRequirements to Complete Stage
All Requirements Are Met (AND) -
Add the following requirements.
Resource Operator Value {!$Record.OMSId__c}Is Null{!$GlobalConstant.False}{!$Record.SAPId__c}Is Null{!$GlobalConstant.False}{!$Record.NetSuiteId__c}Is Null{!$GlobalConstant.False}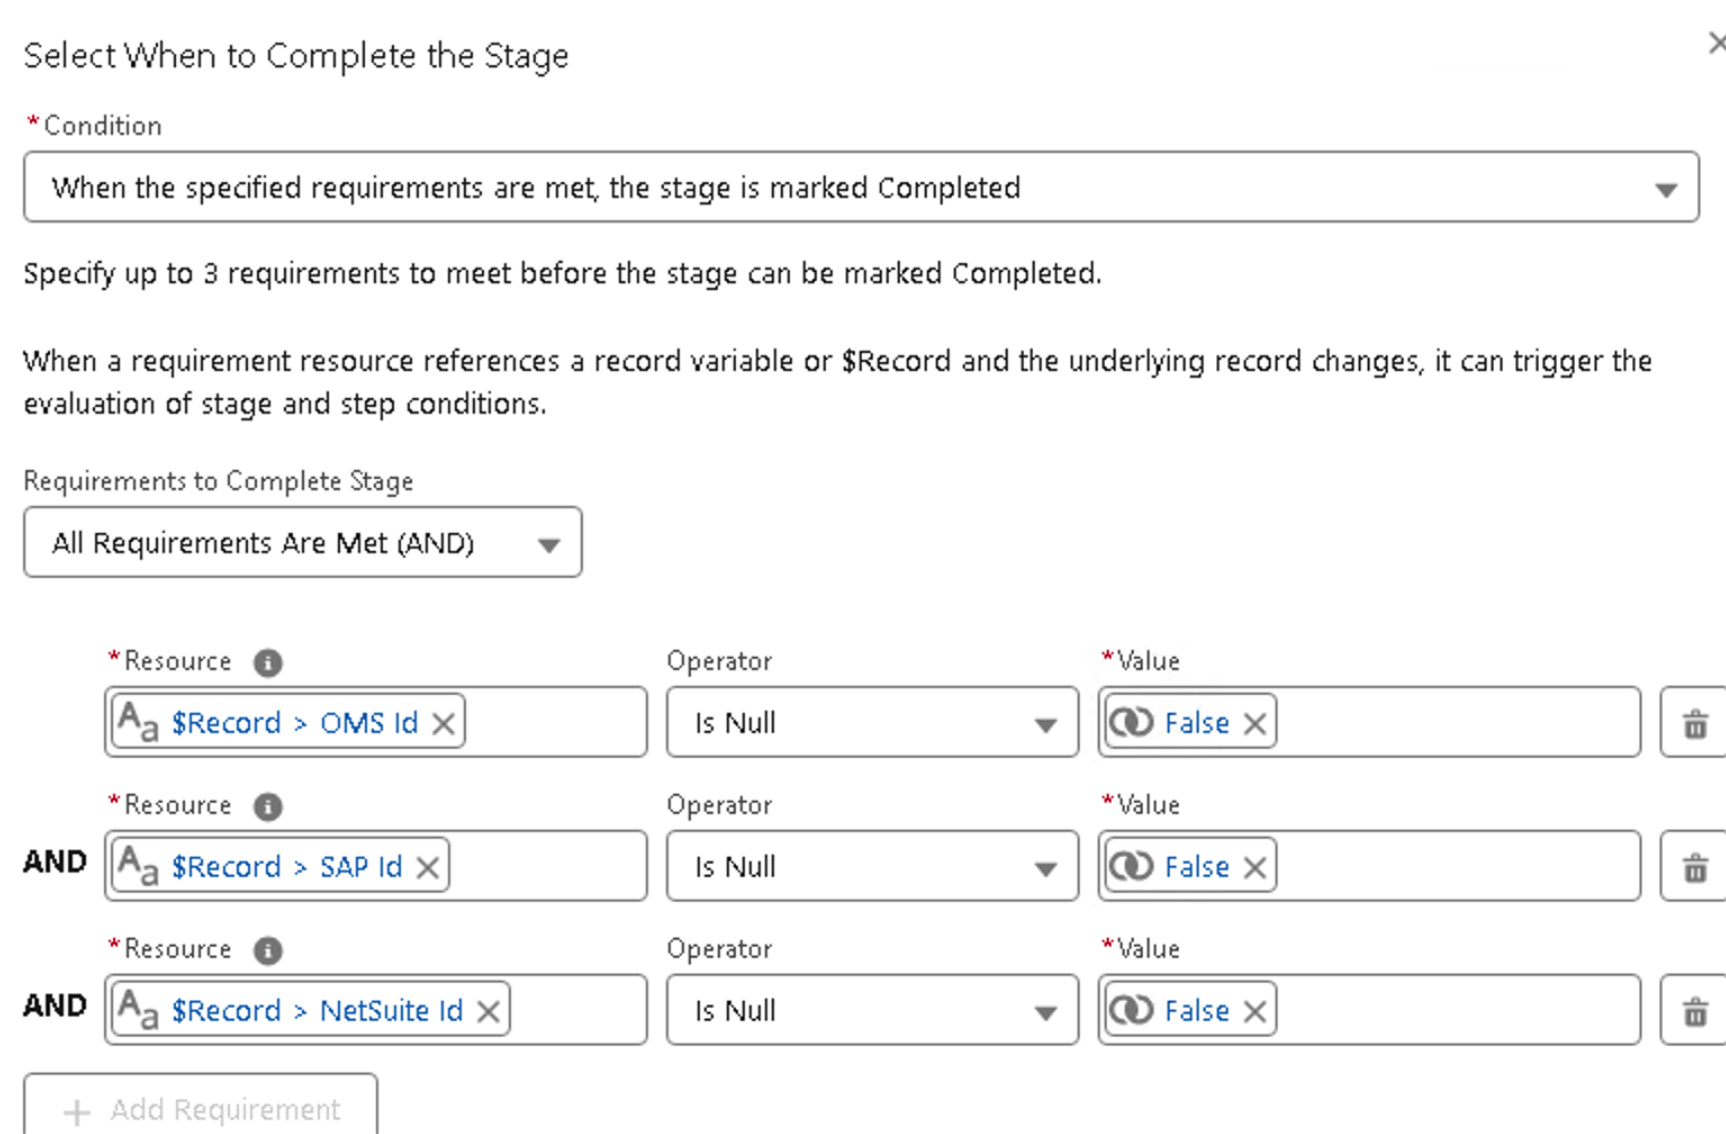
Step 7: Configure the "Notify Customer" stage
Add Interactive Step
-
Click the
Add Stepbutton within theNotify Customerstage.
-
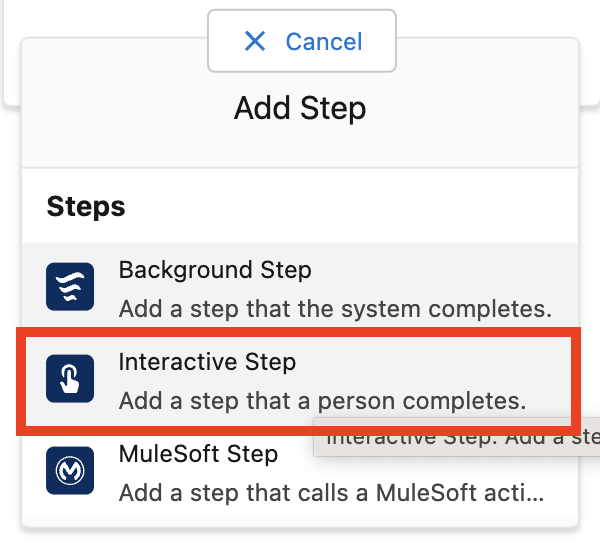
Select the interactive step option
-
Set
Review Updates & Notify Customeras Label andService_Agent_Reviewas API name. Configure the step as follow.Field Value Condition
When the stage starts, the step startsAction
NTO - SCRN - Agent Review & Customer NotificationcaseId
{!$Record.Id}Assignee Type
QueueQueue
NTO Chat AgentsRelated Record ID
{!$Record.Id}Condition
When the assigned user has completed the screen flow, the step is marked Complete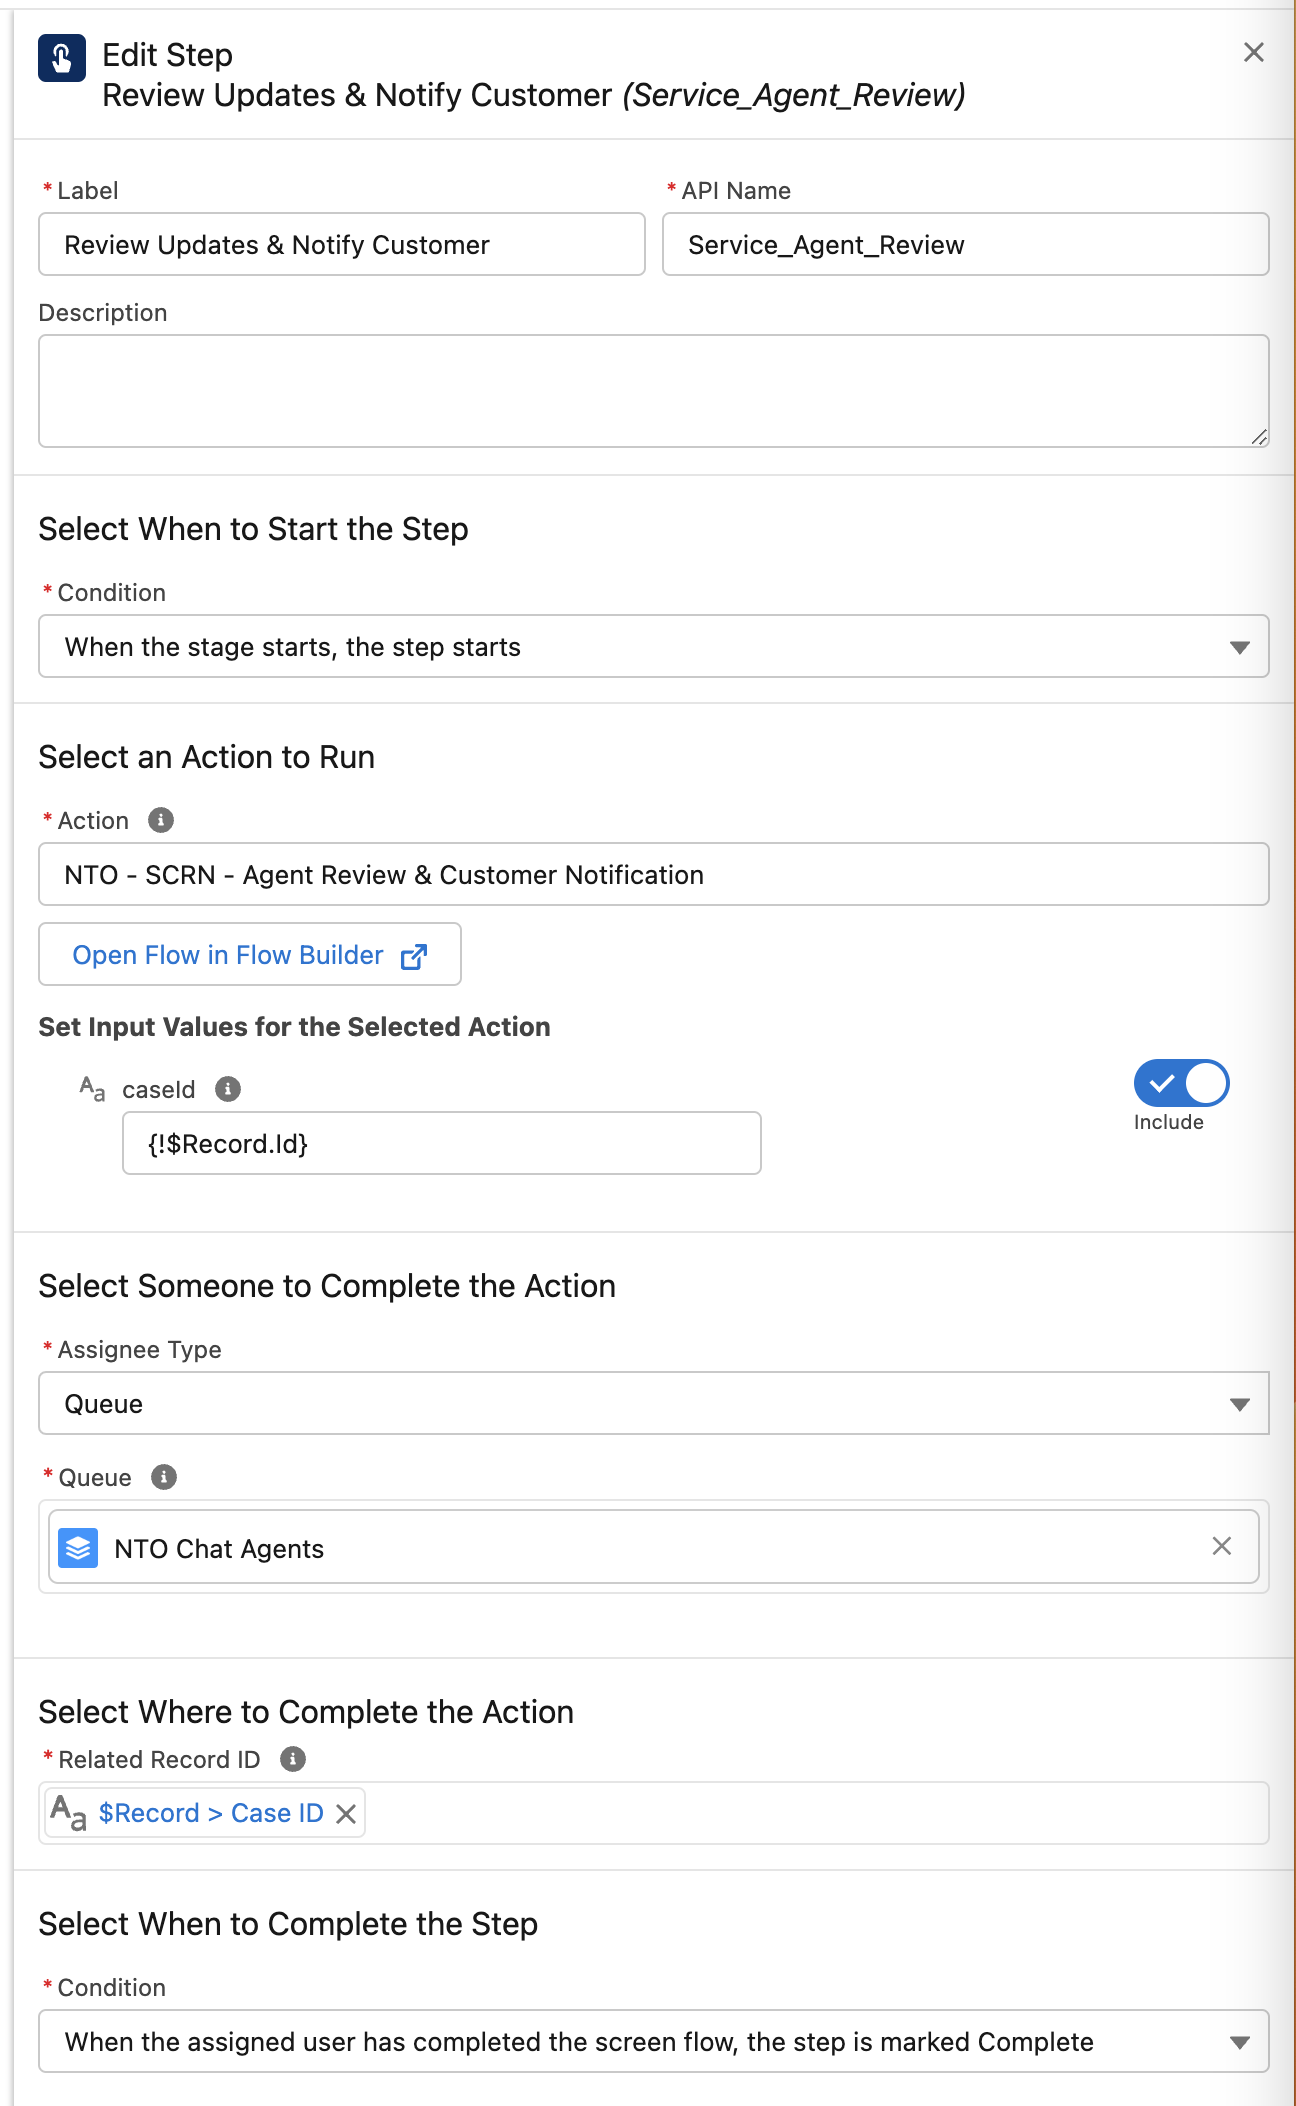
Add Background Step
-
Click the
Add Stepbutton within theNotify Customerstage after theReview Updates & Notify Customerstep.
-
Select the background step option
-
Set
Notify Review Order Updates Assignmentas Label andNotify_Review_Order_Updates_Assignmentas API name. Configure the step as follow.Field Value Condition
When the stage starts, the step startsAction
NTO - AUTO - Send Custom NotificationContains external callouts or pause elements
falsebody
You have been assigned to review external systems updates for an order change request.caseId
{!$Record.Id}queueName
NTO Chat Agentstitle
Order Update Notification Request: {!$Record.Subject}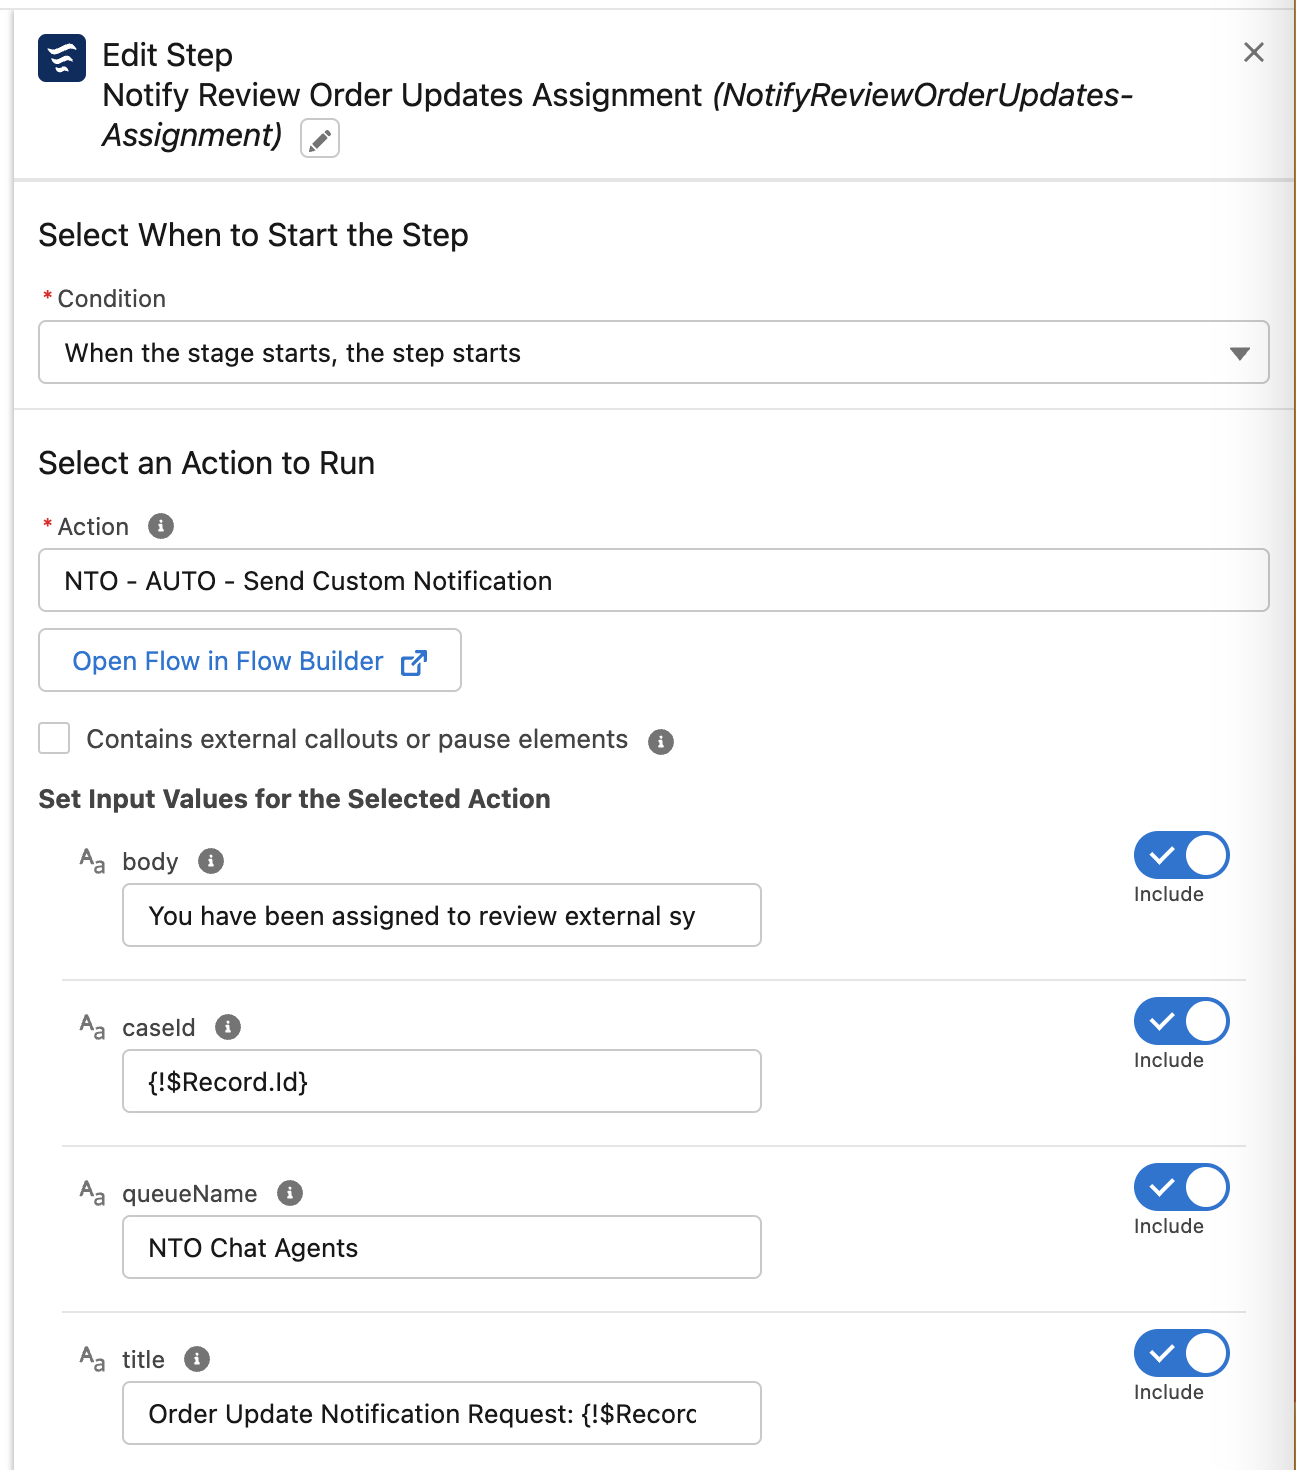
Step 8: Activate the Orchestration
-
Click the
Savebutton in the top-right corner.
-
Click the
Activatebutton in the top-right corner.
Please proceed to Lab 3: Execute and monitor the e2e process