Lab 3: Execute and monitor the e2e process
Overview
In this module, you will learn, how a flow orchestration run is executed and can be monitored and tracked. As the workflow involves multiple users to contribute, you will be logging in as different users (Admin, Service Agent & Shipping Manager) to perform the assigned tasks for the orchestration to continue.
The submission of the order update request is the trigger for the orchestration process. We will be creating the customer service case using the admin user, so flow orchestration can assign it to the right queue (of NTO service agents).
Step 1: Create Order Update Request (Customer call)
-
Login into the Salesforce Developer ORG and access the Service Console.
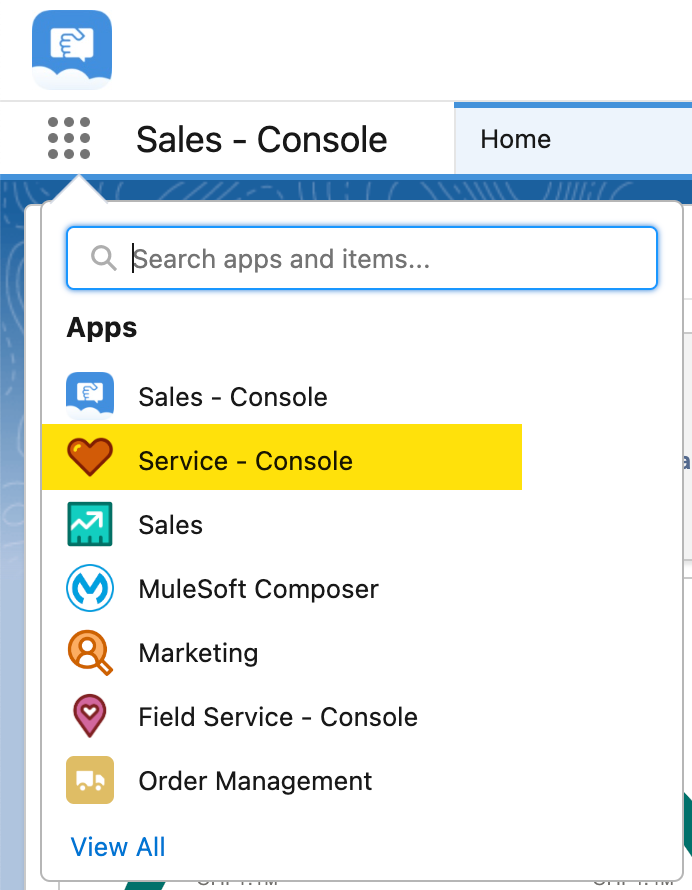
-
From the Service Console menu, select
Cases.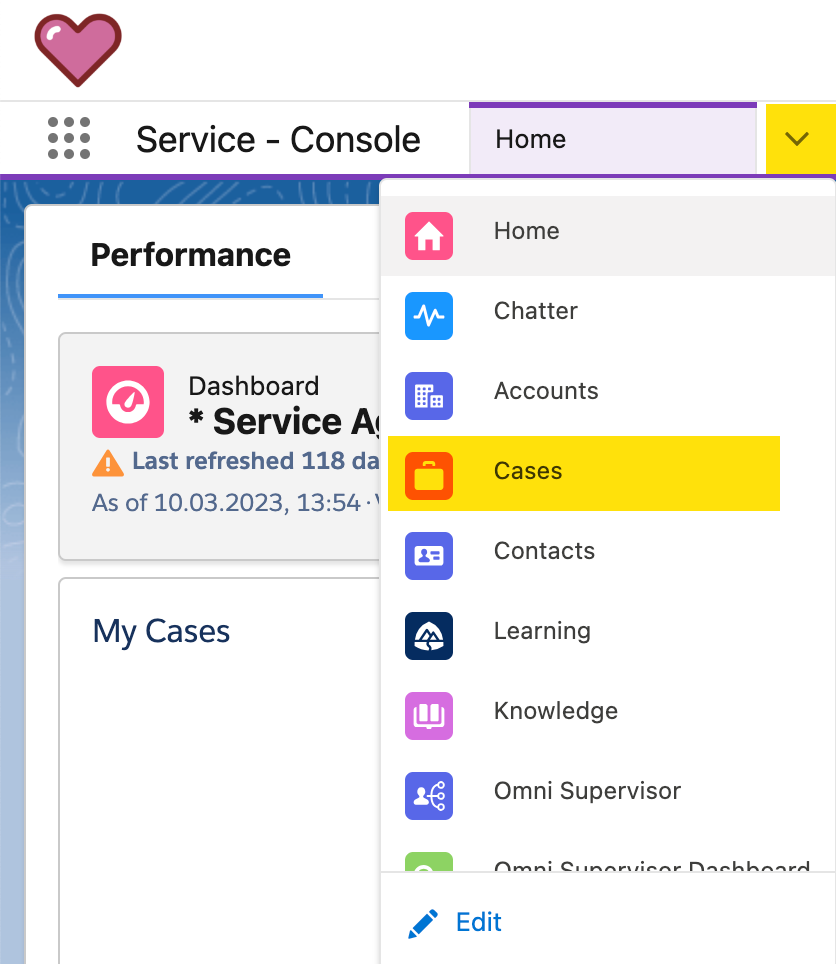
-
Click on the
Newbutton to create a new case.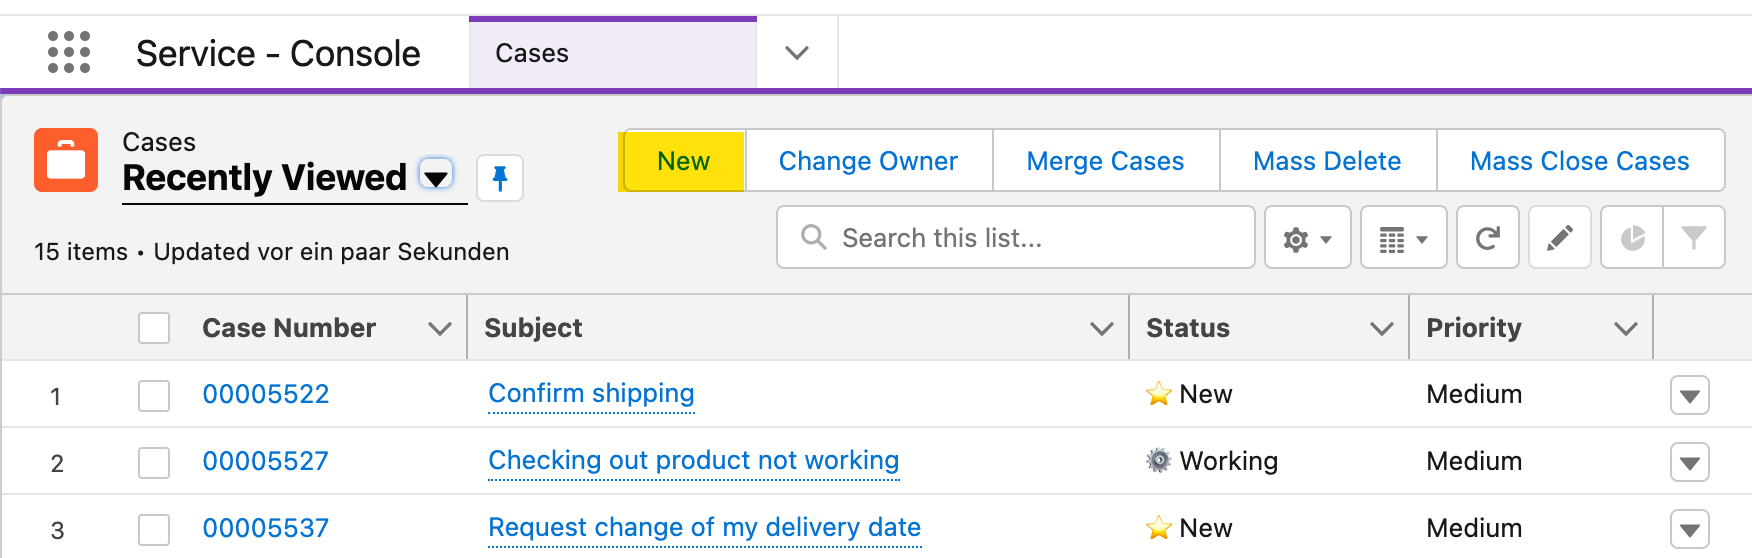
-
Select the case type
Order Update.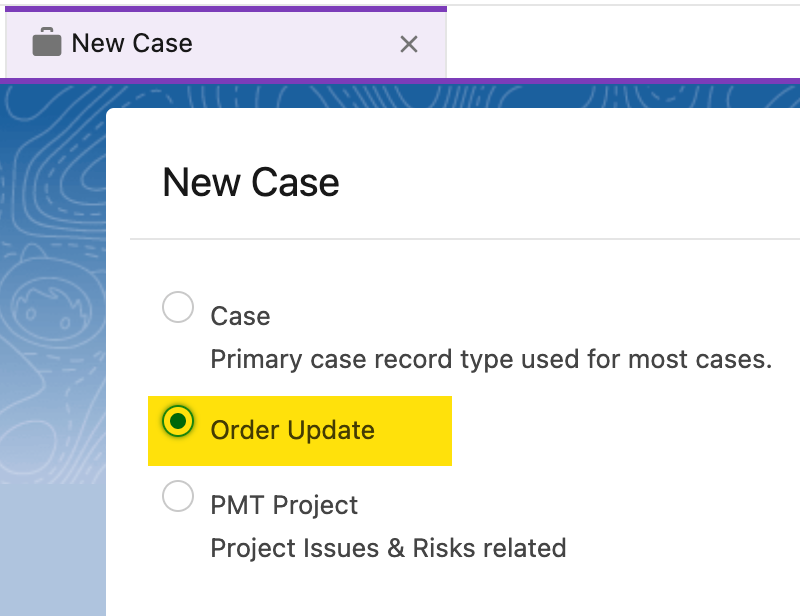
-
Fill out the following data for the fields
Subject,Description,Order,Product(select 'Hiking Boots'),Contact NameandAccount Nameas show in the images below. Once done, pressSave.Field Value Subject
<your-initials>`-Request change of my delivery date`
Description
I’ve entered the wrong delivery date during the booking process. I need the product earlier.Order
Get the order number from Nina Morris account page
Product
Hiking BootsContact Name
Nina MorrisAccount Name
Nina Morris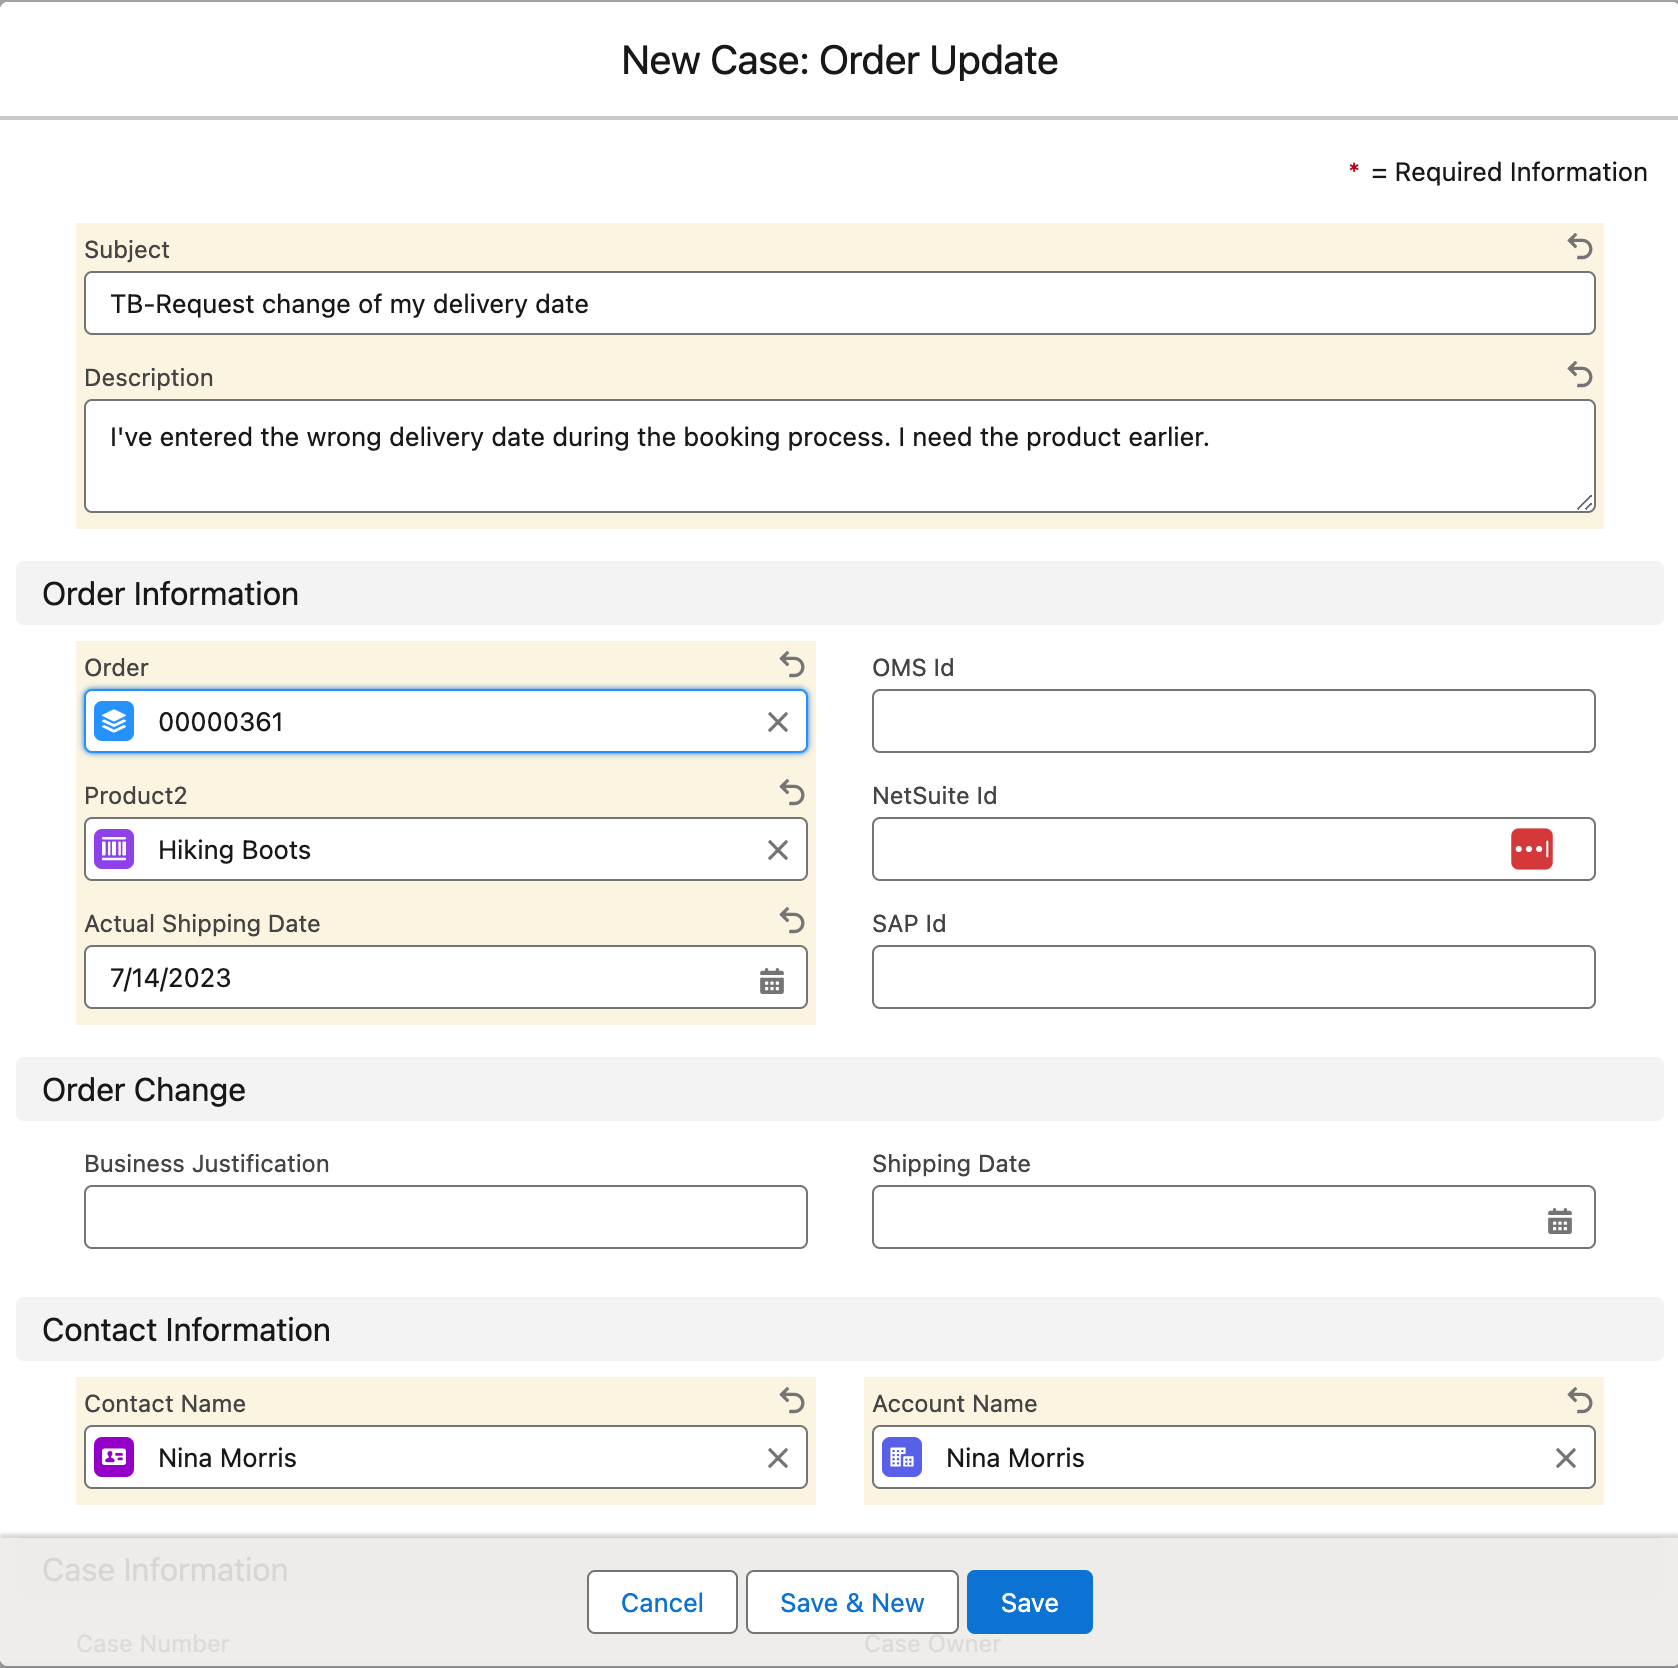
-
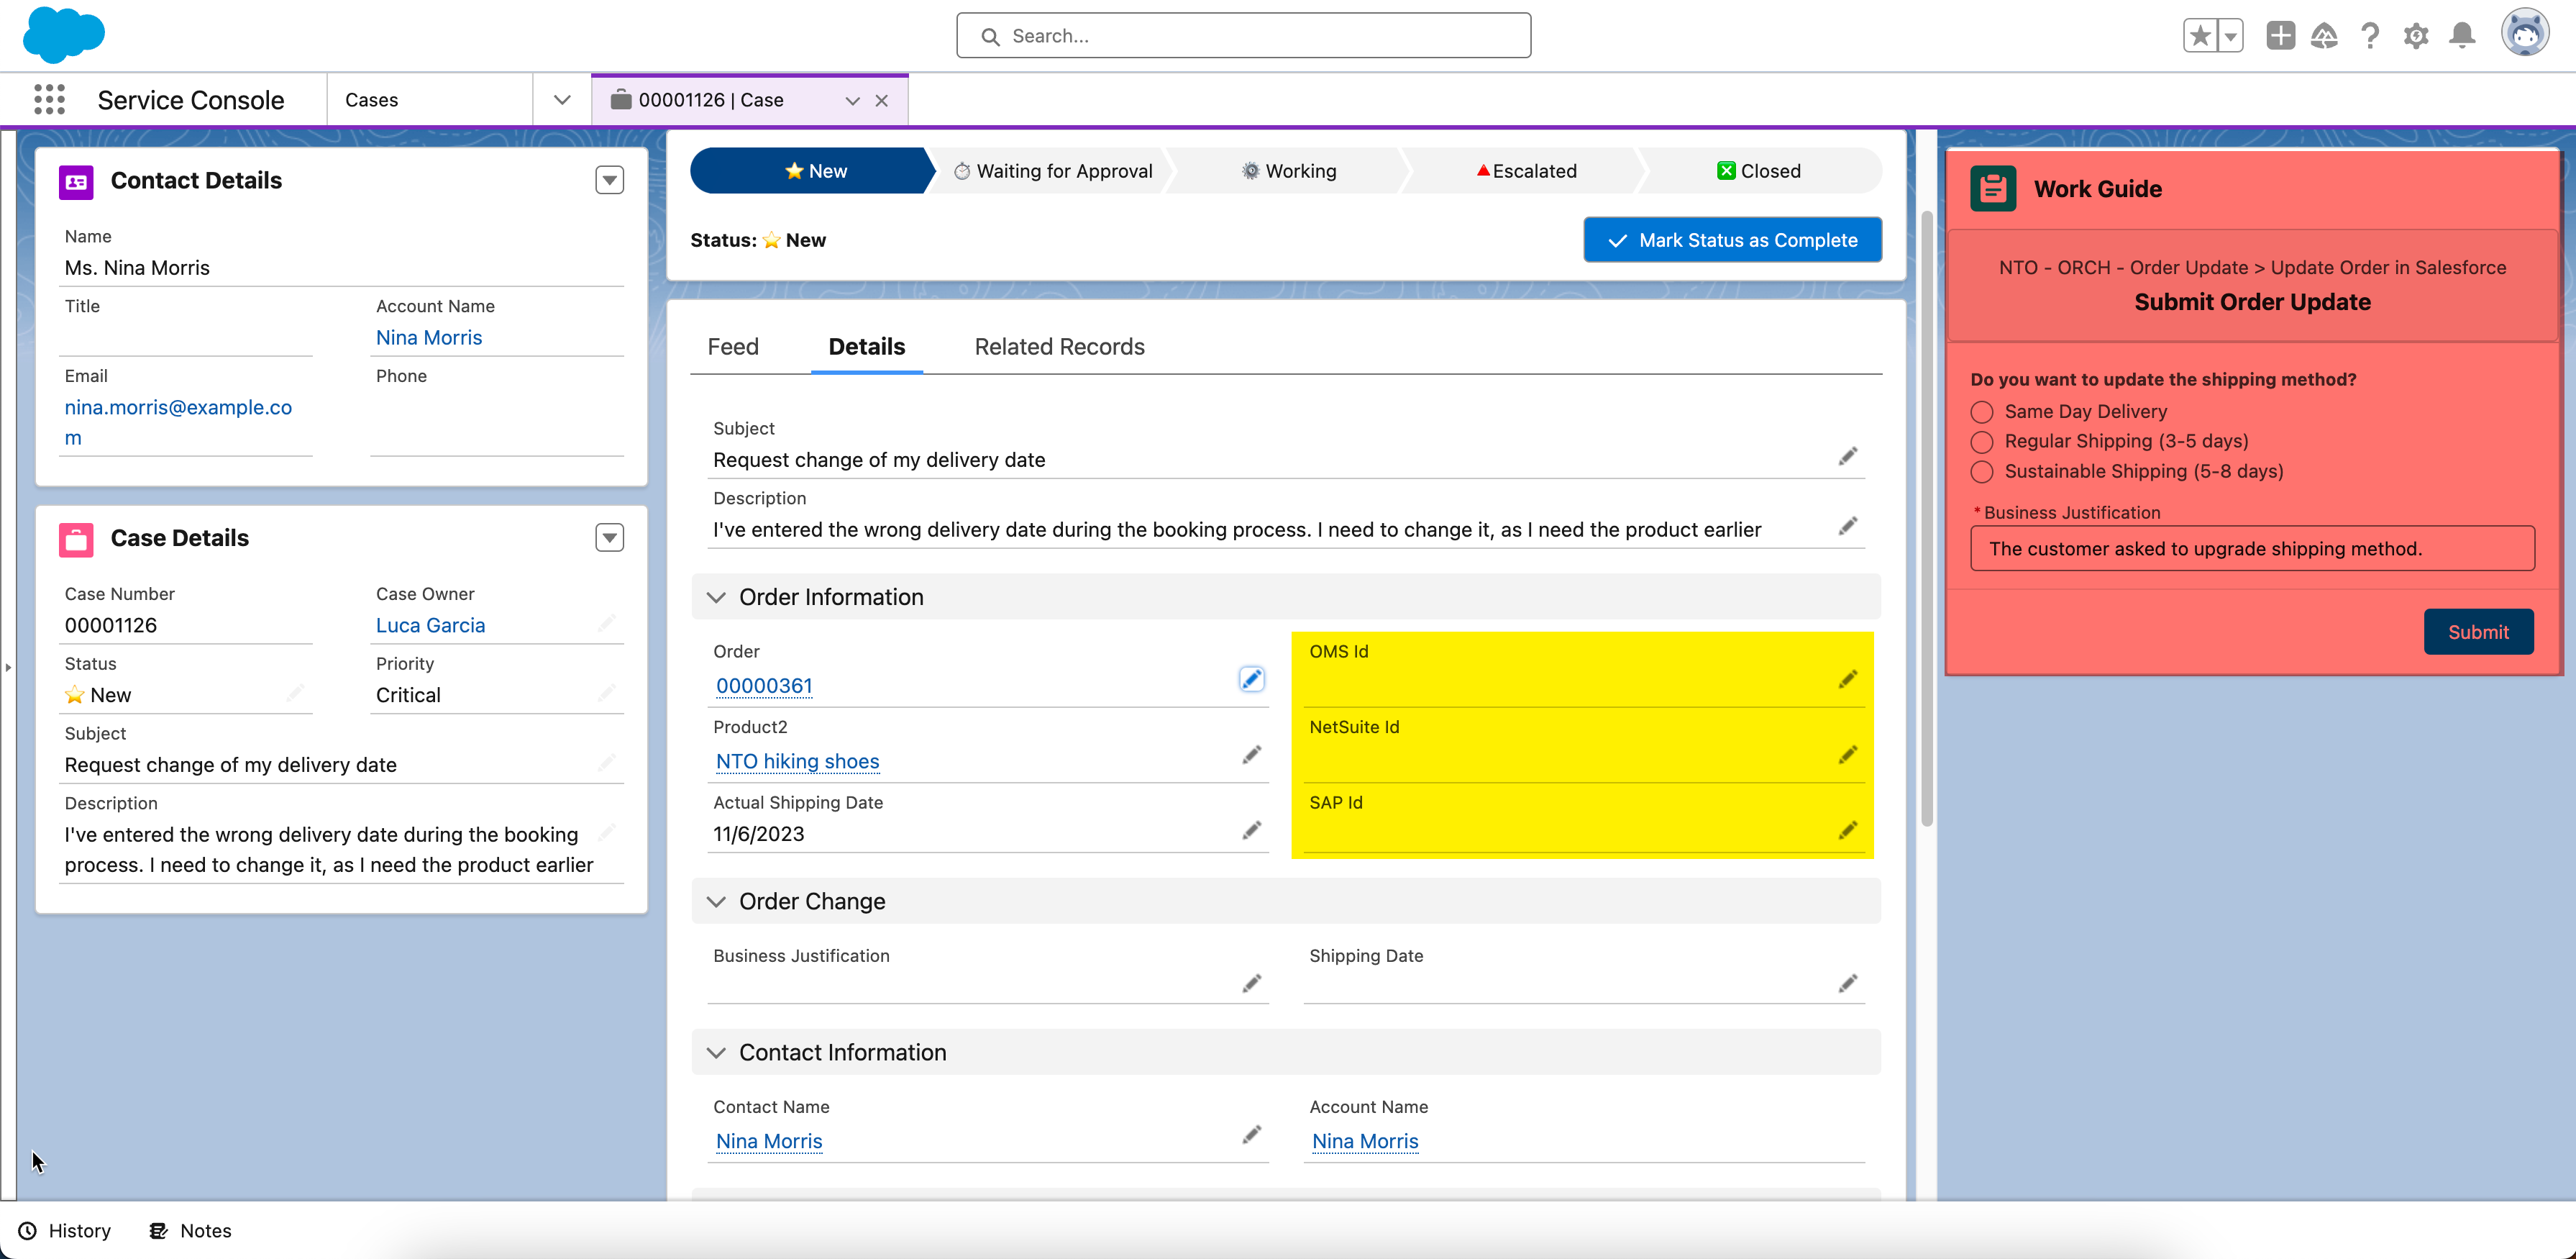
Case will be created. Note the fields of the external systems (highlighted in yellow), these fields will be updated during the execution. Also you have noticed (highlighted in purple), that there is a workguide on the right side of the screen. This workguide will be used by the Service Agent in Step 3.
Step 2: Check Orchestration Run and Orchestration Work Items (IT/Admin)
-
Note, that currently you are logged in as admin. As the orchestration process has been triggered, let’s check the orchestration run and the related work items. Click on the Salesforce Menu on the top left side and type
Orchestration.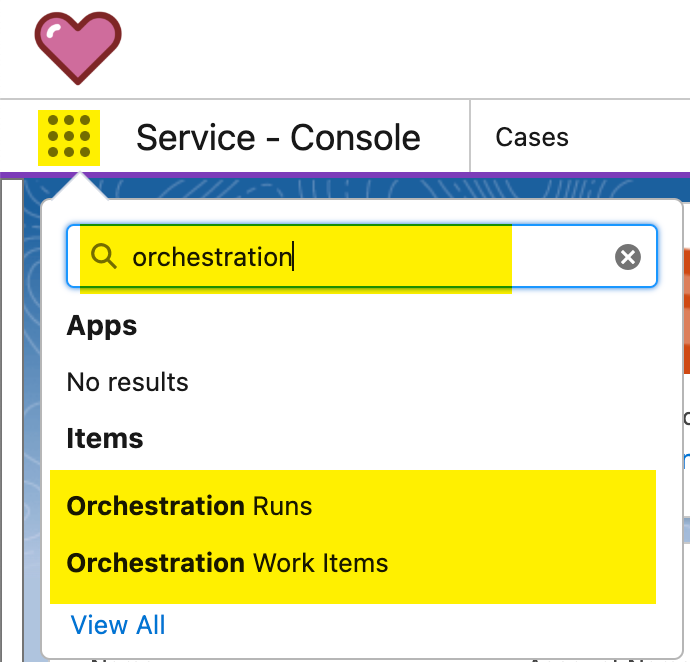
-
First, select the
Orchestration Runs. It will open a new tab with all the orchestration runs. Note that the last one has a creation date time of now and its Status isIn Progress.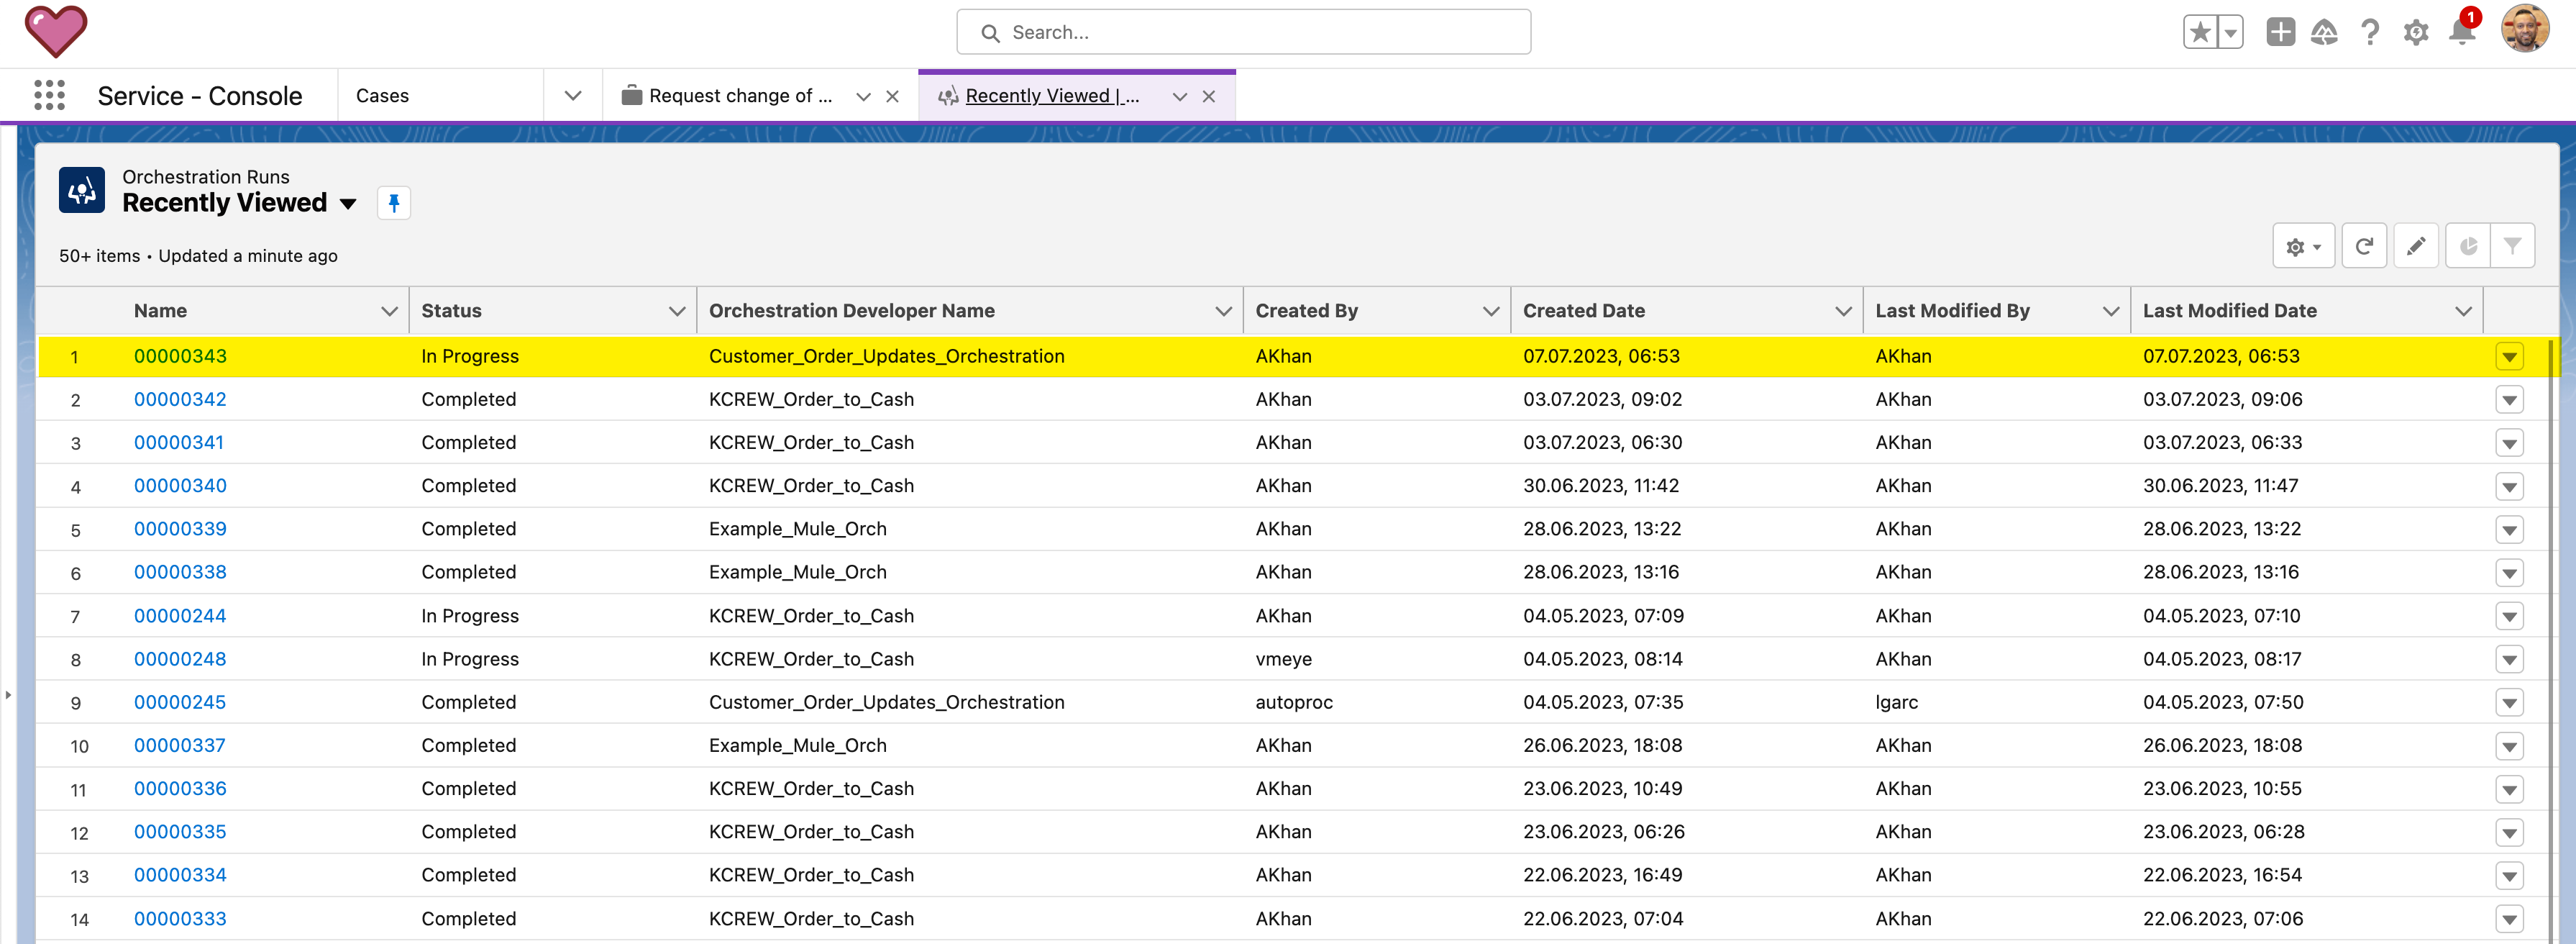
-
Let us explore
Debug Modefor our Orchestration Run. To start the debug view, select the context menu of the record, and click onDebug Orchestration.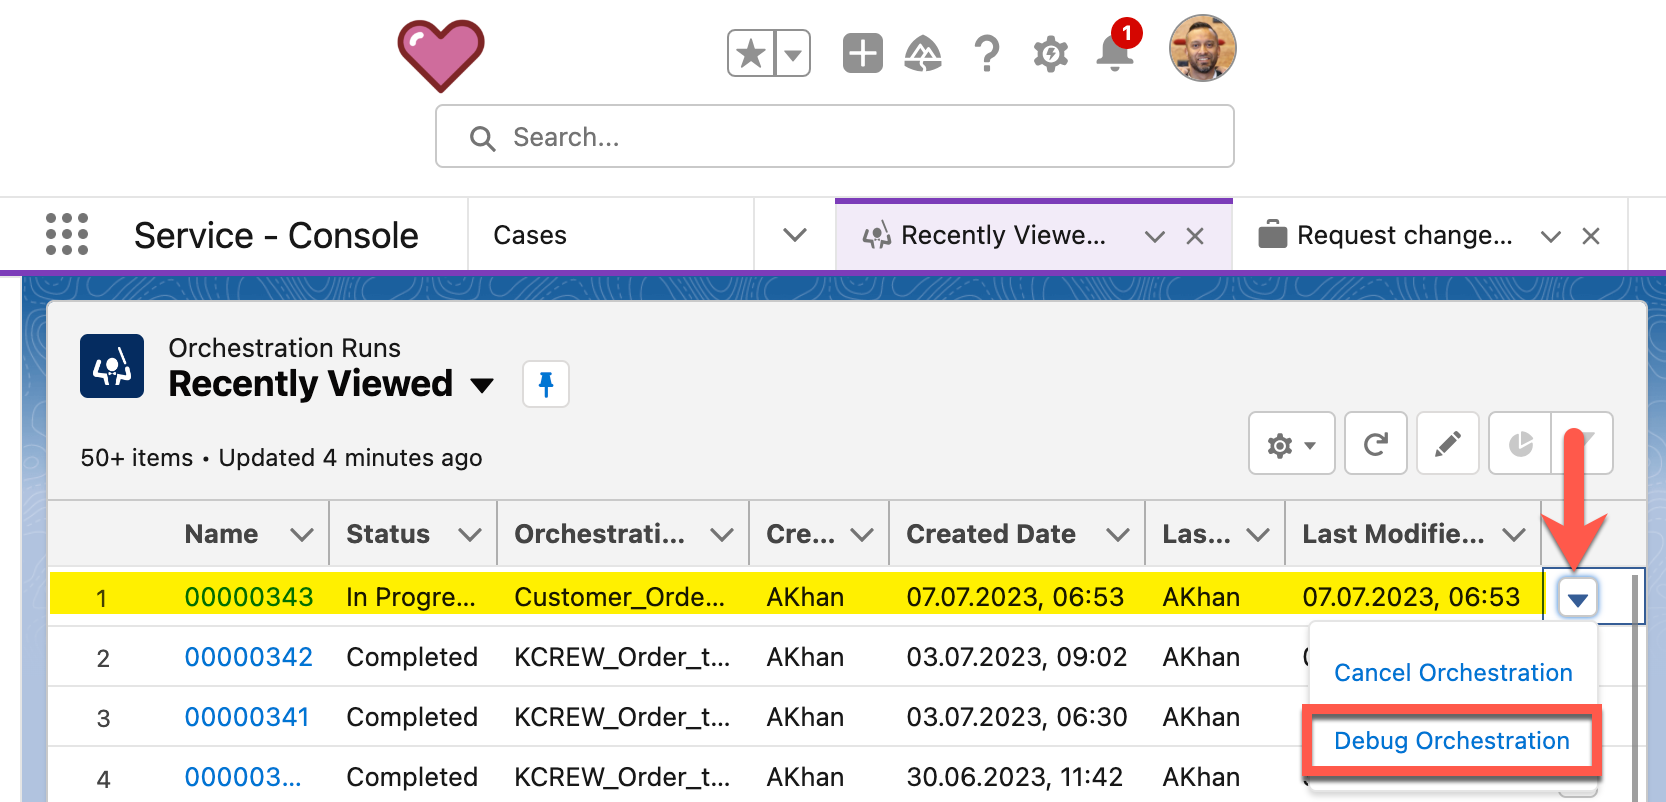
-
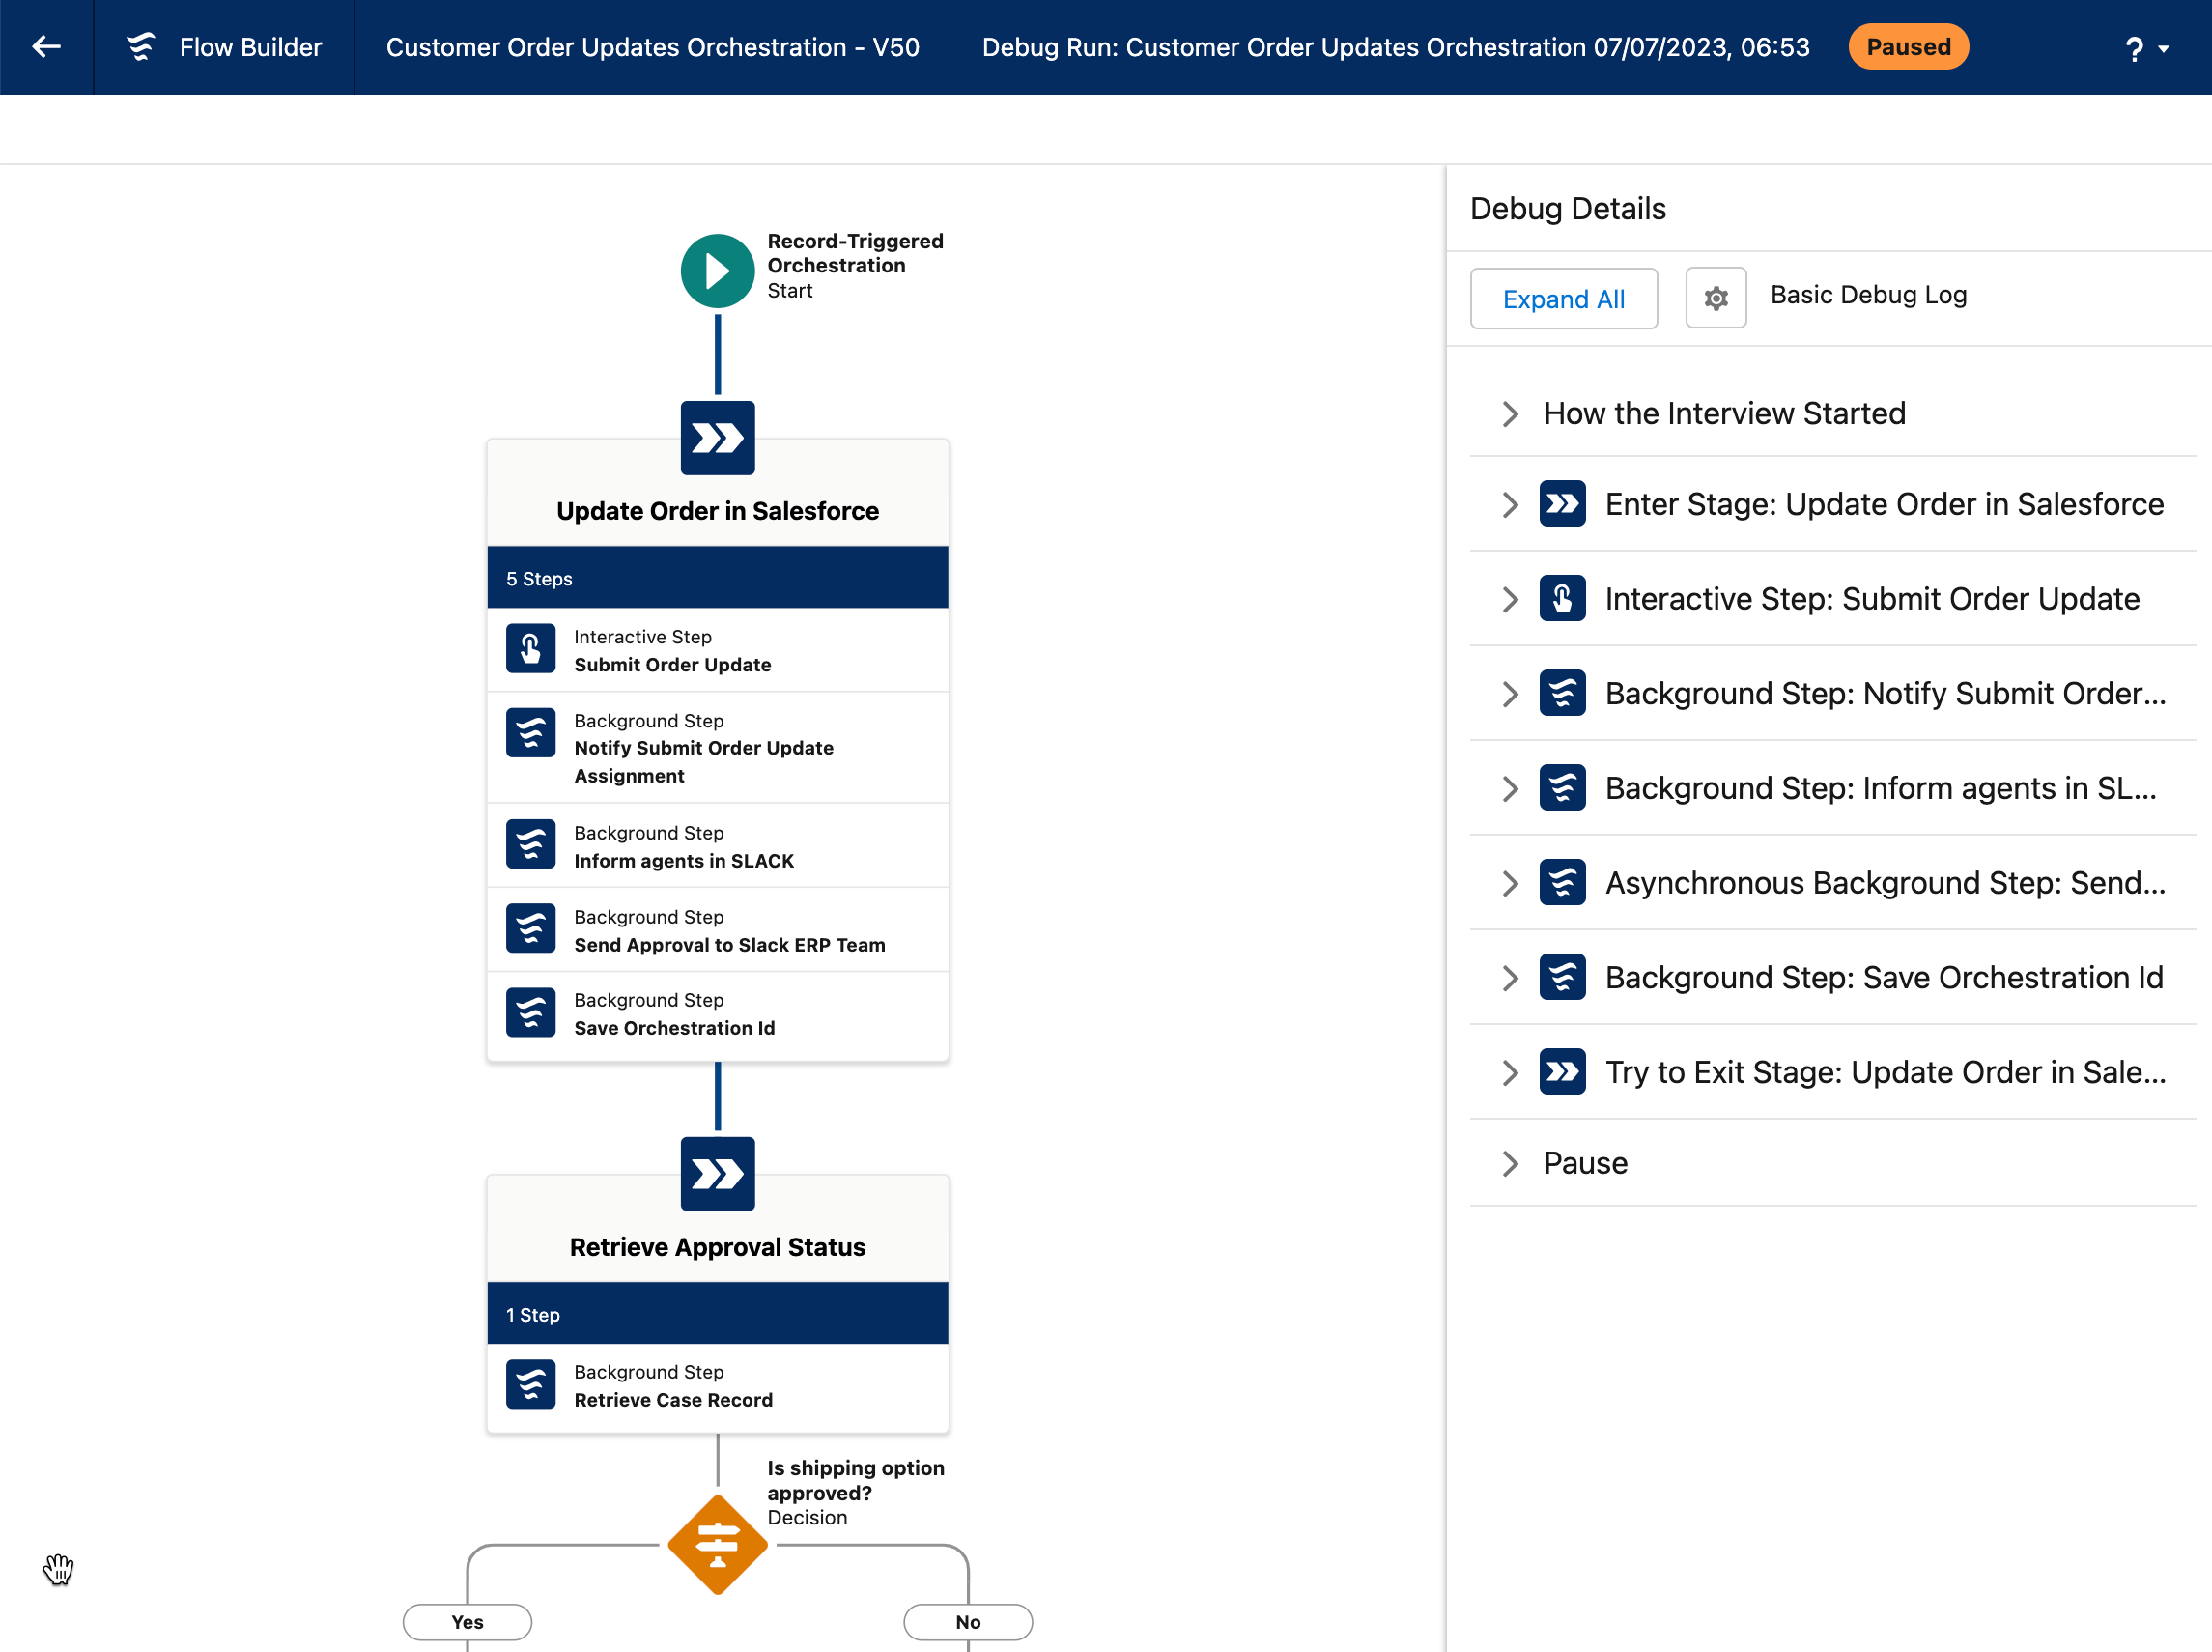
A new browser tab will open, and the current Orchestration Run will load. This can take up to 90 seconds. Once the Debug View is loaded, you will see a visual representation of the current orchestration run and on the right side the current stages and their logs which have been executed. Take some time to explore the debug view.
-
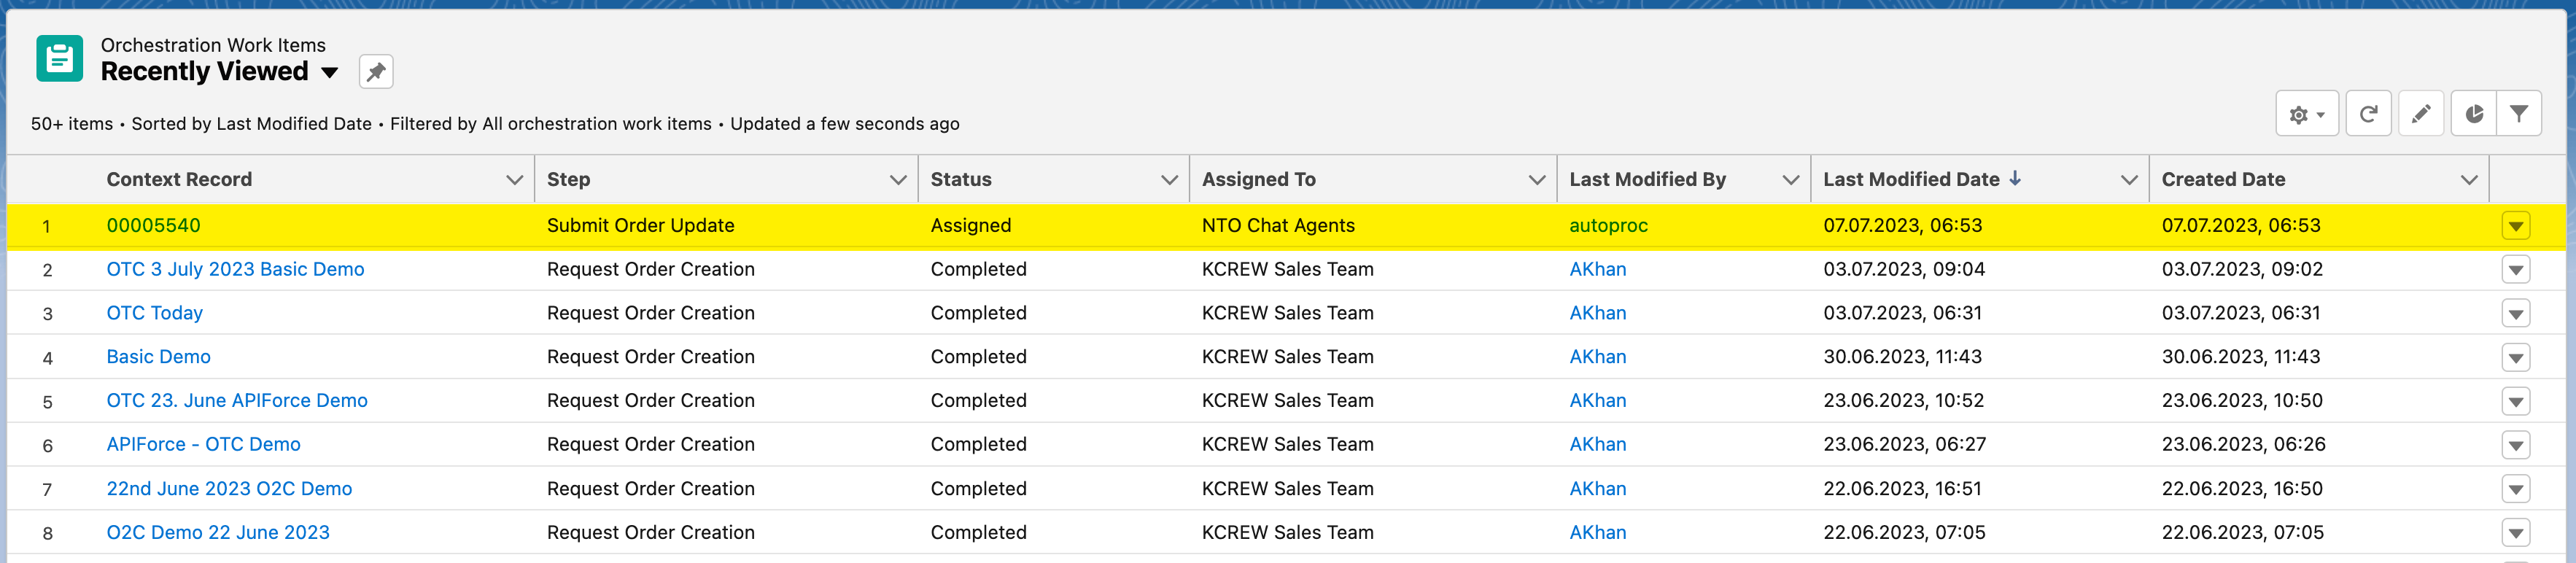
Once you are done exploring, go back to the lightning menu to see the "Orchestrations Work Items" view.
-
By clicking on the
Context RecordNumber for your work item, it will navigate you back to the Case you’ve created and on the right-hand side you will see the work item.
-
In the next step, we have to log in as the service agent (Luca). Therefore open setup and go to
Users.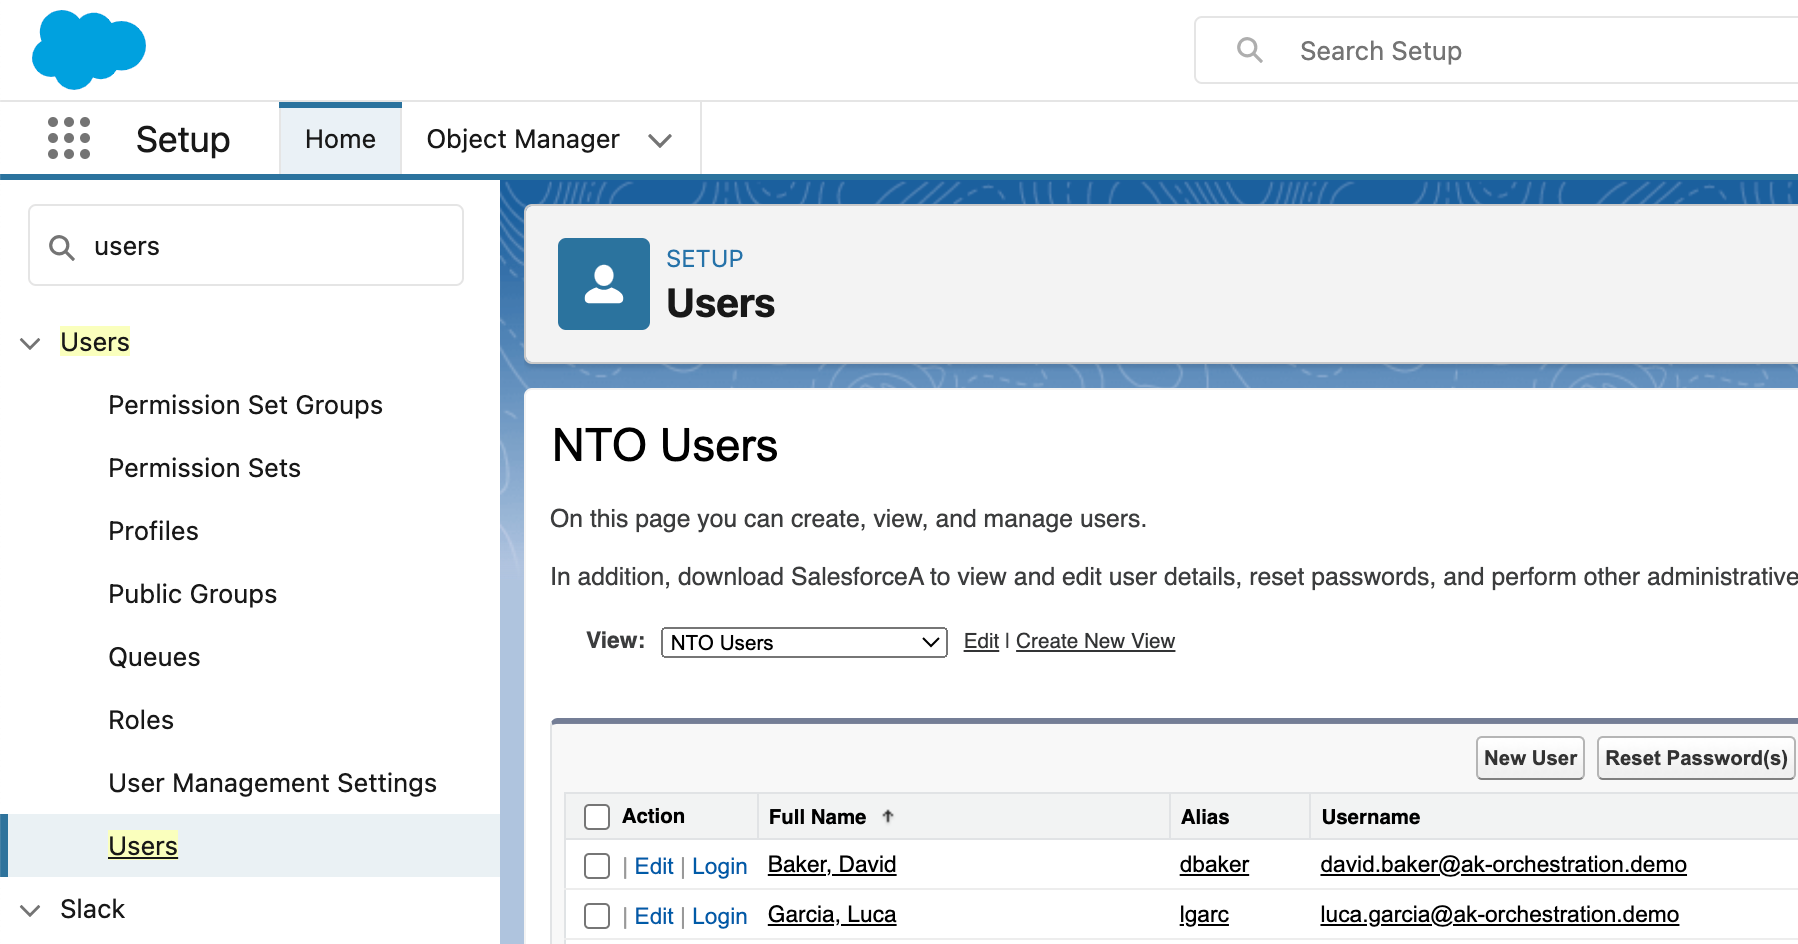
Step 3: Review Order Update Request and Submit for Approval (Service Agent)
-
In this section, we will log in as the service agent (Luca) and submit an order update request on the case we opened earlier. On the users page, click on
loginnext to Garcia, Luca.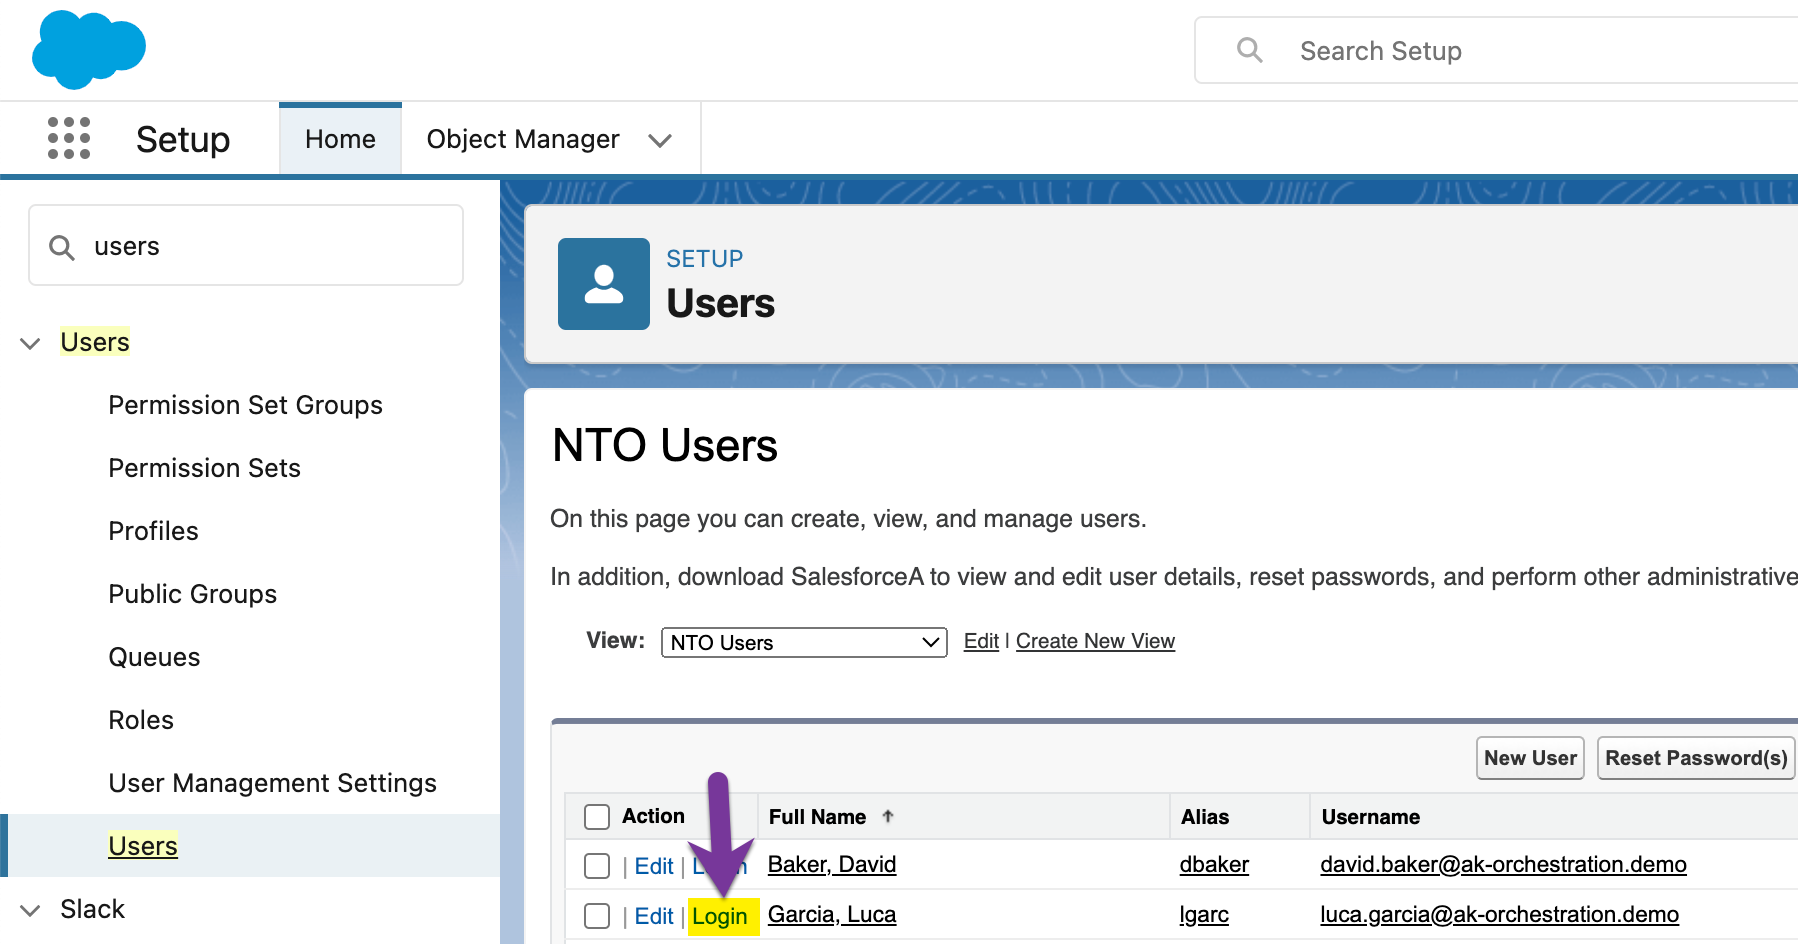
-
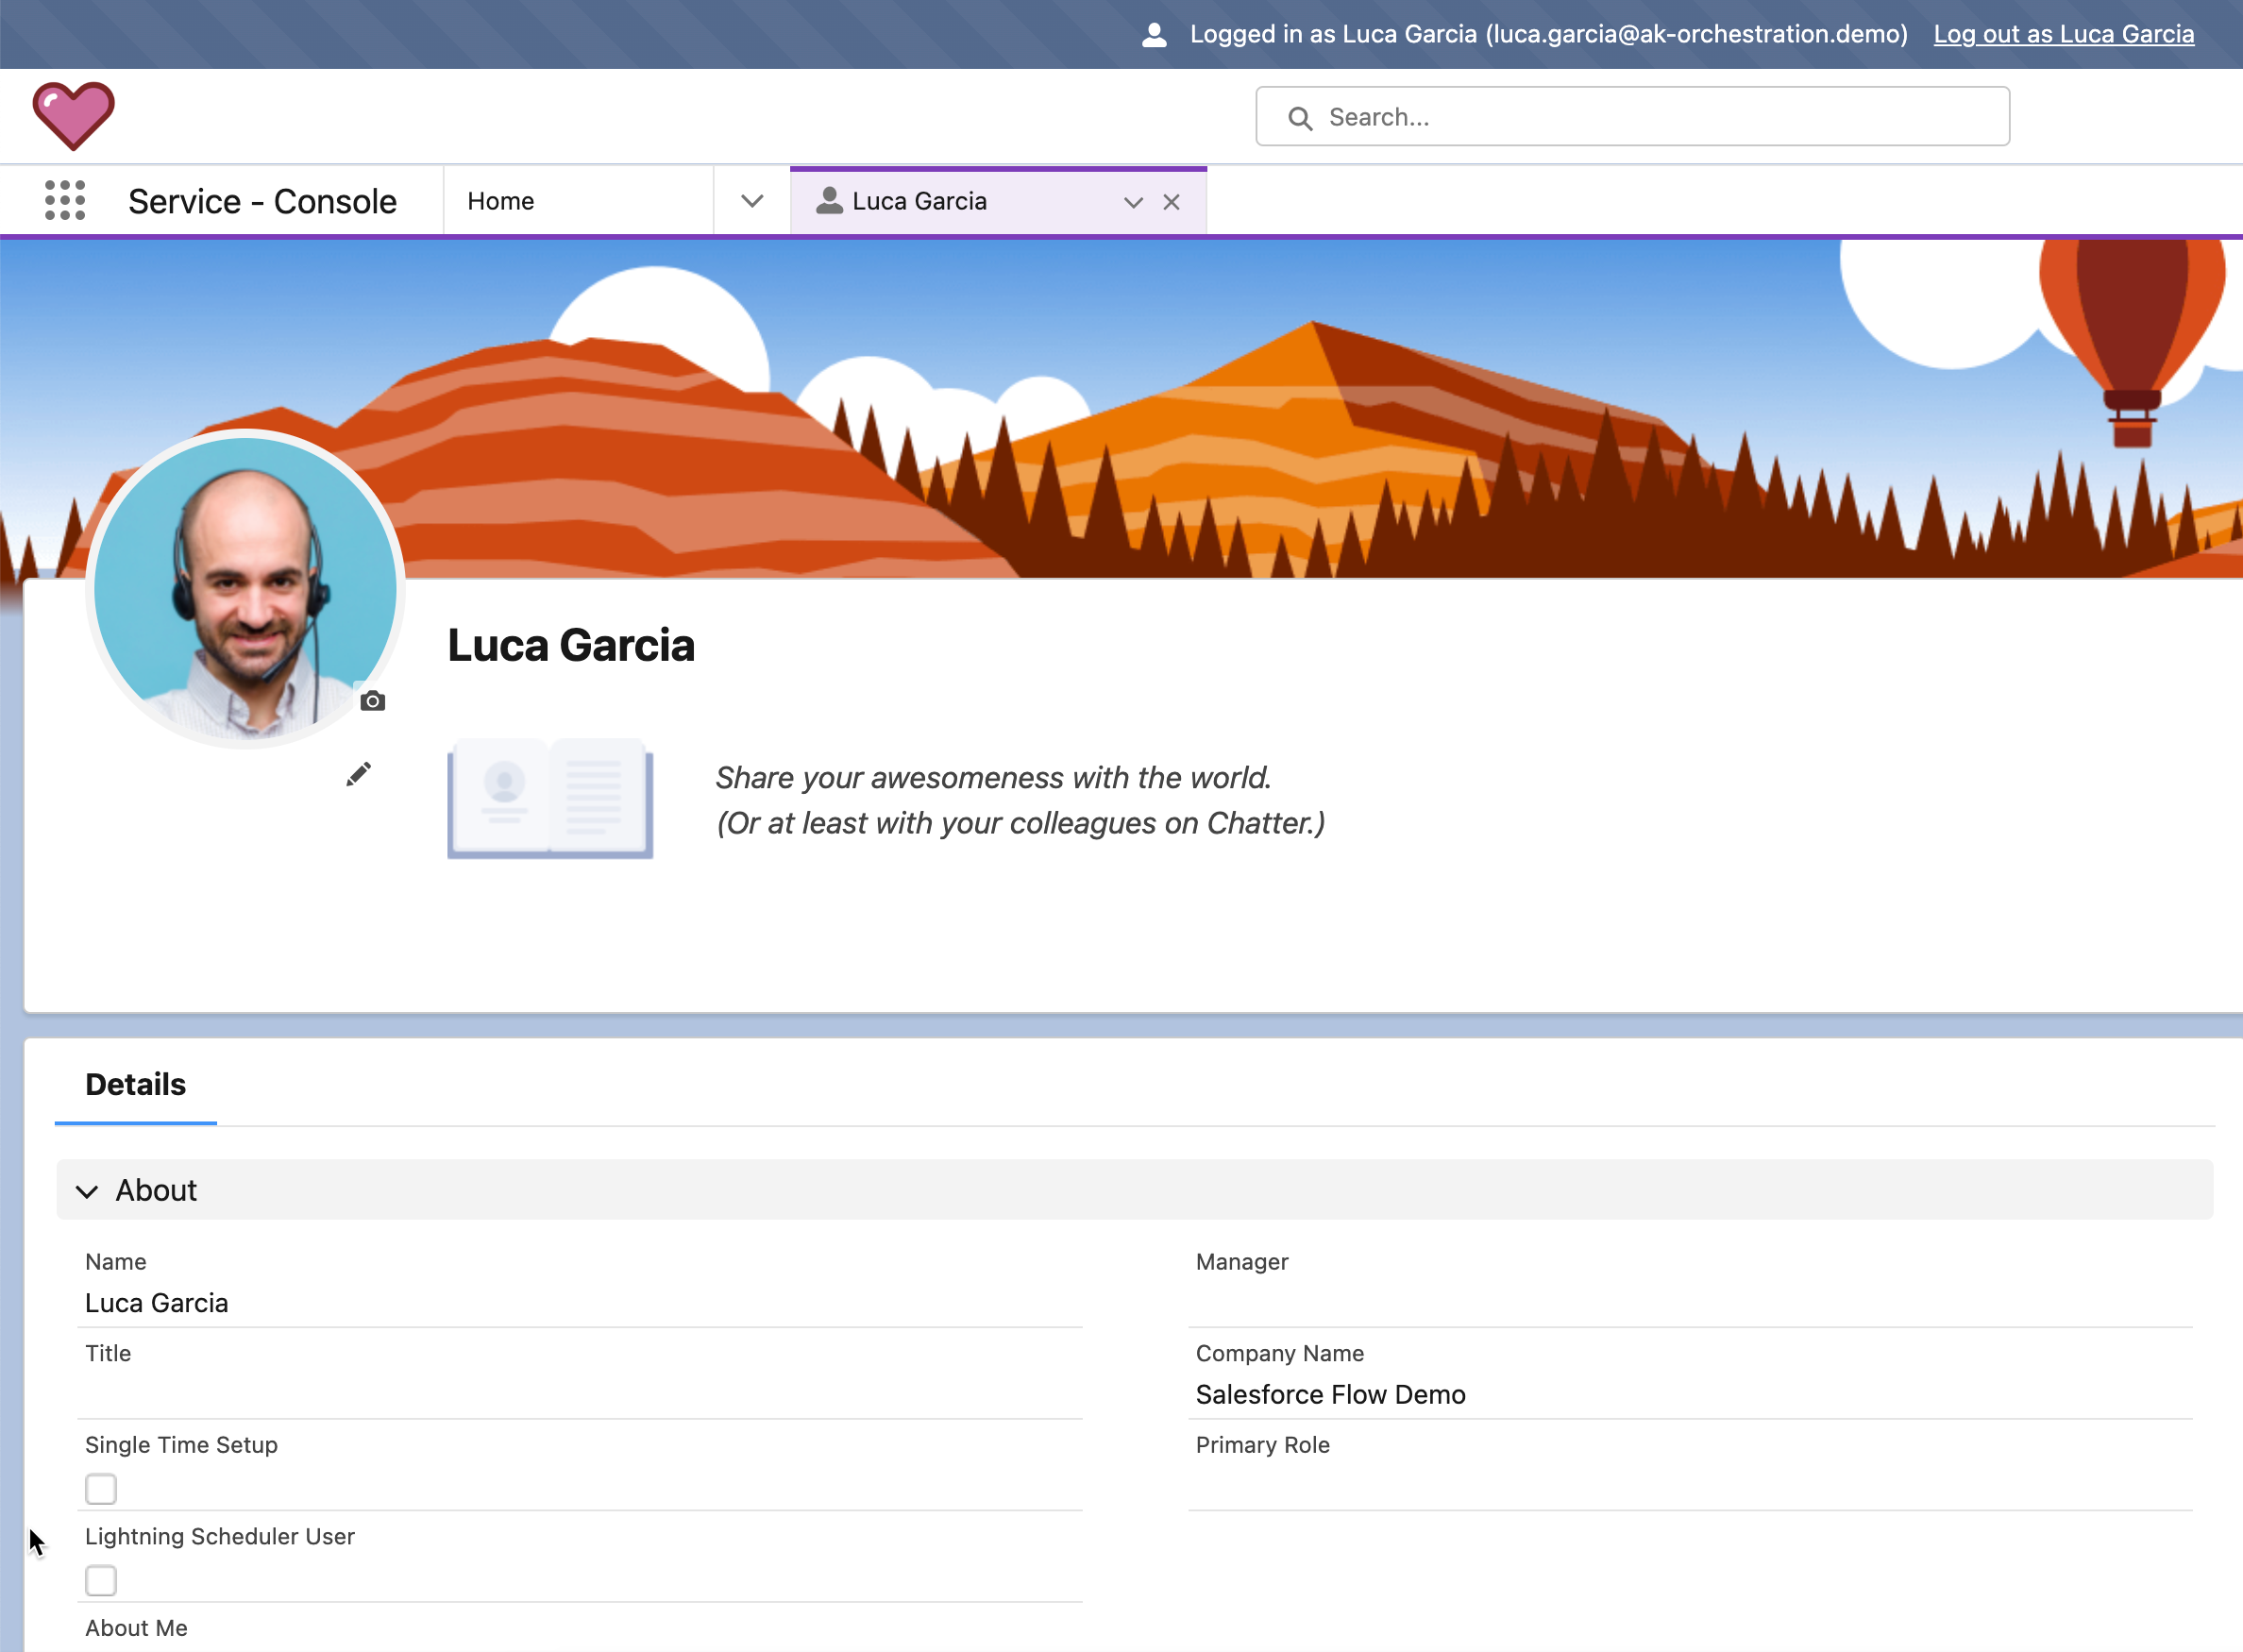
After login in as the service agent (Luca), you should see his profile page.
-
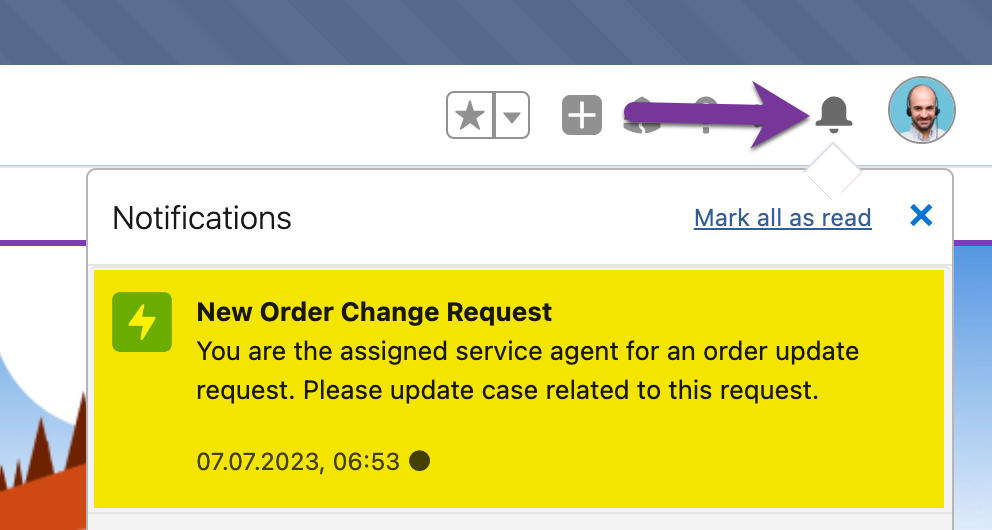
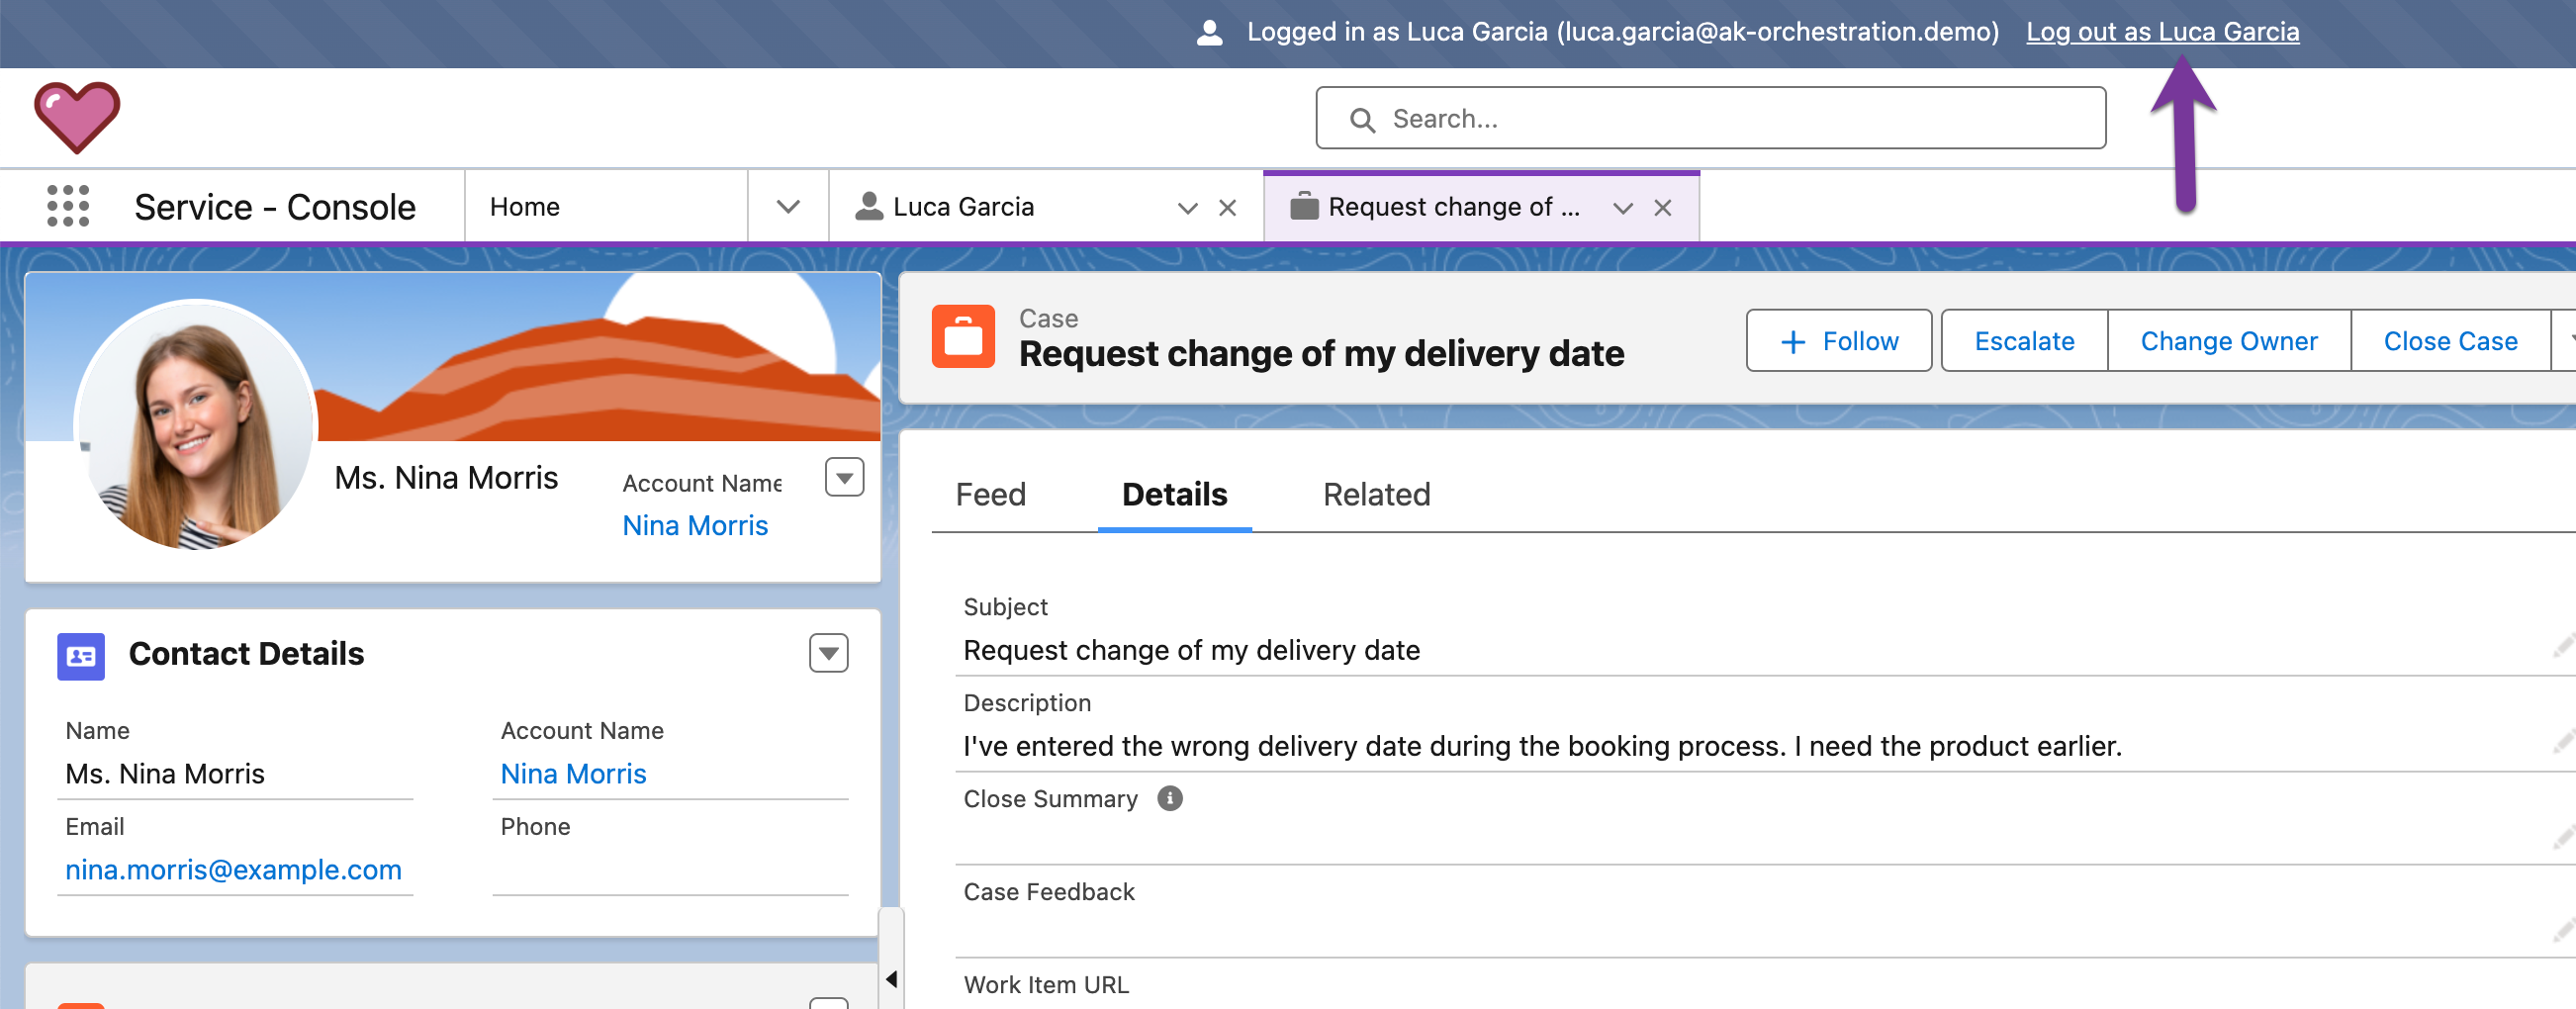
On the top right, you should see at least 1 notification on the bell Icon. Click on the bell icon and select the top notification, you should be routed to the order update case.
-
Once the update order case is opened, you will see a work guide (workflow) assigned to the service agent. On the work guide, you can submit the order update request. Note: that the external system fields (
OMS id,Netsuite IdandSAP Id) are empty, these will be filled with values during the workflow.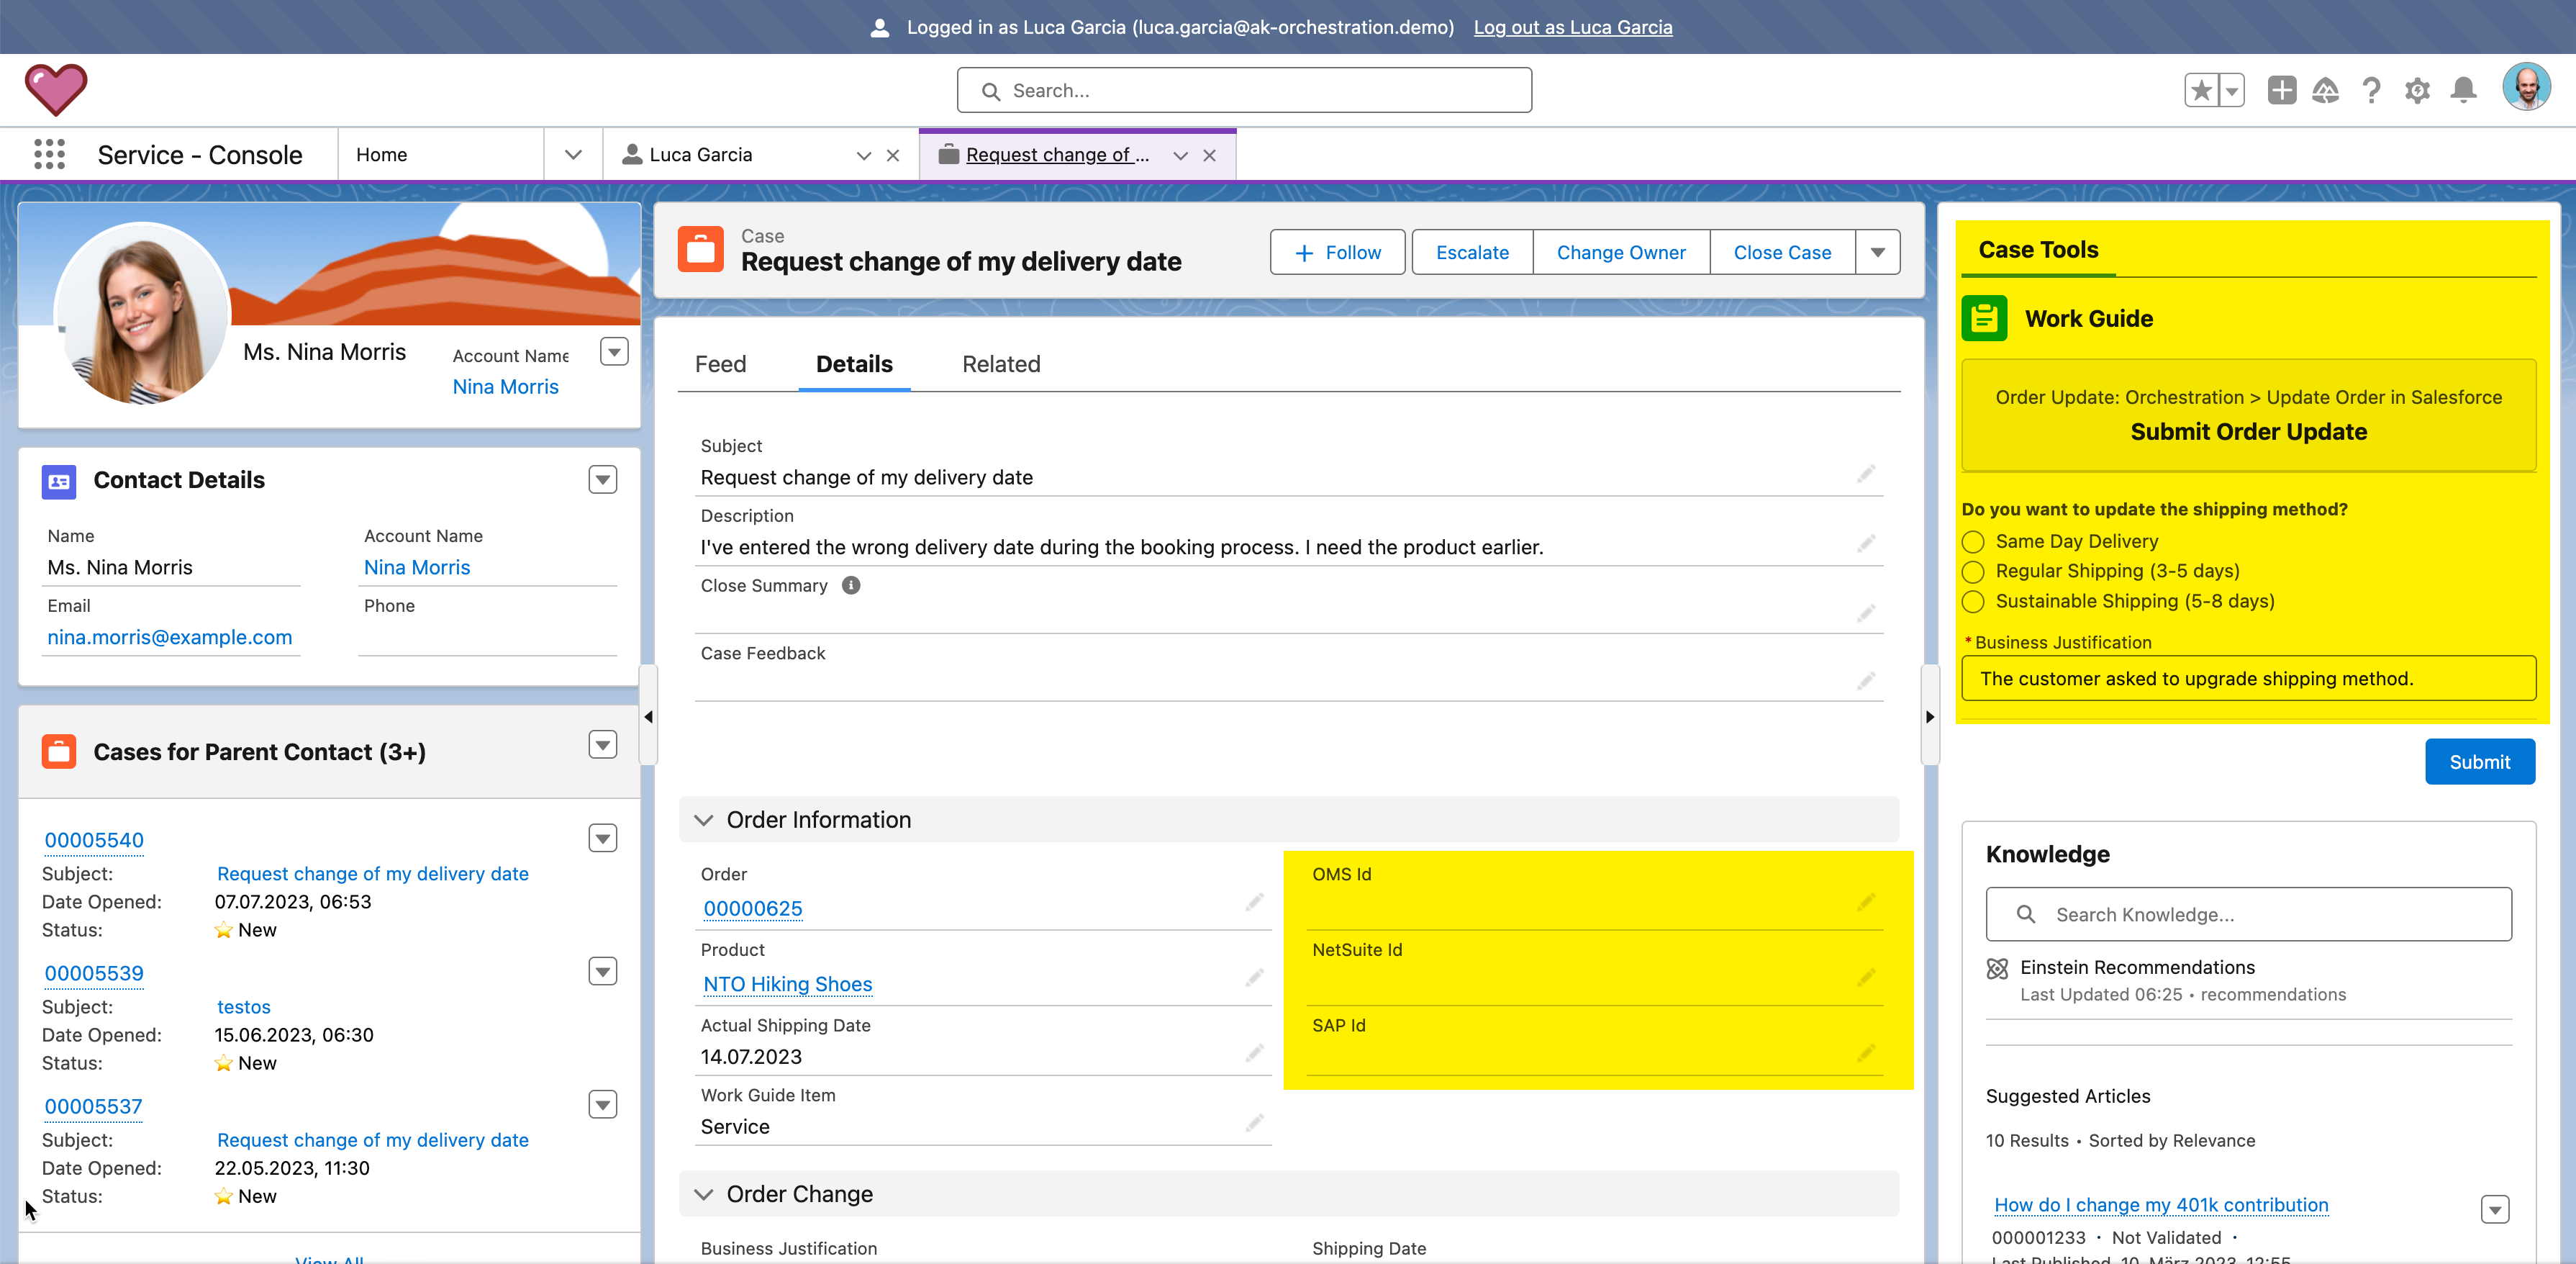
-
On the work guide, select the first option
Same Day Delivery, and optional change theBusiness Justification. Finally, click onSubmitto complete the Order Update Request.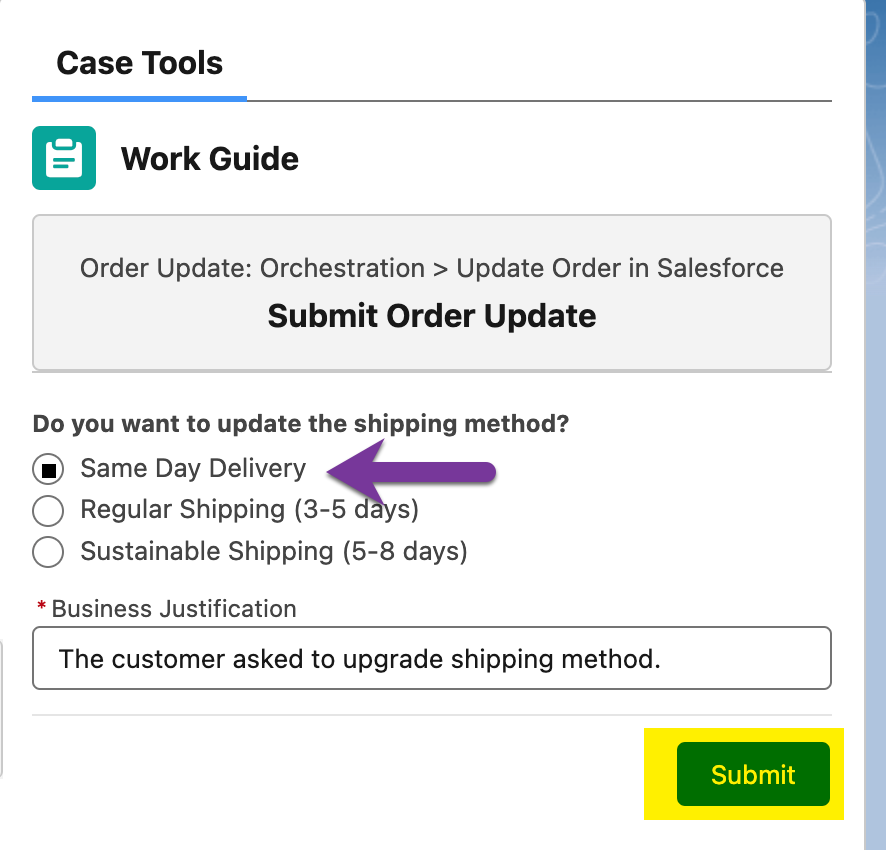
-
After submitting the order update request, please log out as the Service Agent (Luca). The case has now been moved to approval stage.
Step 4: Check Orchestration Run and Orchestration Work Items (IT/Admin)
-
Note, that you are logged in back as admin. As the orchestration process has continued, let’s check the orchestration run and the related work items. Click on the Salesforce Menu on the top left side and type
Orchestration.
-
First, select the
Orchestration Runs. It will open a new tab with all the orchestration runs. Note that the last one has a creation date time of now and its Status isIn Progress.
-
Let us explore
Debug Modefor our Orchestration Run. To start the debug view, select the context menu of the record, and click onDebug Orchestration.
-
A new browser tab will open, and the current Orchestration Run will load. This can take up to 90 seconds. Once the Debug View is loaded, you will see a visual representation of the current orchestration run and on the right side the current stages and their logs which have been executed. Take some time to explore the debug view.
-
Once you are done exploring, go back to the lightning menu to see the "Orchestrations Work Items" view.
-
By clicking on the
Context RecordNumber for your work item, it will navigate you back to the Case you’ve created and on the right-hand side you will see the work item.
-
In the next step, we have to log in as the delivery manager (David Baker). Therefore open setup and go to
Users.
Step 5: Approve Order Update Request (Shipping Manager)
-
In this section, we will log in as the delivery manager (David) and approve the order update request (submitted by Luca in the previous step). On the users page, click on
loginnext to Baker, David.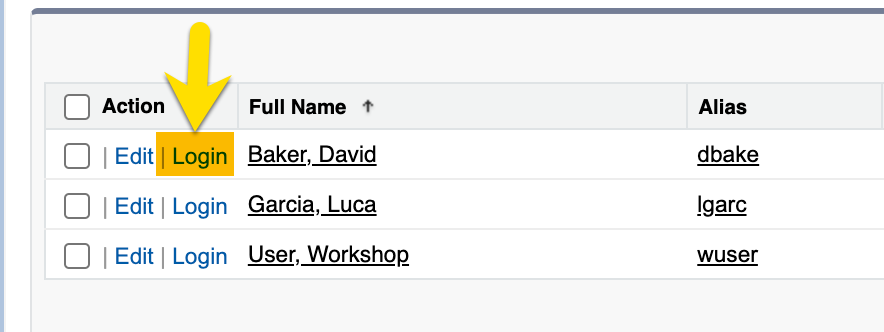
-
After logging in as the delivery manager (David), you should see his profile page.
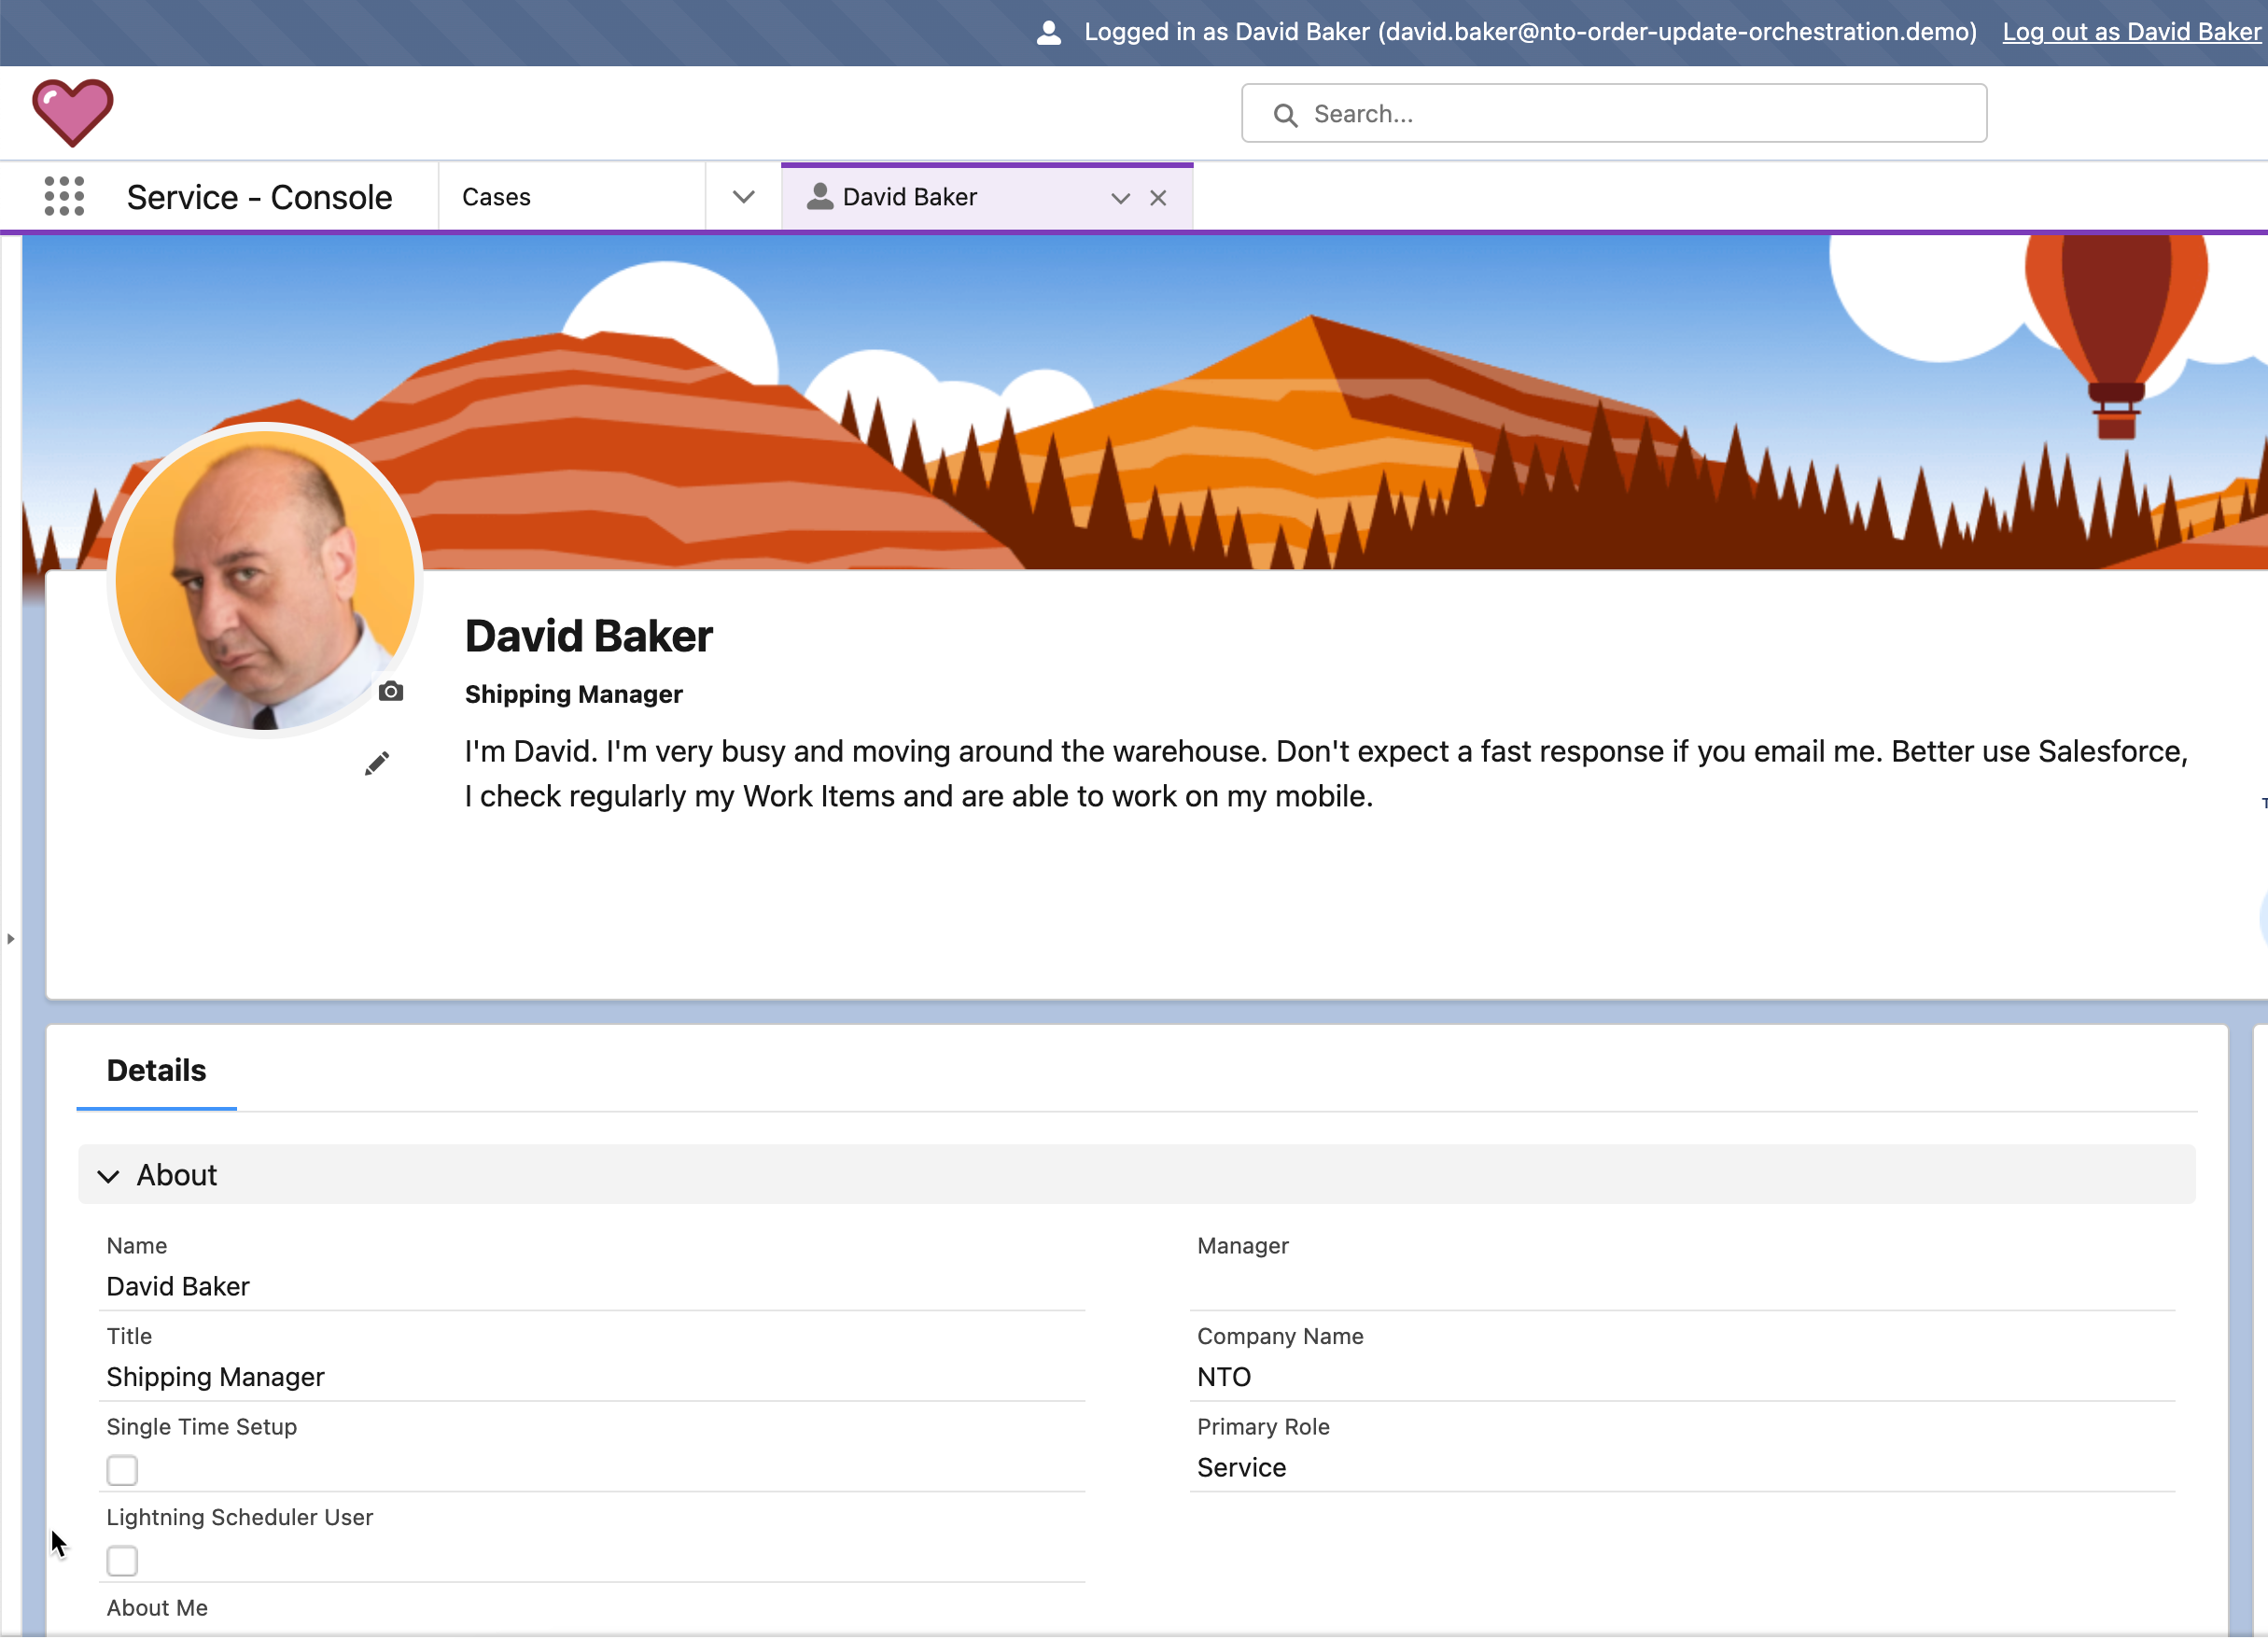
-
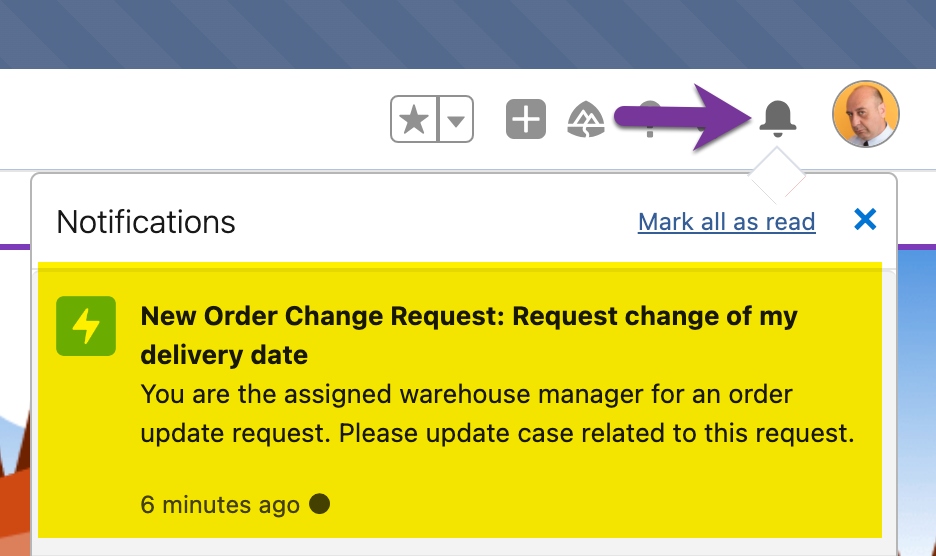
On the top right, you should see at least 1 notification on the bell Icon. Click on the bell icon and select the top notification, you should be routed to the order update case.
-
Once the update order case is opened, you will see a work guide (workflow) assigned to the delivery manager. On the work guide, you can approve or reject the order update request. Note: that the external system fields (
OMS id,Netsuite IdandSAP Id) are still empty, these will be filled with values after the approval.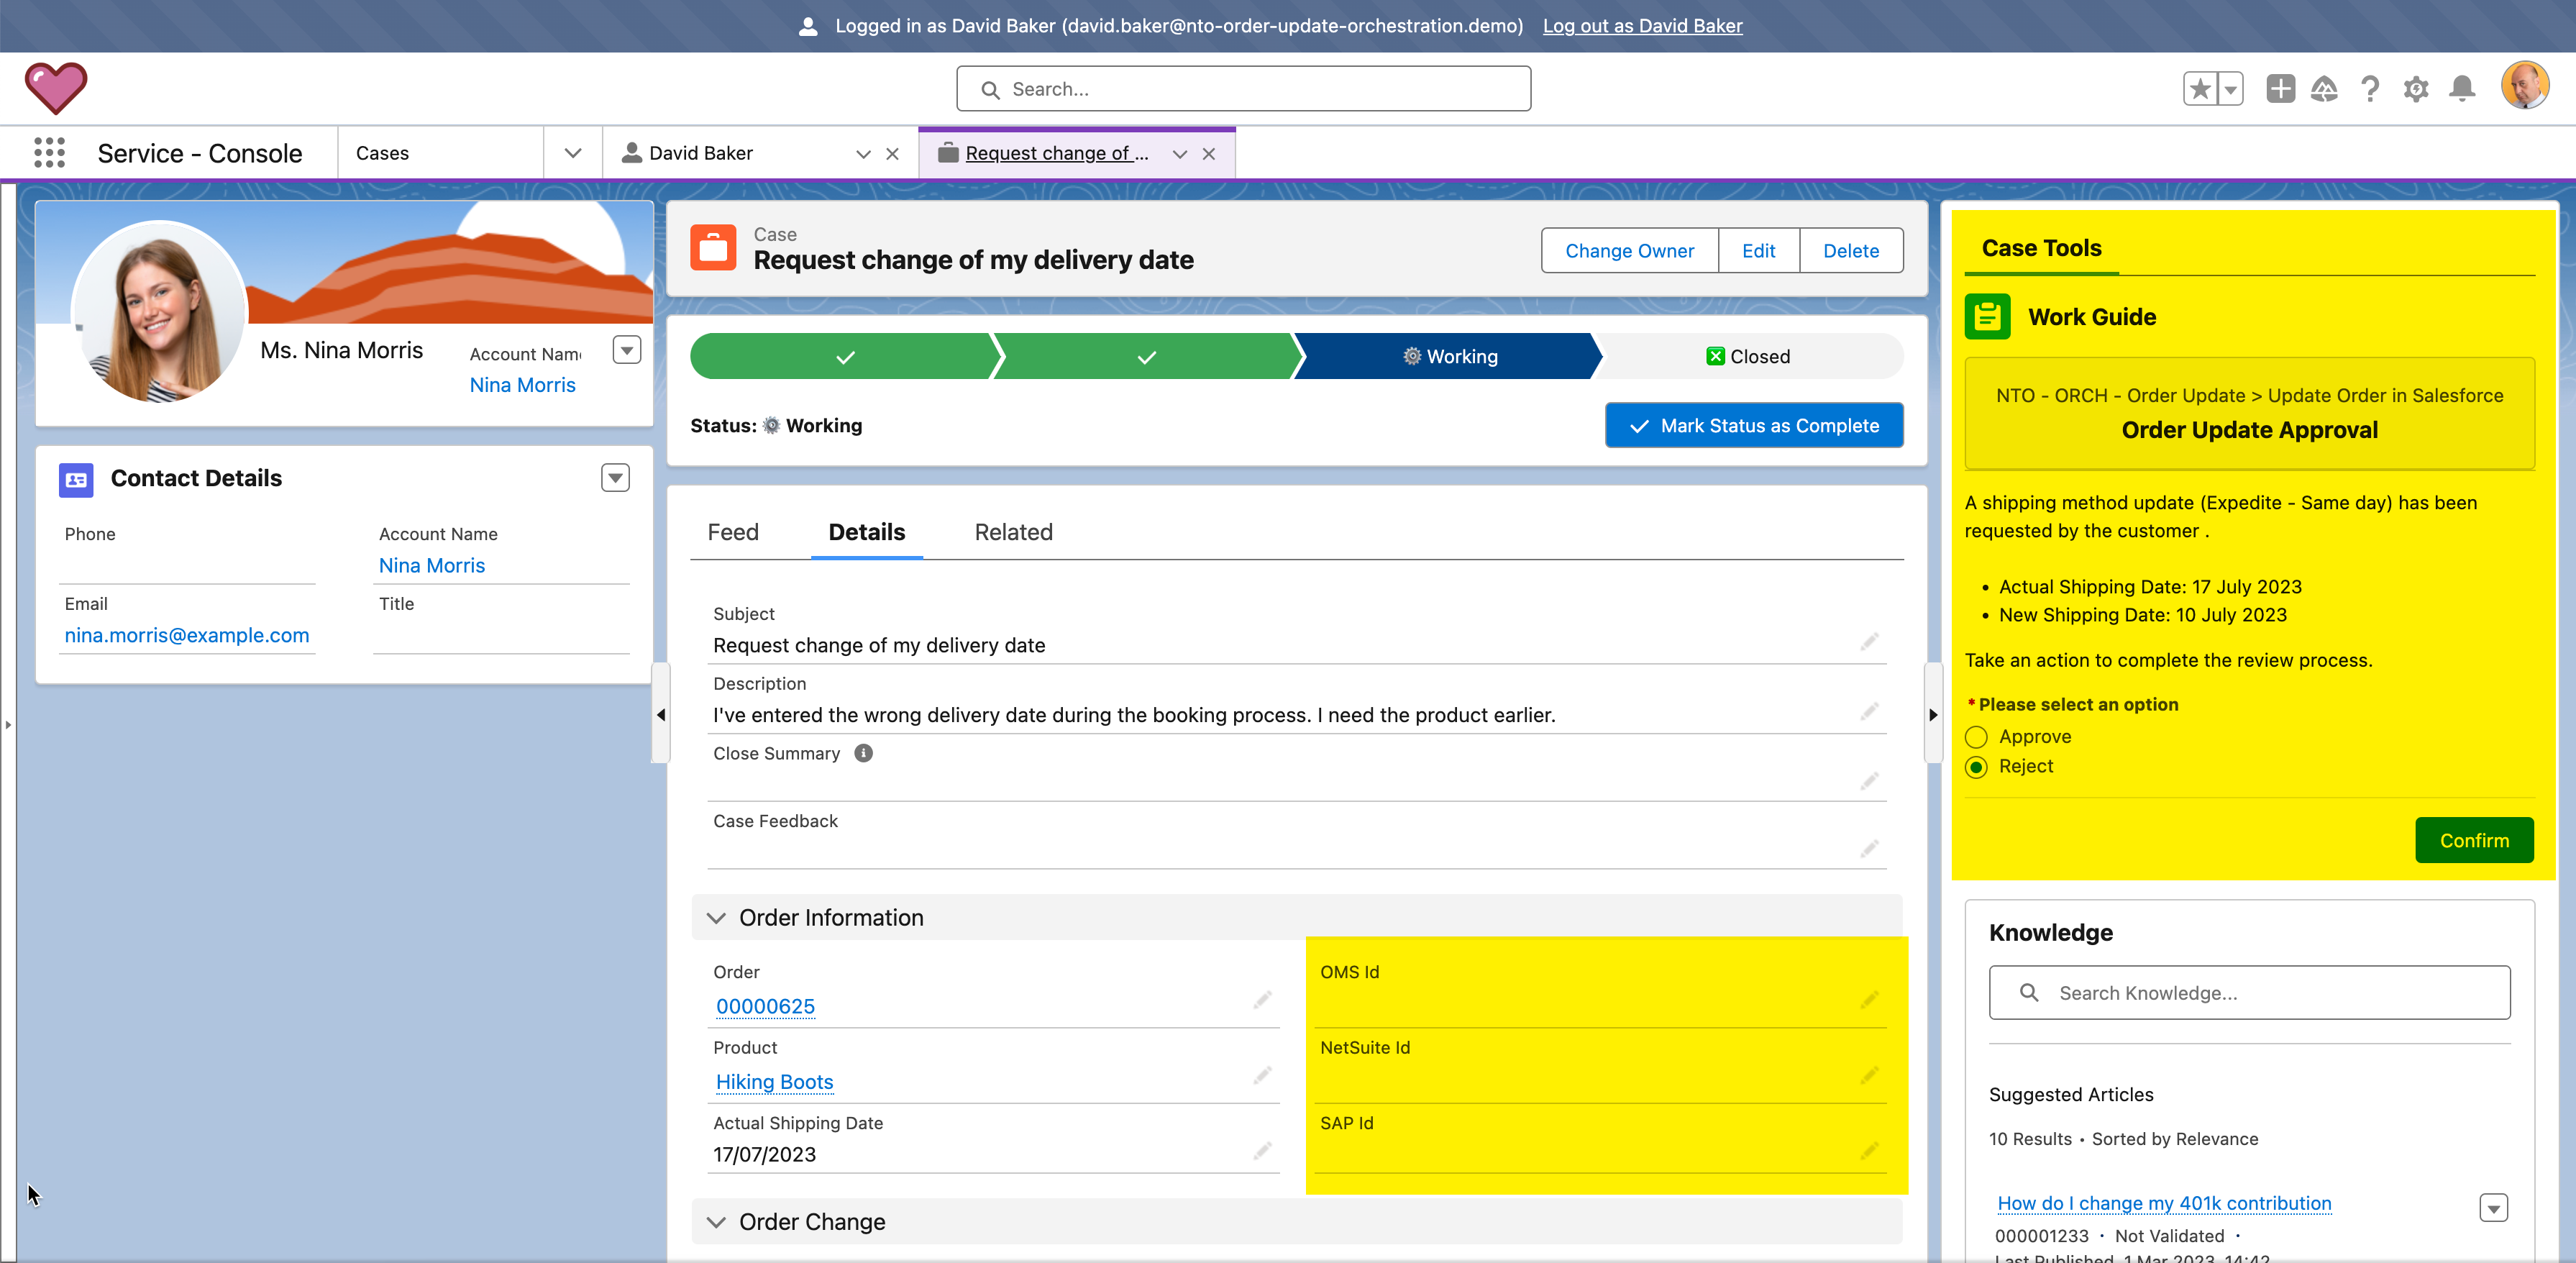
-
The default value is set to
Reject, but we want toApprovethe request. Please click onApprove.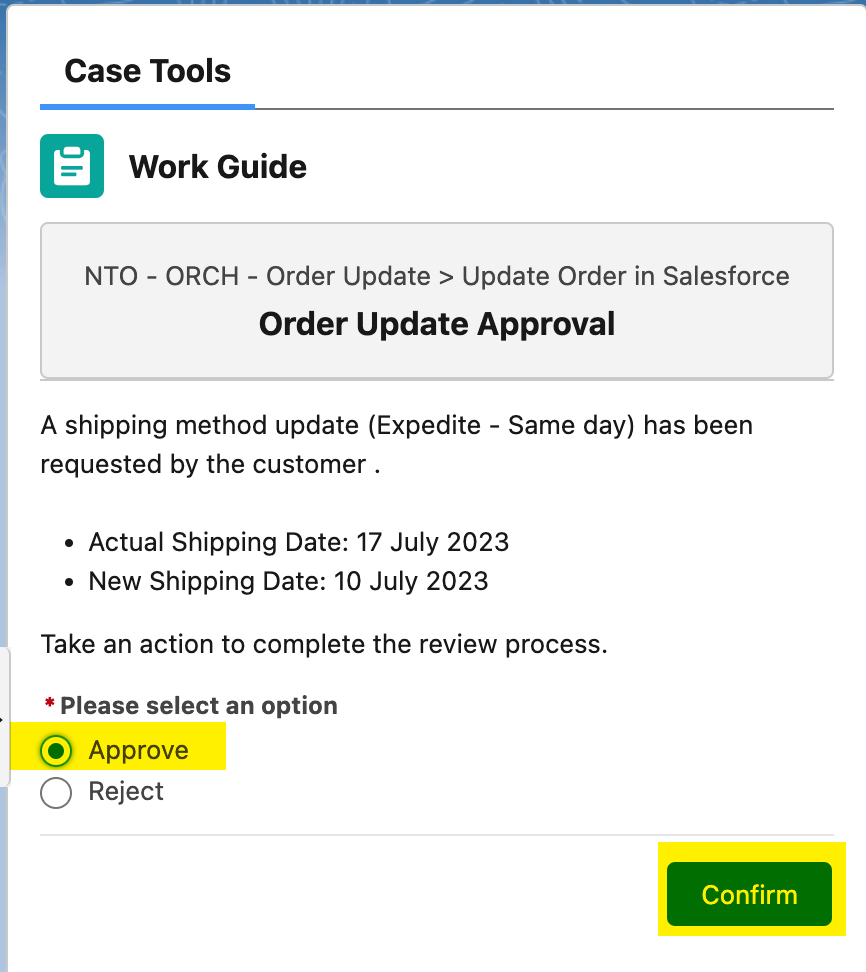
-
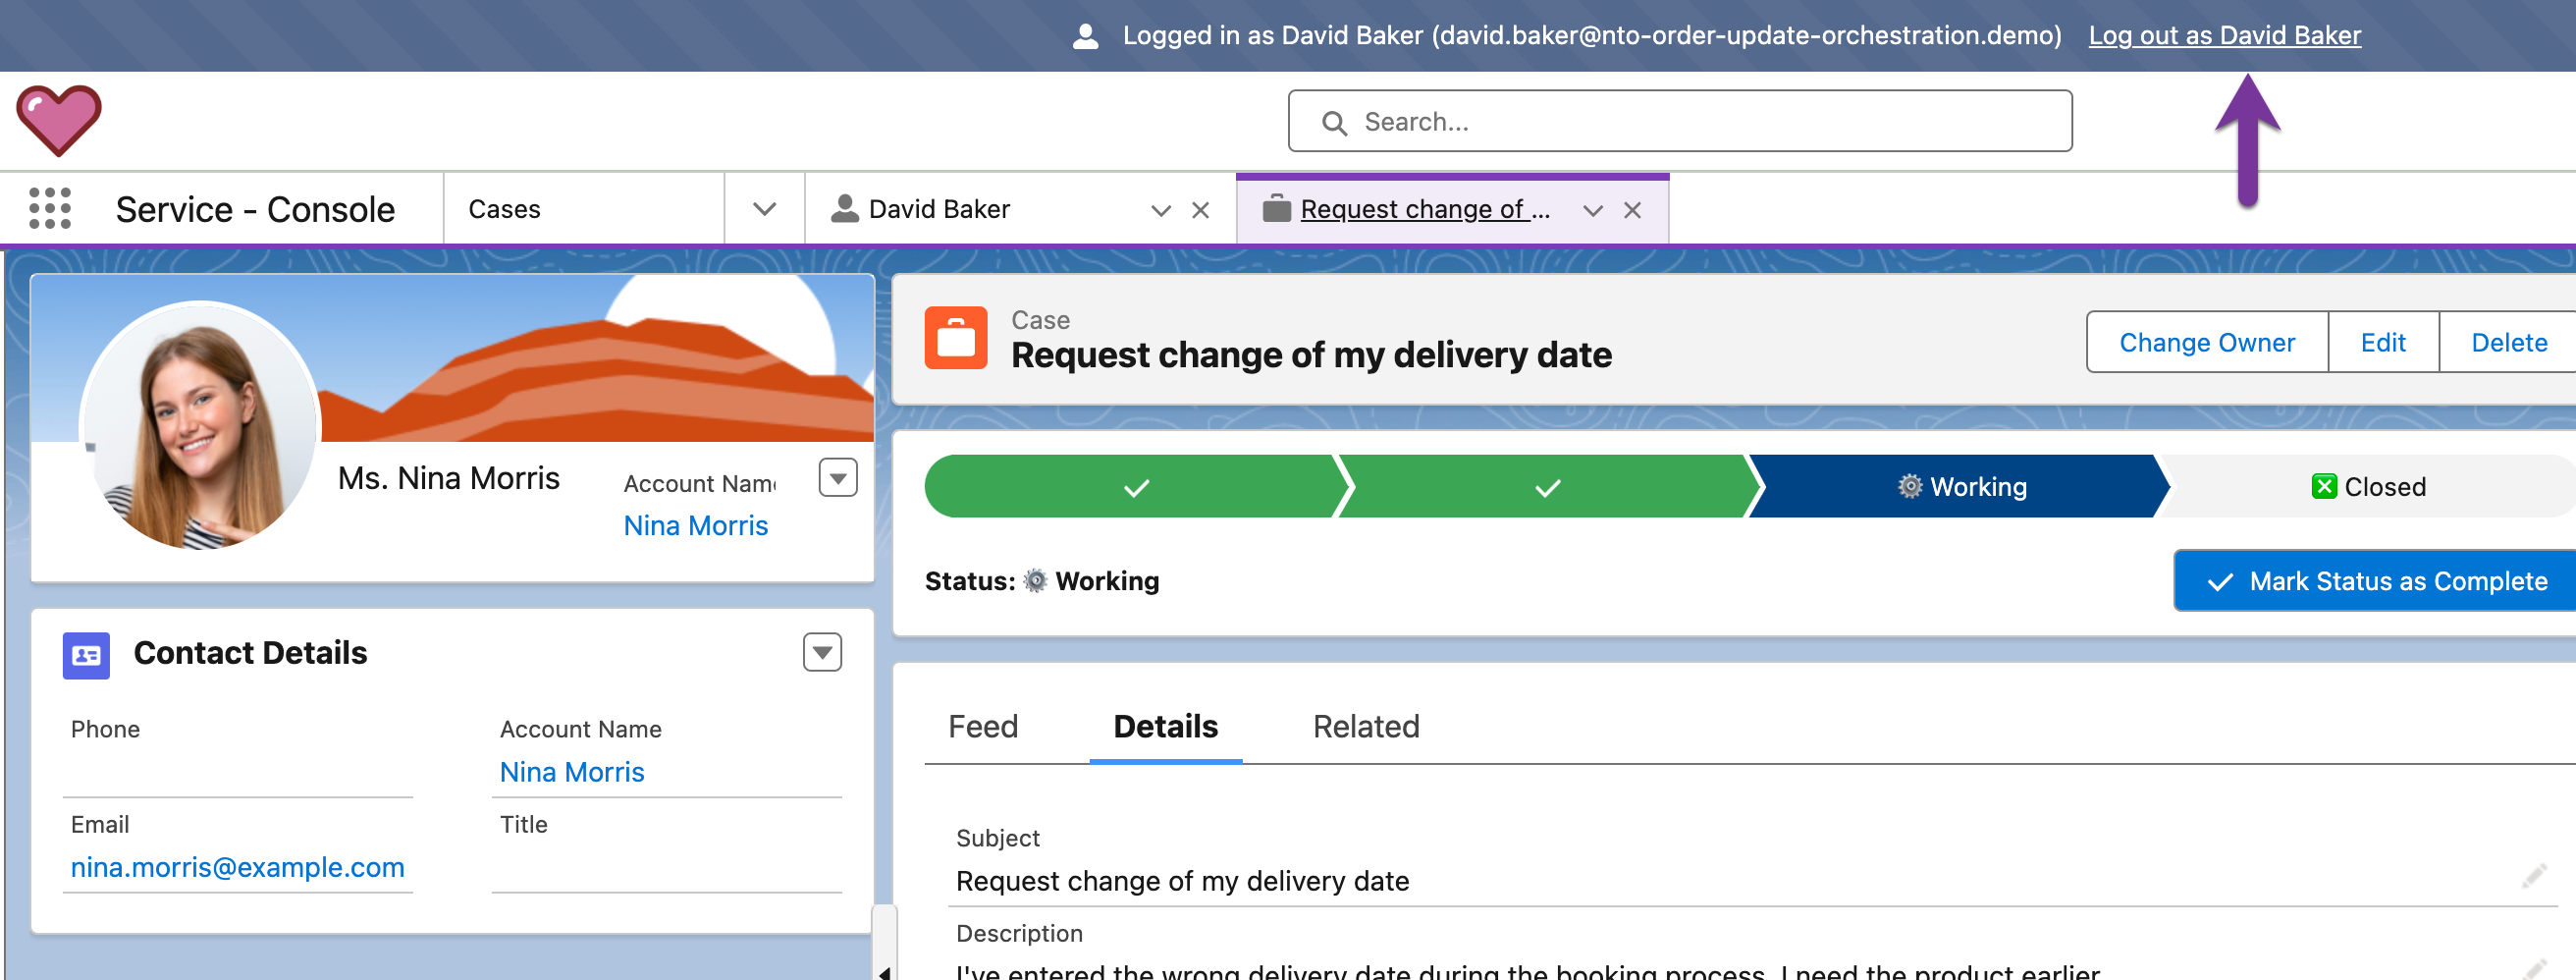
After approving the order update request, the case has been moved to "Working Stage". Please log out as the Delivery Manager (David).
Step 6: Check Orchestration Run and Orchestration Work Items (IT/Admin)
-
Note, that you are logged in back as admin. As the orchestration process has continued, let’s check the orchestration run and the related work items. Click on the Salesforce Menu on the top left side and type
Orchestration.
-
First, select the
Orchestration Runs. It will open a new tab with all the orchestration runs. Note that the last one has a creation date time of now and its Status isIn Progress.
-
Let us explore
Debug Modefor our Orchestration Run. To start the debug view, select the context menu of the record, and click onDebug Orchestration.
-
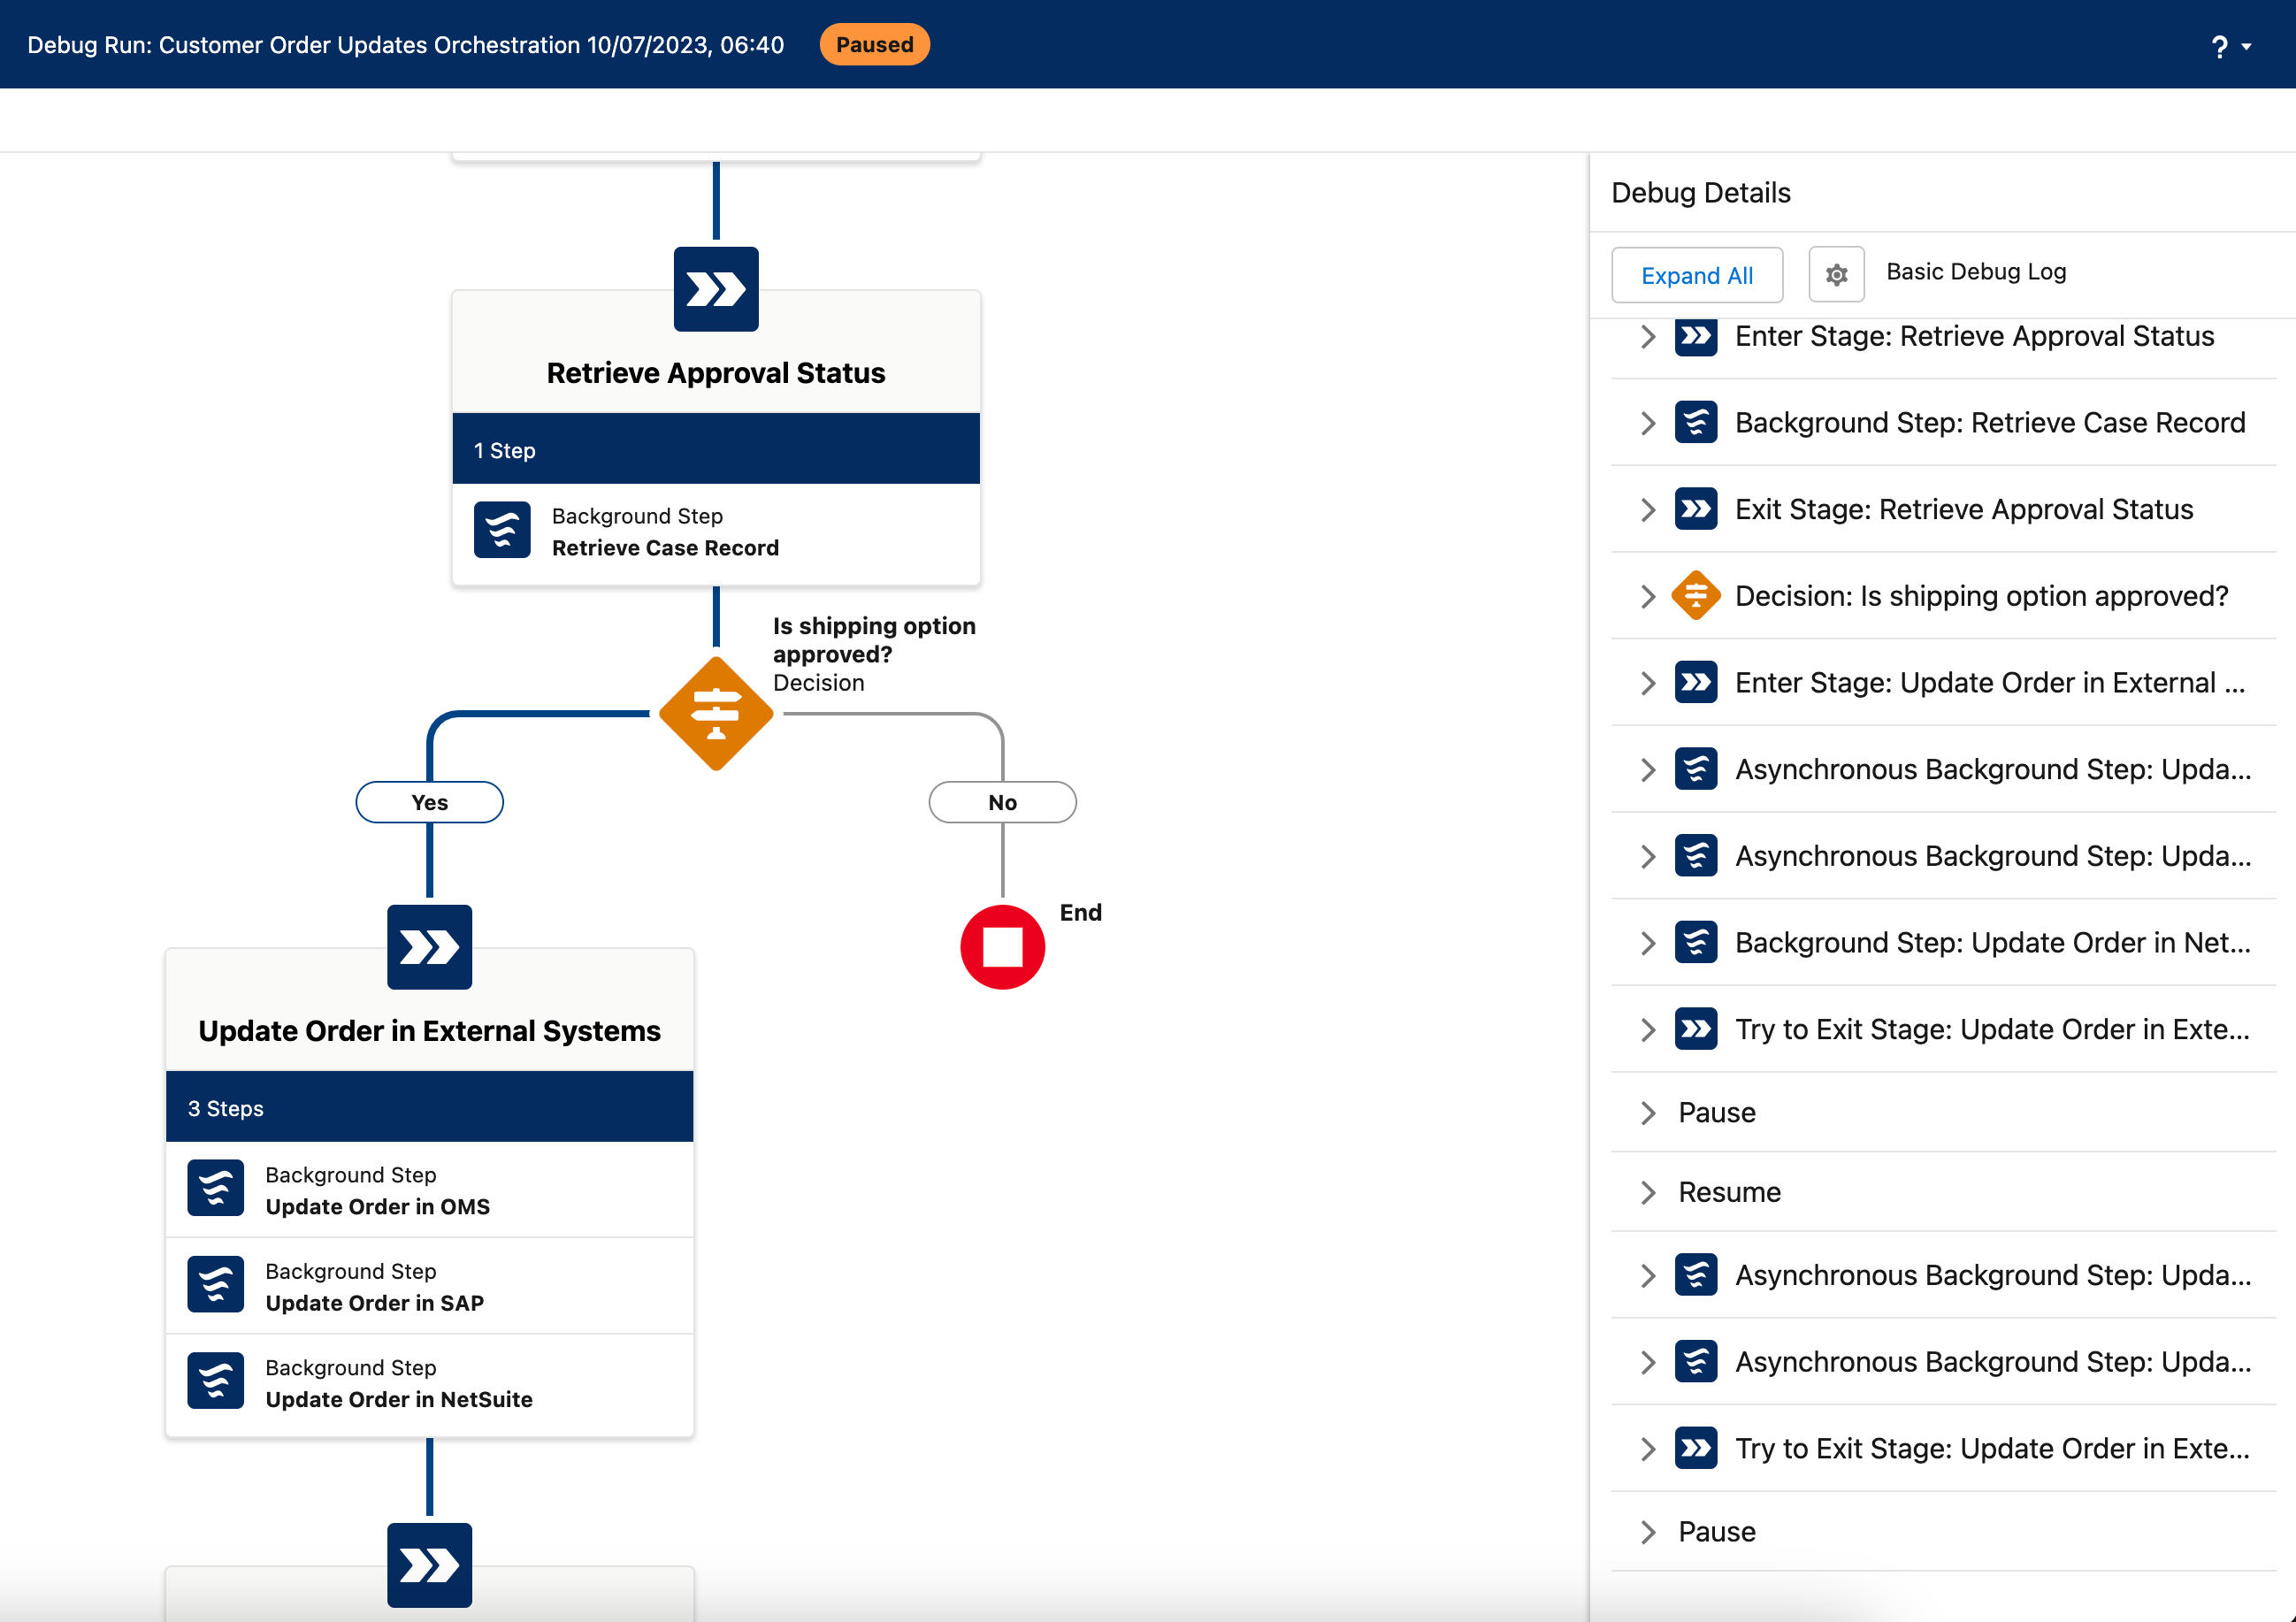
A new browser tab will open, and the current Orchestration Run will load. This can take up to 90 seconds. Once the Debug View is loaded, you will note that the workflow has left the first stages and has continued to Update Order in External Systems. This is an automatic step, which will complete and update the workflow for the Service Agent (Luca). Take some time to explore the debug view.
-
Once you are done exploring, go back to the lightning menu to see the "Orchestrations Work Items" view.
Step 7: Notify Customer and Close Case (Service Agent)
-
In this section, we will log in as the service agent (Luca) and notify the customer as the update of the order has been completed. On the users page, click on
loginnext to Garcia, Luca.
-
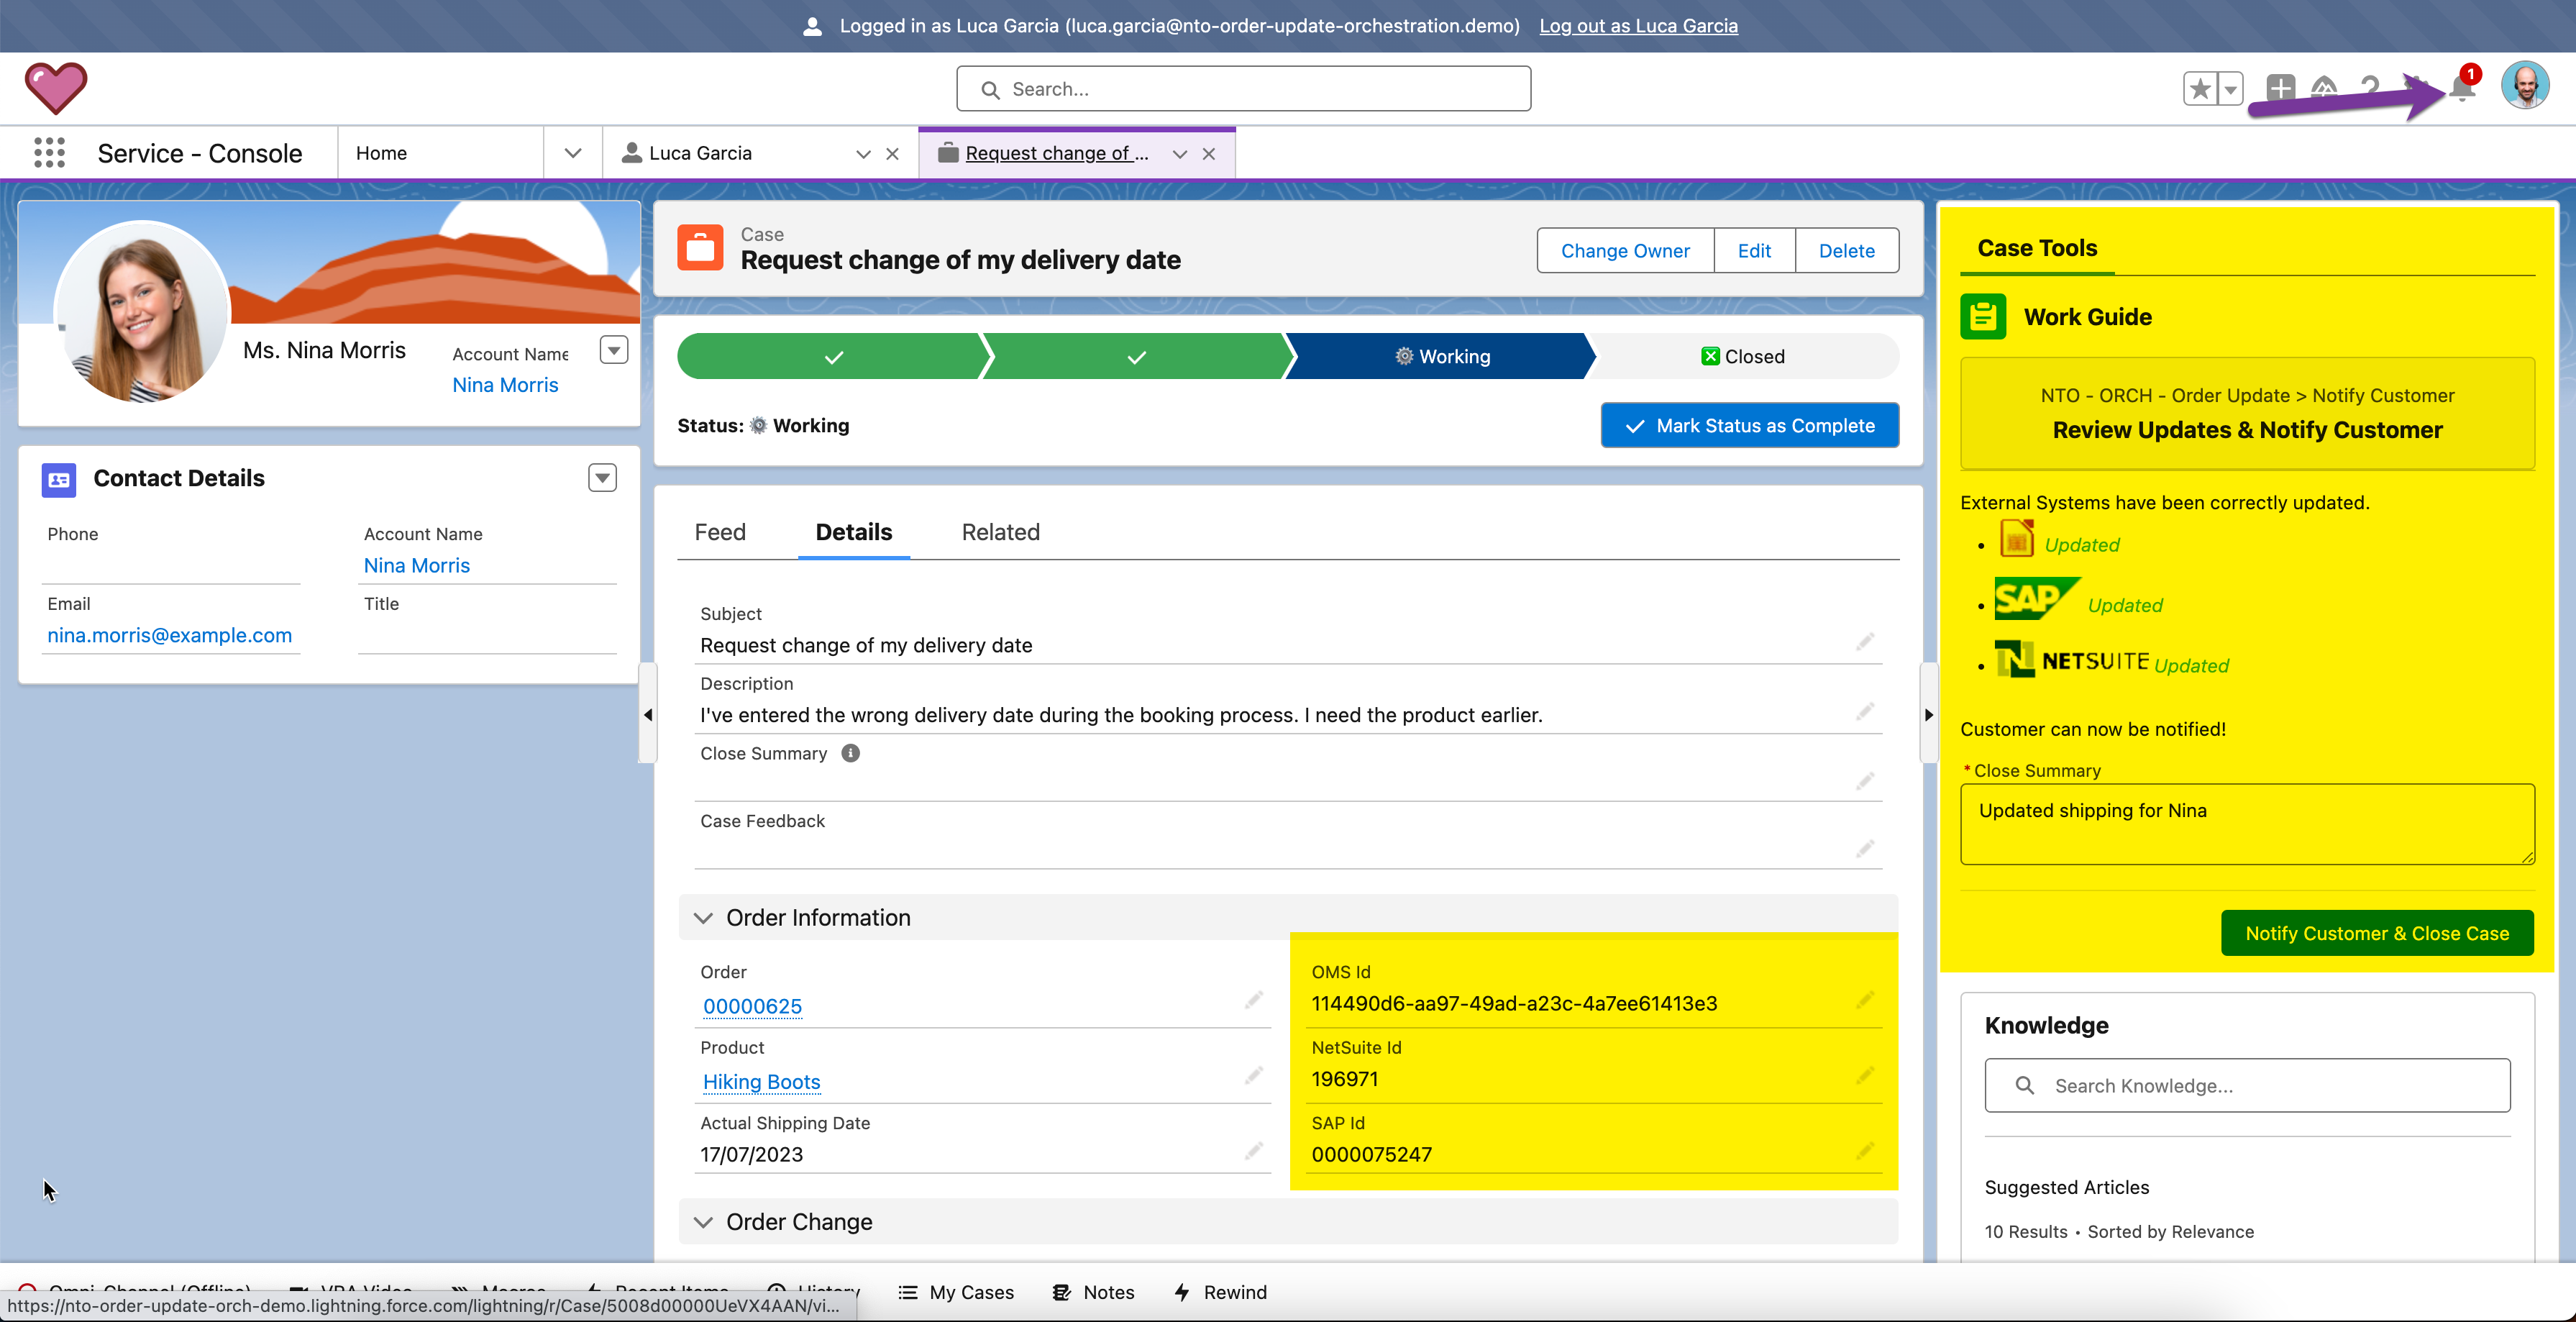
After login in as the service agent (Luca), you should see the case opened and on the bell icon a new notification for the service agent. Note that the external system fields (OMS Id, Netsuite Id and SAP Id) are now filled with values. This reflects for the service agent that all the backend systems are updated accordingly. He can notify the customer now.
-
To notify the customer, the service agent will review the case and check that all external system fields are updated with values. Once this is the case, please click on
Notify Customeron the work guide. Also enter aCase Closure Feedback.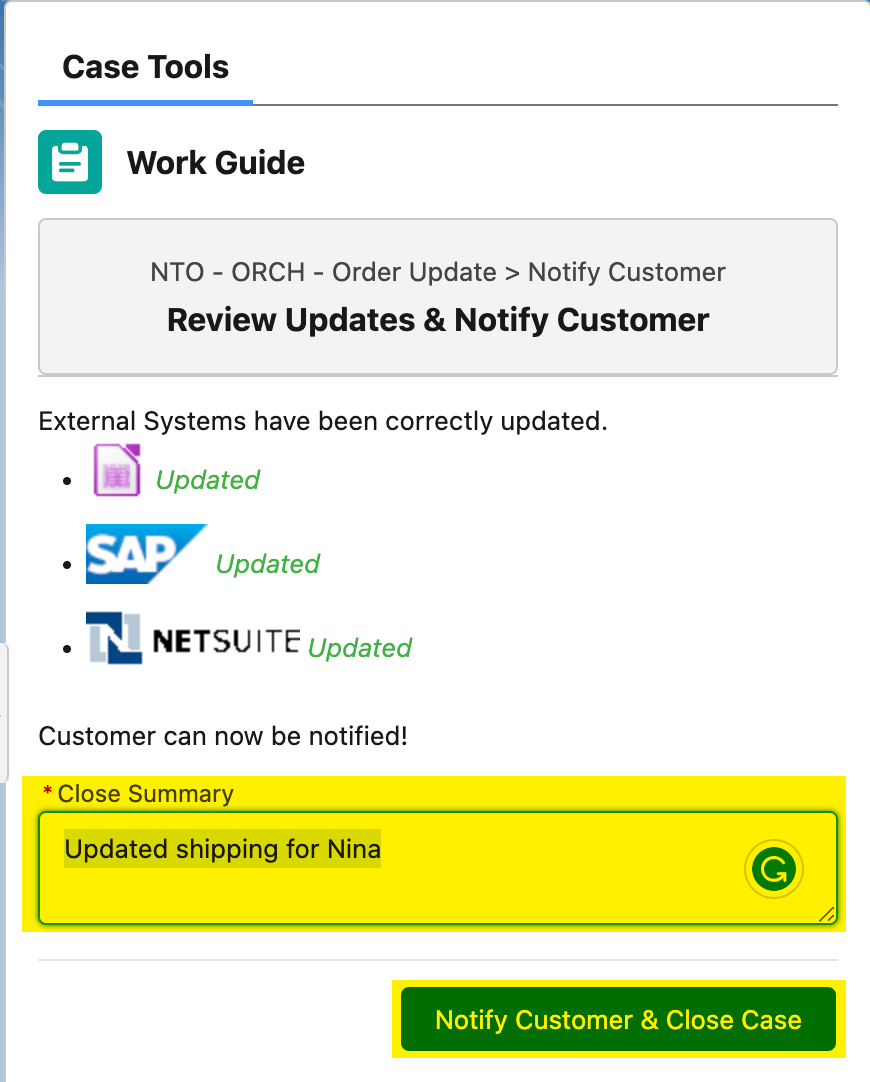
-
After completing the workflow, please log out as the Service Agent (Luca).
== Step 6: Check Orchestration Run and Orchestration Work Items (IT/Admin)
-
Note, that you are logged in back as admin. As the orchestration process has continued, let’s check the orchestration run and the related work items. Click on the Salesforce Menu on the top left side and type
Orchestration.
-
First, select the
Orchestration Runs. It will open a new tab with all the orchestration runs. Note that the last one has a creation date time of now and its Status isCompleted. As all workflow steps has been successfully executed the orchestration run is completed as well.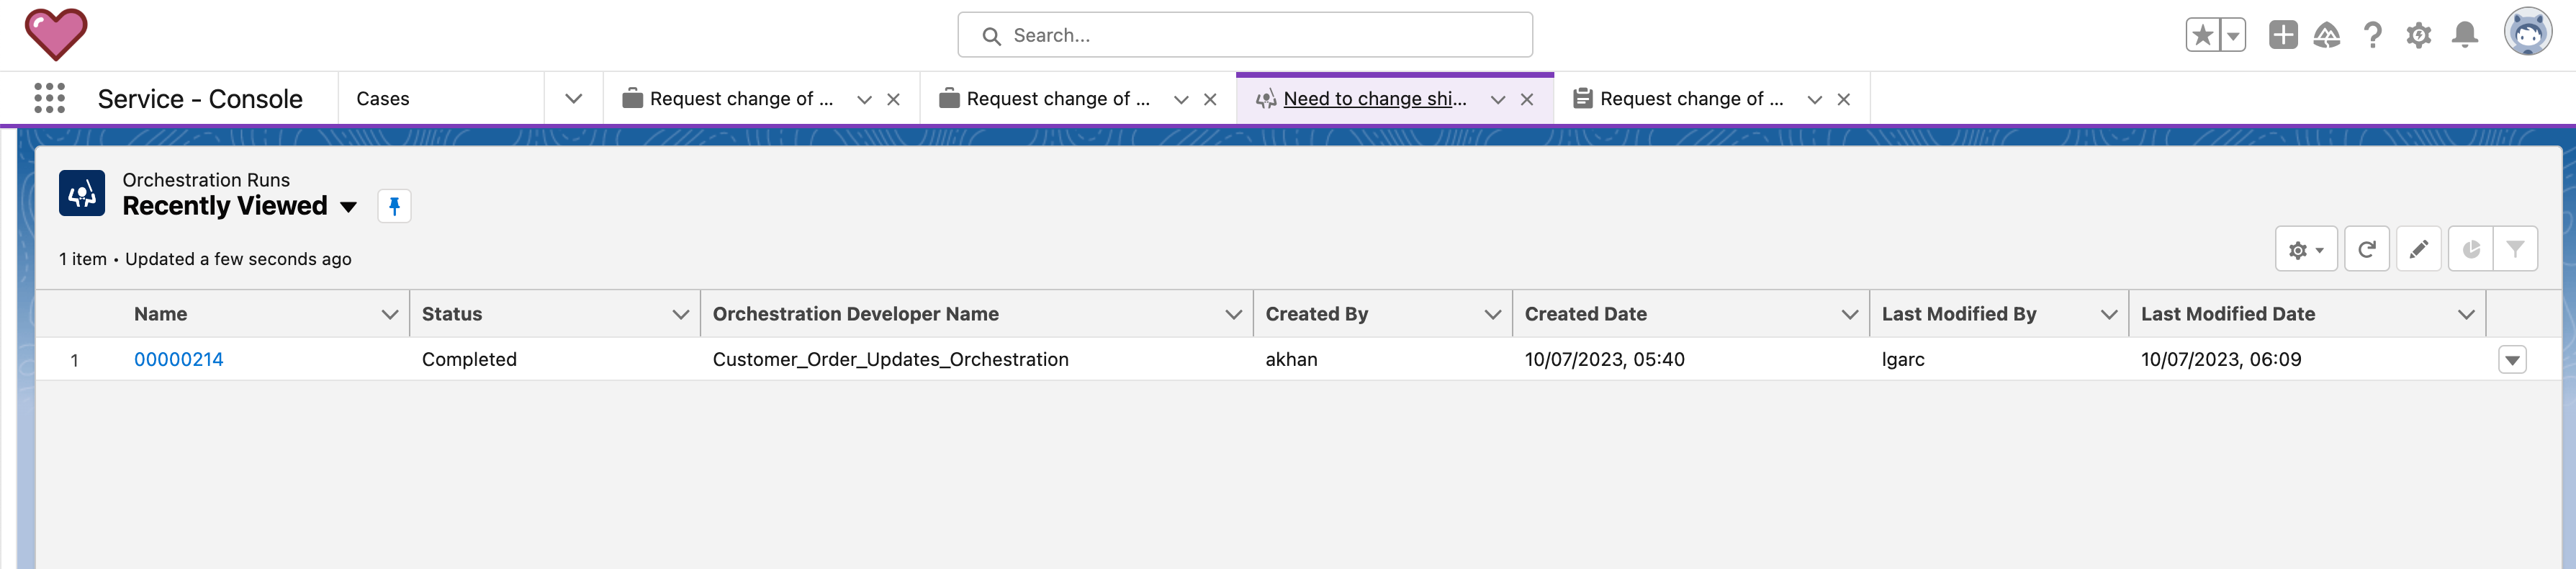
-
Now open the Work Items view. See the second bullet point of this section 2. After you’ve selected the
Orchestration Work Items, it will open a new tab with all orchestration work items. Also here you will notice, that all work items has been successfully completed.